How To Add Google Analytics To WordPress

Table of contents
Knowing how your site visitors interact with your website is quite crucial. This is where Google Analytics comes in.
Integrating Google Analytics to your WordPress website shouldn’t be a difficult task for beginners to carry out. Within this article, we will look into What Google Analaytics is, its importance and some of the ways that you can use to add Google Analytics to your WordPress website.
What Is Google Analytics
Google Analytics is a web traffic analytics tool offered freely by Google, that provides insights on user interaction with your website as well as the performance of your website.
The fetching of this data is made possible with the help of a tracking code that is integrated into your website. The code is responsible for recording all the user interaction data and sending it to the Analytics server.
A few examples of the data that can be tracked include:
- Conversion rates
- Site Visitor Locations
- Bounce Rate
Importance of Google Analytics
Data collected by Google Analytics can be of help to you the site owner in making data driven decisions for your website. For example, if there are high bounce rates on certain pages, then this will serve as a clear pointer that there needs to be improvements done on the pages and especially UX changes.
Google Analytics can also be helpful to marketers as it enables them to easily identify where most of the traffic is coming from. This may serve as a guide for them in putting in mechanisms and resources required to market serve their target users better.
With the help of Google Analytics, you can also easily determine the progress of your business as a whole based on the set goals.
Google Analytics can also provide insights on new business ideas. Thee ideas can be generated from data collected in the past. For example, for Ecommerce sites you may come up with product ideas based on regularly purchased products.
How To Setup Google Analytics
In this method, you will need to carry out the following:
First create a Google account that you will be using. To do so, you will need to access the link here: Create a Google Account and fill in all the required fields.

If you already have an account that you intend to use, you can just click on the “sign in instead” link.
Once done with the sign up/sign in, navigate to the Google Analytics platform and login.

Upon logging in, click on the “Start Measuring” button in the next screen.

On the next screen, you will be required to fill in your account name.
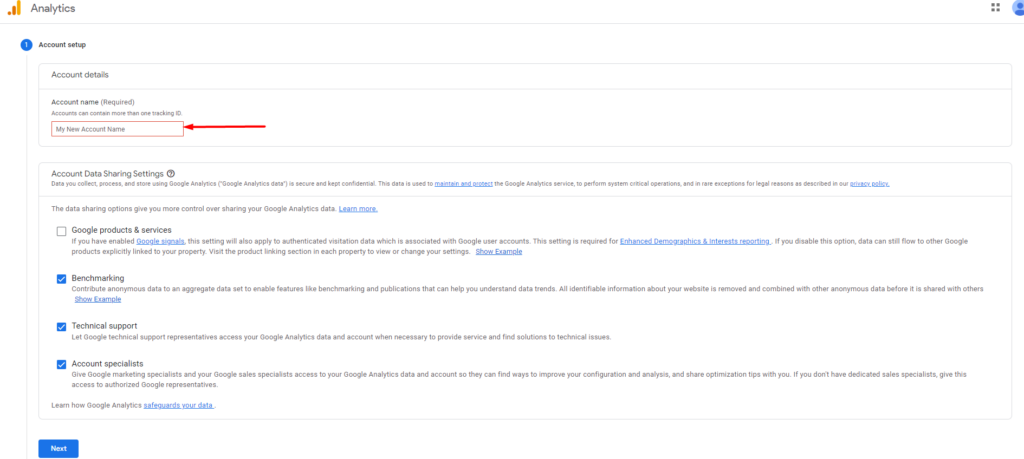
You can fill in any name of your preference, leave the rest of the settings to default and proceed to the next step.
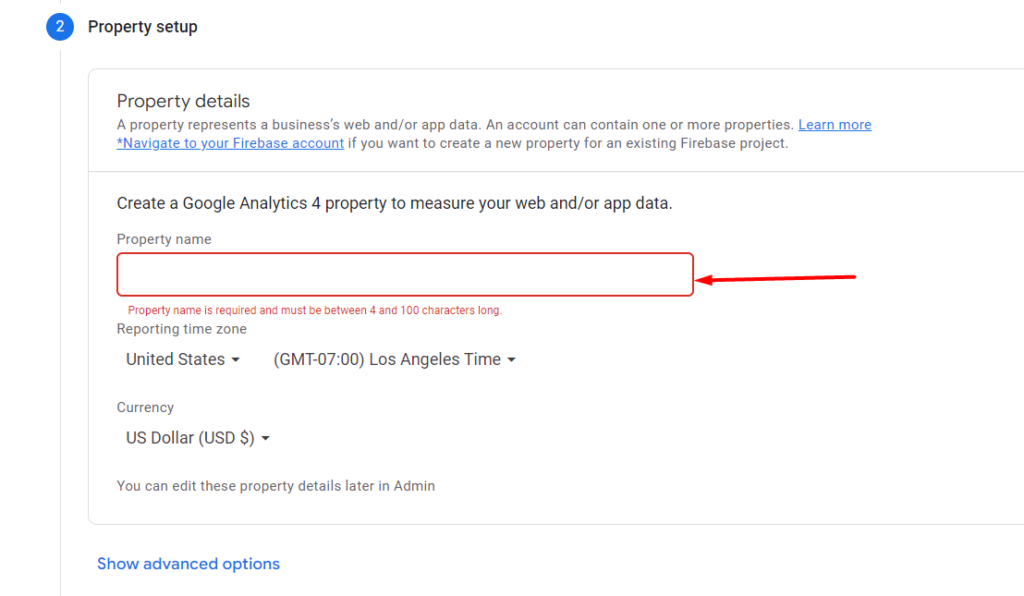
In the next step, you will be required to fill in your property name, which is your website, as well as specify your timezone and currency.
In the next step, you will be required to specify your business information such as industry category, business size and what you intend to use Google Analytics for.
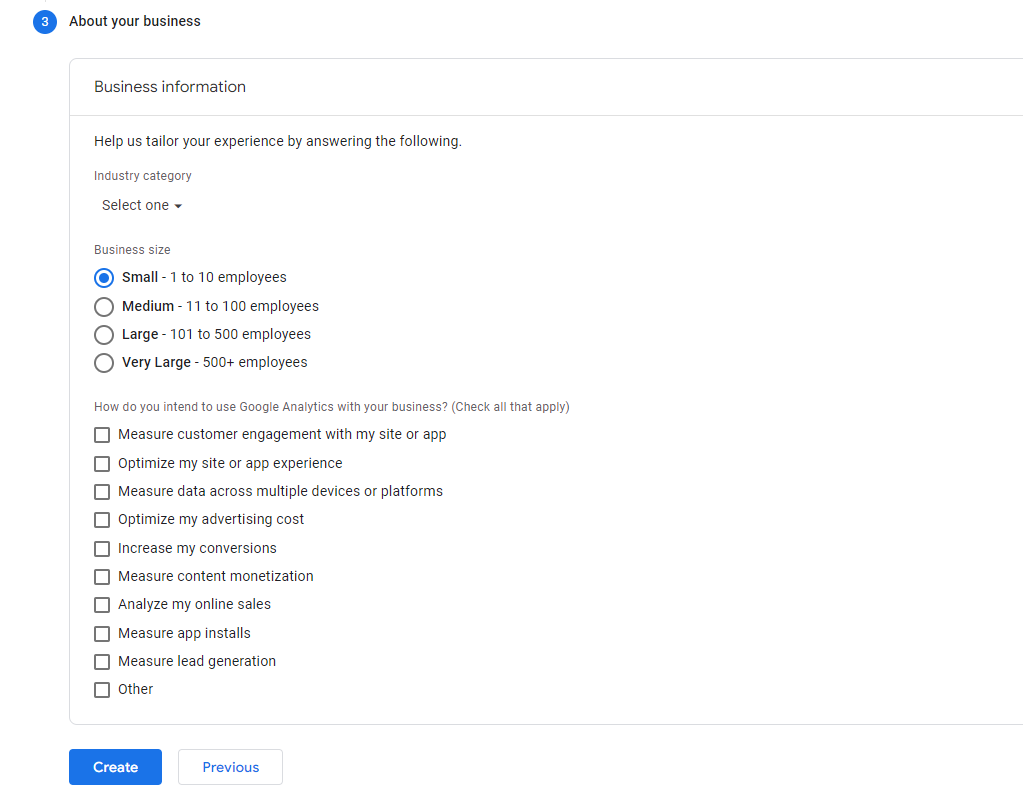
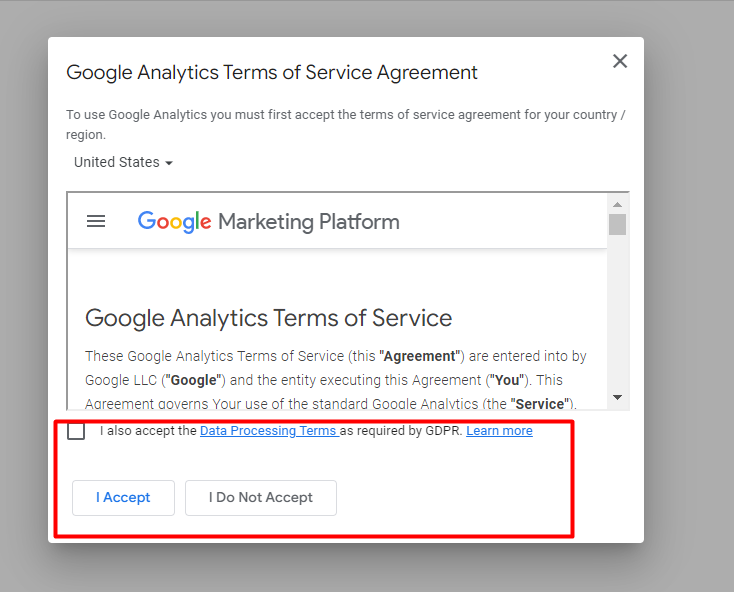
Upon selection of the desired options, click on the “Create” button and on the popup rendered, accept the terms of service.
A popup will then be rendered with a number of options on the emails that you would like to receive.
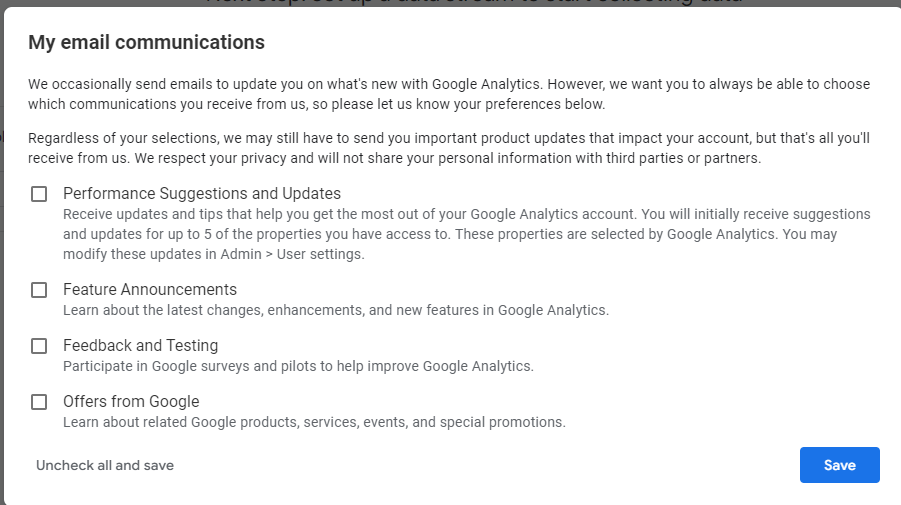
Check your desired options and save your changes.
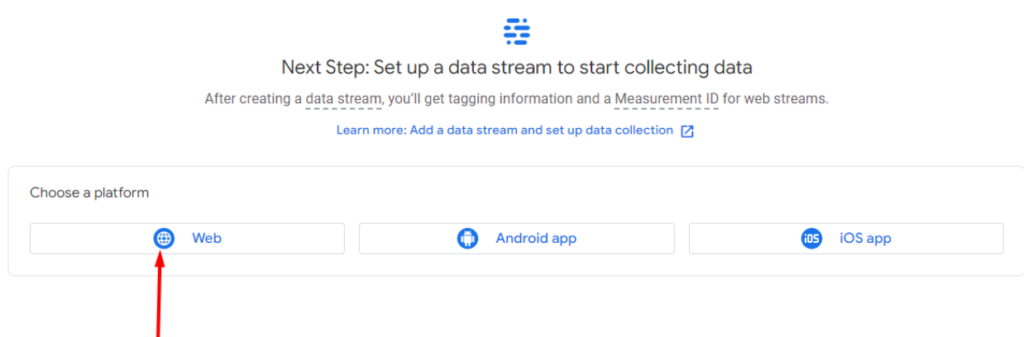
In the next step, you will need to select a stream to use. In our case here, this will be “web”.
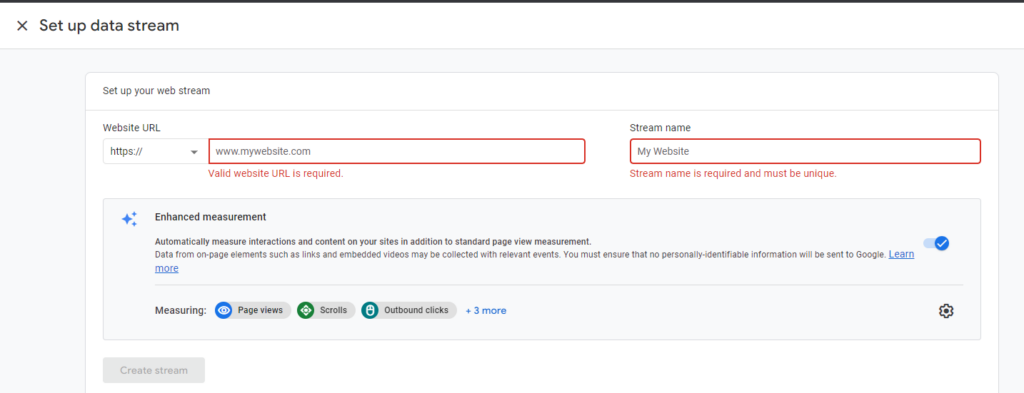
Within the popup rendered, fill in your website URL and Stream name.
Upon creating the Stream, you will then be provided with a number of options to add Google Analytics.

Upon clicking the “Global Site Tag” dropdown, you will have a view of the tracking code, of which you will use within your website.
![]()
Ensure that you copy and save this tracking code to your local computer.
Adding Google Analytics In WordPress
There are a number of ways to ad Google Analytics to your WordPress website. These include:
Manually Via Code
This method involves placing the Analytics code within your theme files. We recommend adding the code within the header.php file, and most appropriately on the child theme.
To do so, copy the header.php file to your child theme.
Next, navigate to the Appearance > Theme File Editor and select the header.php file.
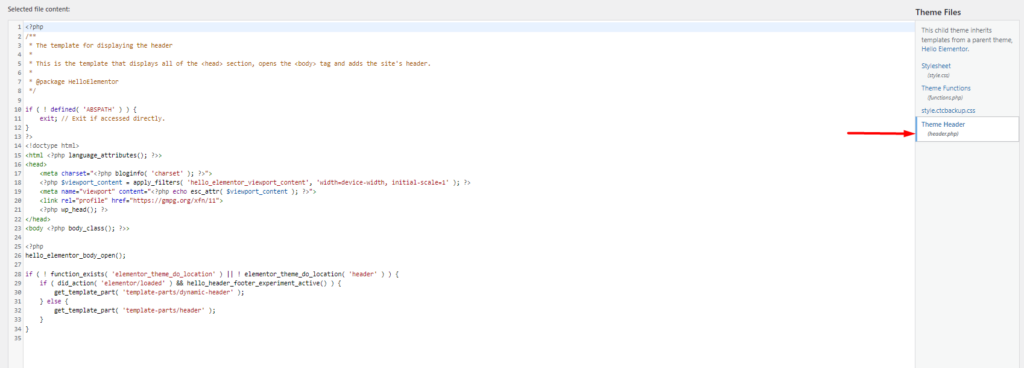
Add the Analytics code before the closing tag.
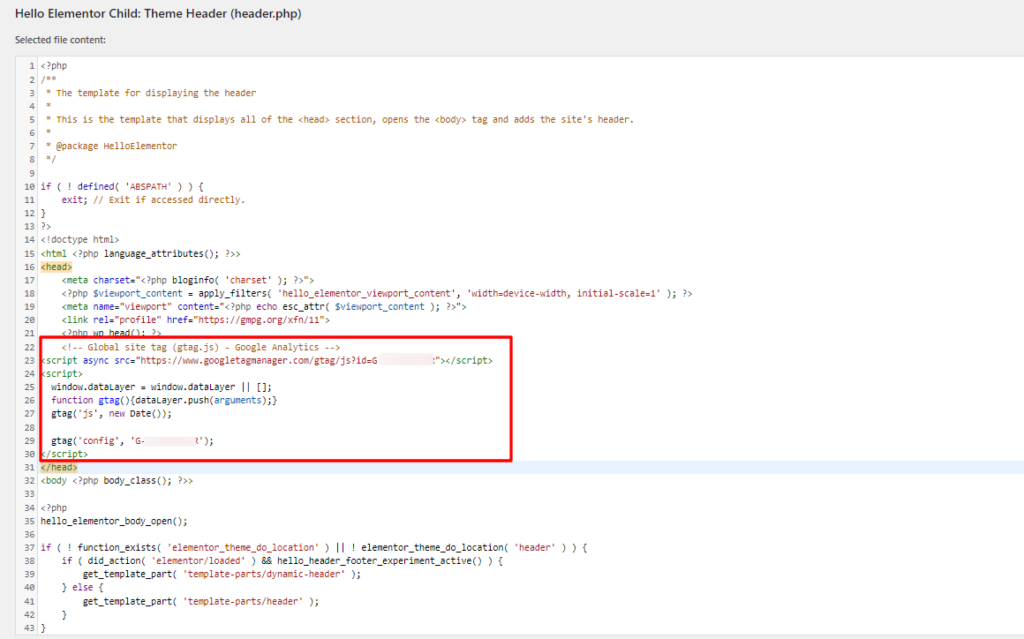
Once this is done, save your changes.
Using a Plugin
There are a number of plugins that can be used to add Analytics to your website. Here we will look into how to three plugins:
i) Monster Insights
ii) Site Kit by Google
iii) Insert Headers and Footers
Adding Analytics Using Monster Insights Plugin
First and foremost, you will need to install the Monster Insights plugin from the Plugins > Add New section within the WordPress dashboard, upon searching for it.

Proceed to installing and activating the plugin.
Upon activating the plugin, you will have a screen with the “Launch the Wizard” button.

Click on the button to launch the setup wizard.
On the first step, specify your website type and proceed to the next step.

In the second step, connect Monster Insights with Google Analytics allow Monster Insights to access your Analytics data.
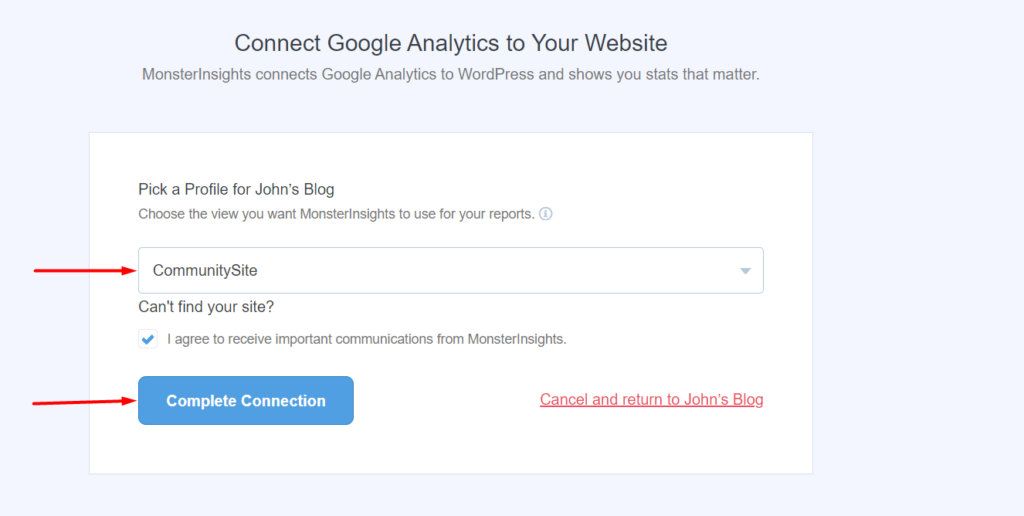
On the next screen, you will be required to select an Analytics profile if you have more than one, and complete the connection.
In the next step, specify the recommended settings for your website, if needed as well as who can see reports.
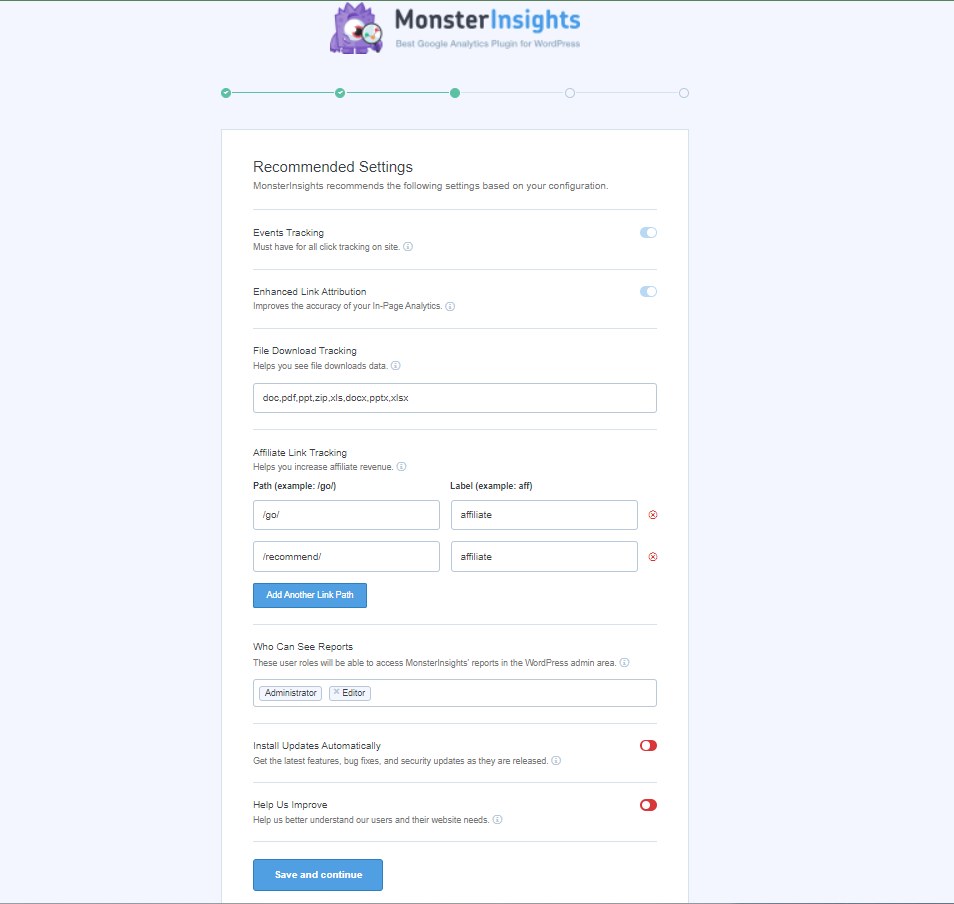
Once this is done, save and continue.
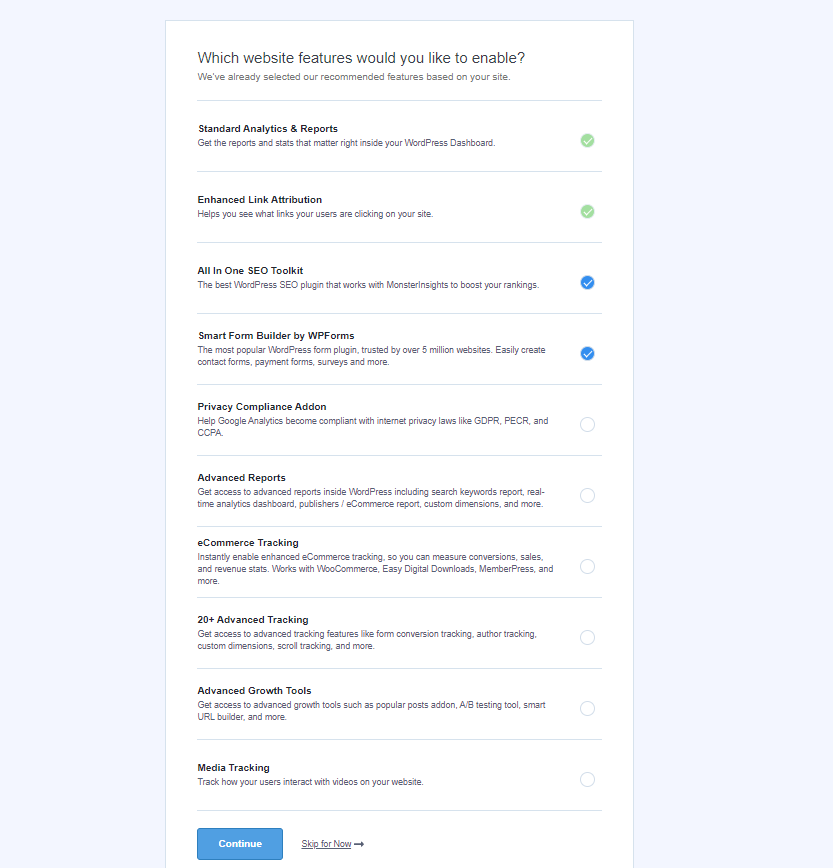
On the next screen, you can set more tracking options, addons and settings that you would wish to include.
With this done, proceed to the next step and the setup should not be complete. You may then proceed to clicking the “Complete Setup without Upgrading” link.

After a number of hours, depending on your website, you will be in a position to view reports within your WordPress dashboard Insights > Reports section.
Adding Analytics Using Site Kit by Google Plugin
The Site Kit By Google plugin can be installed from the Plugins > Add New section as shown below:

Upon installing the plugin, ensure that you as well activate it.
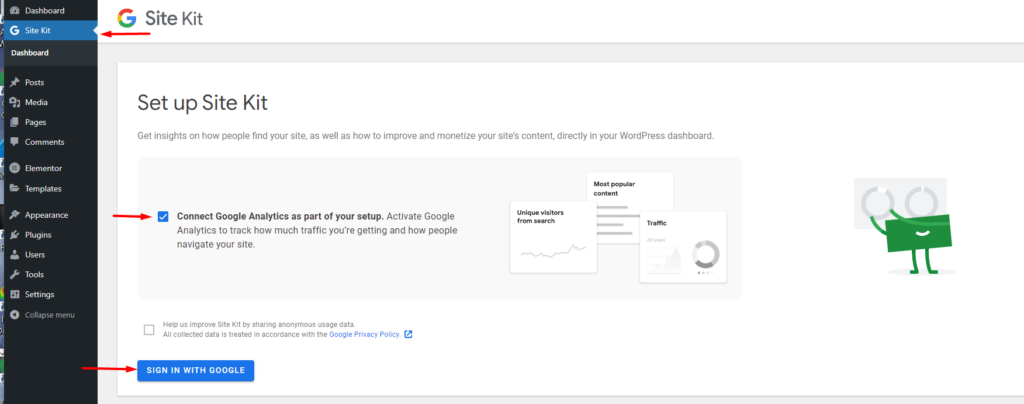
Next, navigate to the Site Kit section within the dashboard, select the option “Connect Google Analytics as part of your setup.” and sign in with Google.
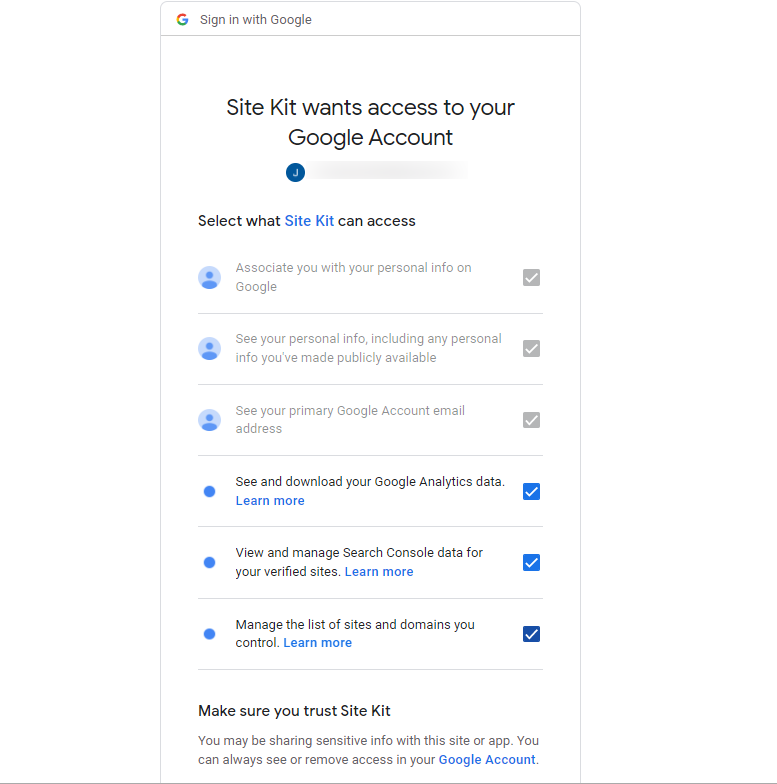
On the next screen, authorize the permissions needed by Site Kit to access your account.
Next, have Google verify your site ownership.

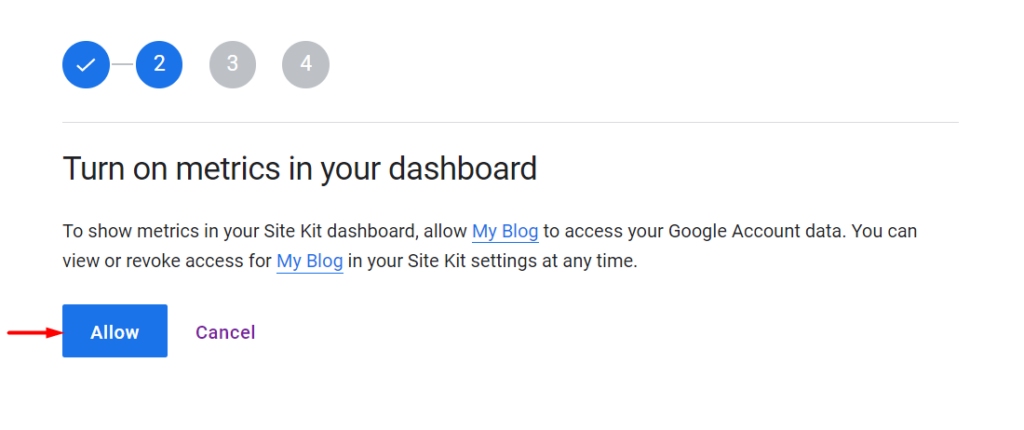
Upon verification, allow metrics in your Site Kit dashboard.
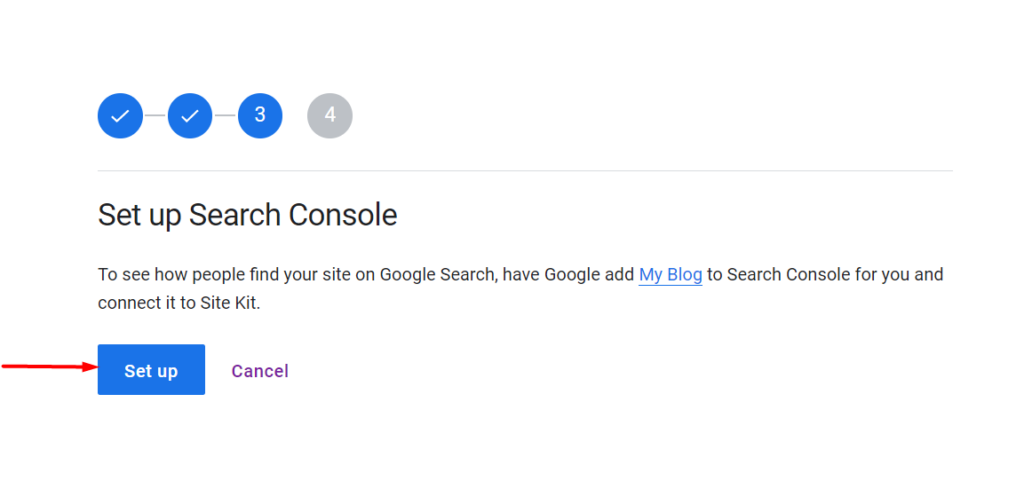
Next, connect your site to the Google Search Console.
Proceed to the next step where you will need to setup Google Analytics.

Next, select an account and property from your account or create new account and property. Upon doing so, proceed to configuring analytics.
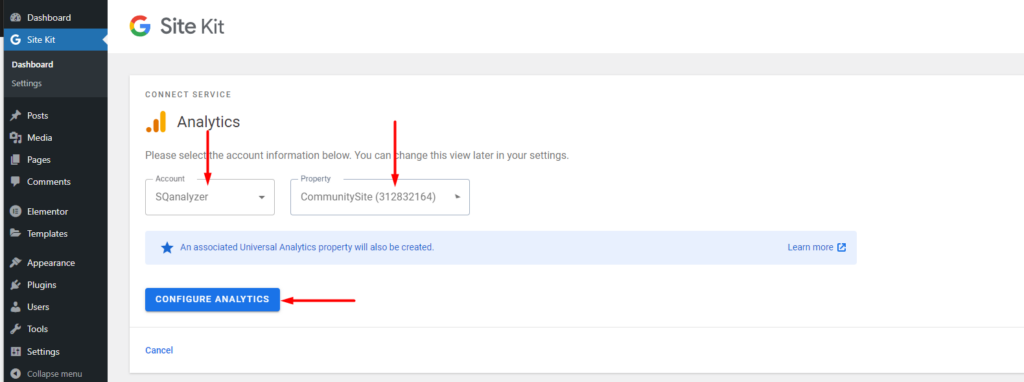
Once this is done, the analytics setup is finalized.

You will now be in a position to view your Analytics data and also any other services data you may have enabled within the Site Kit Dashboard.
Adding Analytics Using Insert Headers and Footer Plugin
The Insert Headers and Footer plugin can be installed from the Plugins > Add New section within the WordPress dashboard, upon searching for it.

Upon installing it, do also activate it.
With this done, navigate to the Settings > Insert Headers and Footers section within your WordPress dashboard.
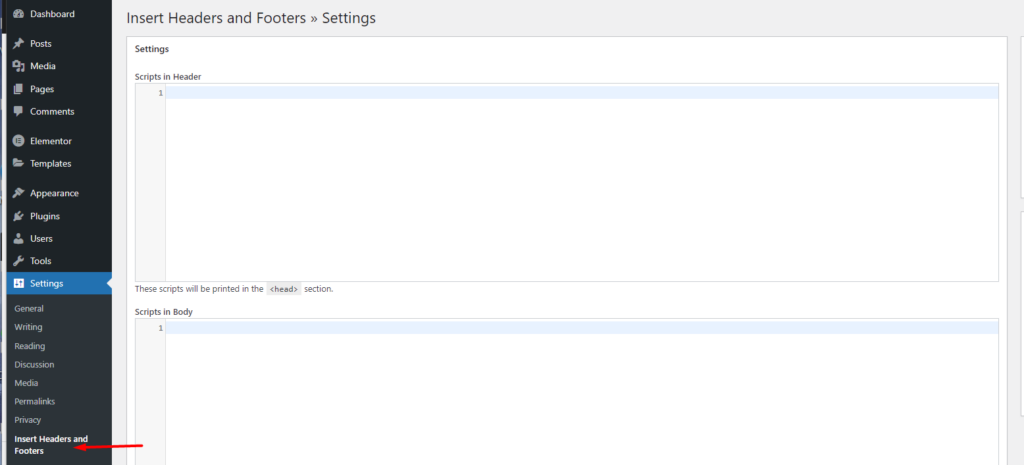
Next, add your Google Analytics code within the “Scripts In Header” section.
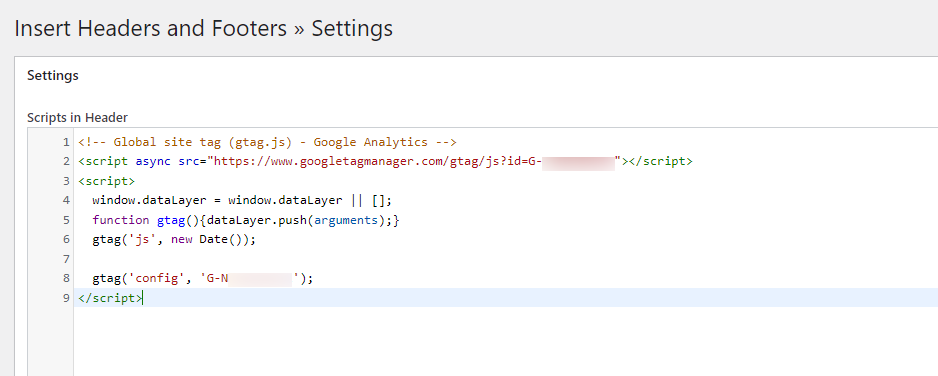
Once this is done, save your changes.
Conclusion
Understanding your site visitors behavior and traffic within your website are things that should not be overlooked, which is where Google Analytics come in. Within this guide, we have looked into how you can add Analytics to your WordPress website. Using either of the plugins above is considered a better approach.