All About The WooCommerce Thank You Page

Table of contents
In any form of business, once a customer makes a purchase, it is always important to say “Thank You”. In E-Commerce, this is facilitated using a Thank You page.
A Thank You page in E-Commerce is quite significant because it enables you to connect to your customers and can in the long run help in increasing sales. This is so because customers who are comfortable with a purchase are likely to carry out another purchase in the future from the store, or even recommend a product to other potential customers.
Within this article, we will look into the WooCommerce Thank You page as well as how to customize the page.
What Is the WooCommerce Thank You Page
The WooCommerce Thank you page is the page that will be displayed to customers right after placing an order within a website. It is also referred to as the “purchase confirmation page ” or “order received page”.
Upon accessing the Thank You page, the URL format would be yourdomain/checkout/order-received/2554/?key=wc_order_WCS88FJQkkjI9.
Below is a sample screenshot of the page:
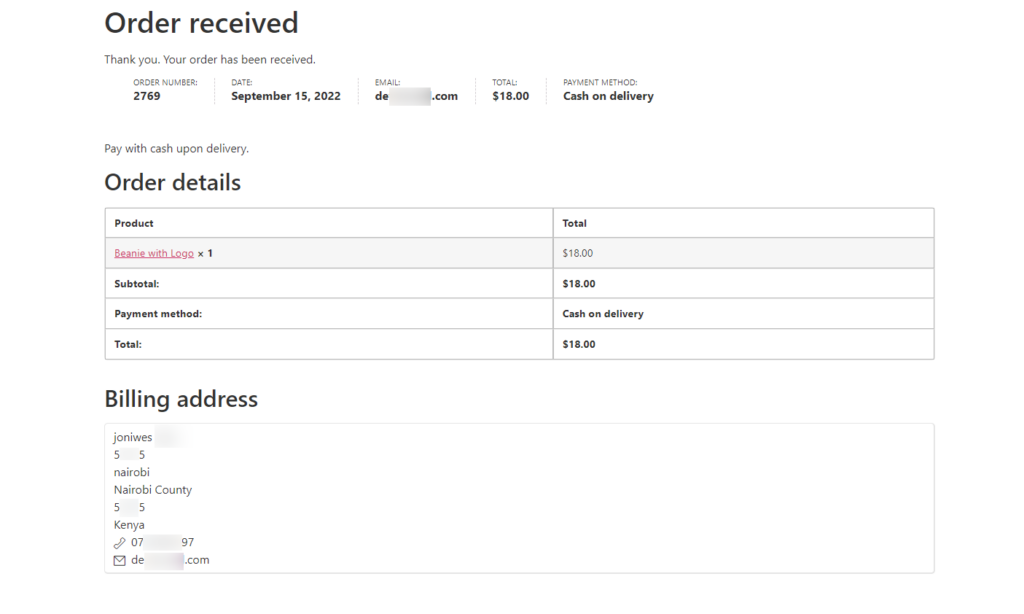
There are various components within the Thank You page as seen in the screenshot above. Some of these include:
Thank You Message: This is simply a message to say Thank You to your customer for purchasing the item. As seen in the above screenshot, it is denoted as: “Thank you. Your order has been received.”
General Order Information: This section mainly contains general details about the particular order. These details include the order number, date, total, email used in purchase and the payment method.
Order Details: In this section is where we have a tabular format representation of the order details. These details include product name(s), product price(s), subtotal, total price, payment method, shipping fee if enabled.
Address: This section will contain details of the addresses to the customer (Billing Address and Shipping Address if enabled).
Customizing the default WooCommerce Thank You Page
From the components discussed above, we can see that the Thank You page still leaves room for improvement taking into consideration that is quite vital in the purchase process.
Within this section we will look into the importance of customizing the default WooCommerce Thank You Page, as well as how to go about customizing it.
Importance of Customizing the Default WooCommerce Thank You Page
Once a customer purchases a product and arrives at the Thank You page, this shouldn’t be seen as the last step in the purchase journey. A lot more can actually be done to increase engagement with the customer as well as instill confidence.
The page can hence provide more functionalities in it. Some of these include:
-
Creating a great onboarding experience: A Thank you page can be used for sharing onboarding materials to customers who just purchased a product, where applicable. Such material may include documentations, product videos and any other material that may be of help to the end-customer.
This information enables a customer dive into the product usage with little time spent trying to figure out how to use the product. -
Creating a great post-sale experience: Having in place a well designed and customized Thankyou page leaves a great impression to a customer compared to the default Thank you page. This in turn translates to a great customer experience within the website.
-
Generates Trust: At times, once a customer carries out a purchase especially on new products, they are likely to have doubts whether the product does work as expected. If a Thank you page is however customized to include content such as positive reviews or testimonials, these serve as a reassurance to such customers thereby clearing such doubts. Customers are also likely to carry out further actions within the website based on this.
-
Act as a marketing strategy: If for example a customer arrives at the Thank you with social share buttons and such a customer already trusts the product, they are likely to share their purchases within the available social sites. These shares are likely to bring in potential customers to your website.
You can also display offers on the page thereby marketing other products that you may have in place. -
Uniqueness: Well designed Thank you pages make your website stand out and hence spike an overall different experience to customers.
How To Customize the WooCommerce Thank You Page
WooCommerce does not offer a wide range of customization options for the Thank You Page. There are however a number of ways to customize the page. Within this section, we will look into some of the ways that you can go about customizing the Thank You Page.
Using Plugins
There are a number of plugins that can be used to customize the WooCommerce Thank You page. Some of these include:
- Custom Thank You Pages extension
- NextMove Lite – Thank You Page for WooCommerce
- YITH Custom Thank You Page for WooCommerce
In this guide, we will look into one of the plugins, which is the free NextMove Lite – Thank You Page for WooCommerce plugin.
Installing the NextMove Lite – Thank You Page for WooCommerce
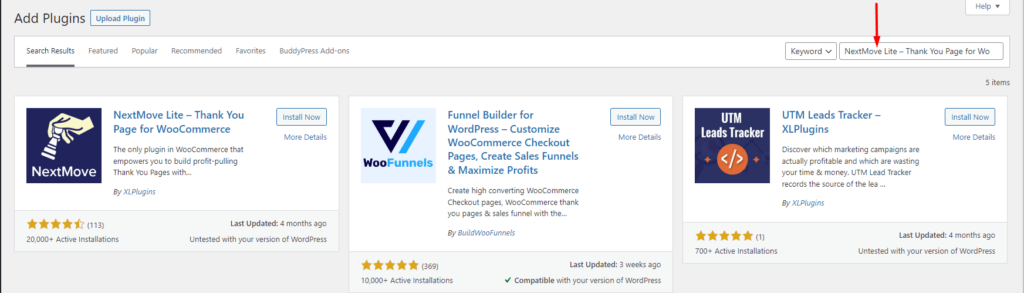
In order to install the plugin, navigate to the Plugins > Add New section and search for “NextMove Lite – Thank You Page for WooCommerce”.
Next, click on the “Install Now” button next to the plugin.
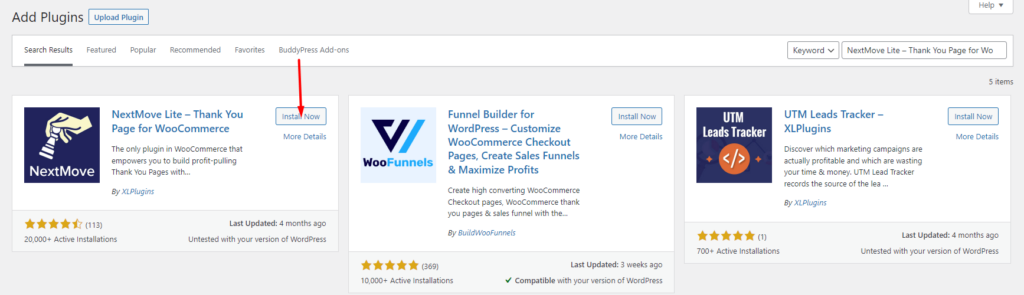
Once this is done, activate the plugin.
The default NextMove Thank You page
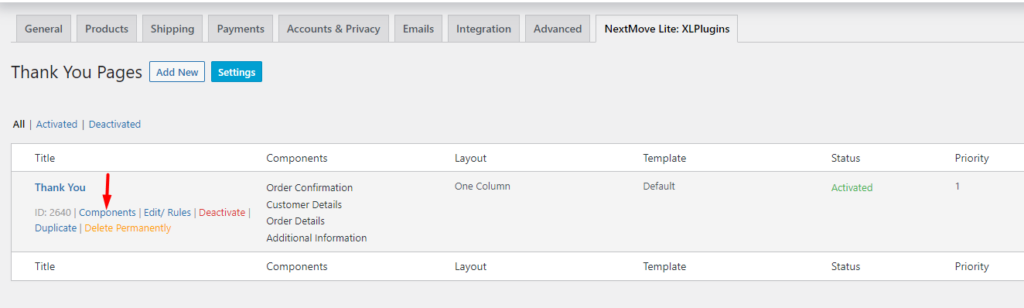
Upon activating the NextMove plugin, the plugin generates a default Thank You page. This can be found within the WooCommerce > Settings > NextMove Lite: XLPlugins section.
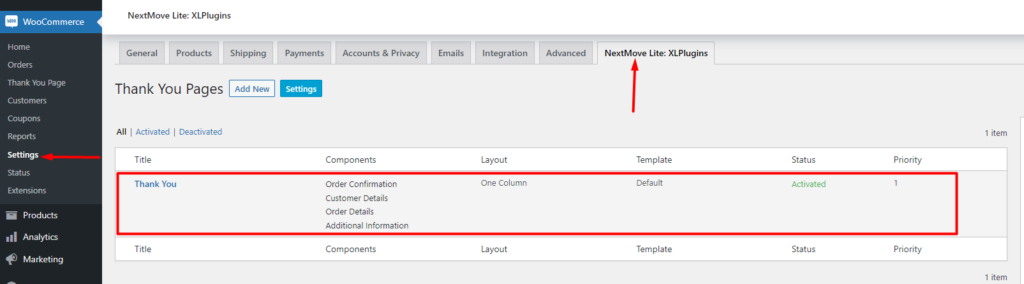
You can customize this Thank You page to your preference or add a new one. To add a new Thank You page, you will need to click on the “Add New” button illustrated in the section below:

The Thank You Page Customizer
The Thank You page customizer can be accessed by first clicking on the “Components” link as illustrated in the screenshot below:
Upon doing so, you will be redirected to the Thank You page customizer section:
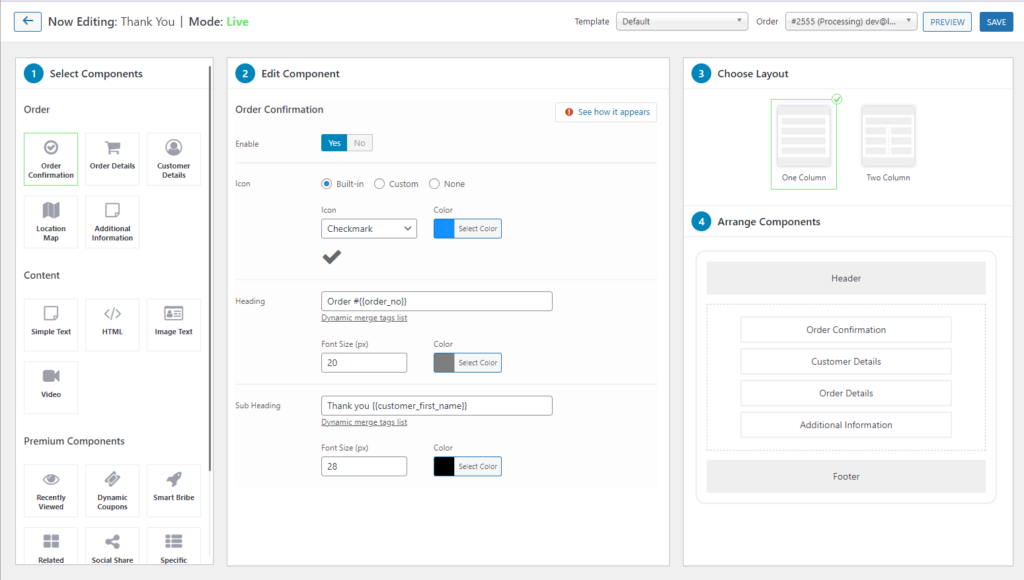
As seen in the screenshot above, the customizer contains 4 core sections. These are:
-
Select Component: Contains the various modules or components that you can use within the Thank You page. Within this section you can select your desired component.
-
Edit Component: Enables you to customize the component that you selected. You can change various contents here such as headings and also apply different stylings.
-
Choose Layout: Within this section you can define your desired layout of the Thank You page. You can select either a one column or two column layout.
-
Arrange Components: The Arrange Components section enables you drag and drop the various components that you have within the Thank You page, to your desired order.
Customizing The Thank You Page
As an example on how to go about the customization, in our case here, we will set up a new Thank You page and add components to it.
To begin with, click on the “Add New” button

On the next screen, specify the title to your Thank You page and also set the page priority to 1 as illustrated below:
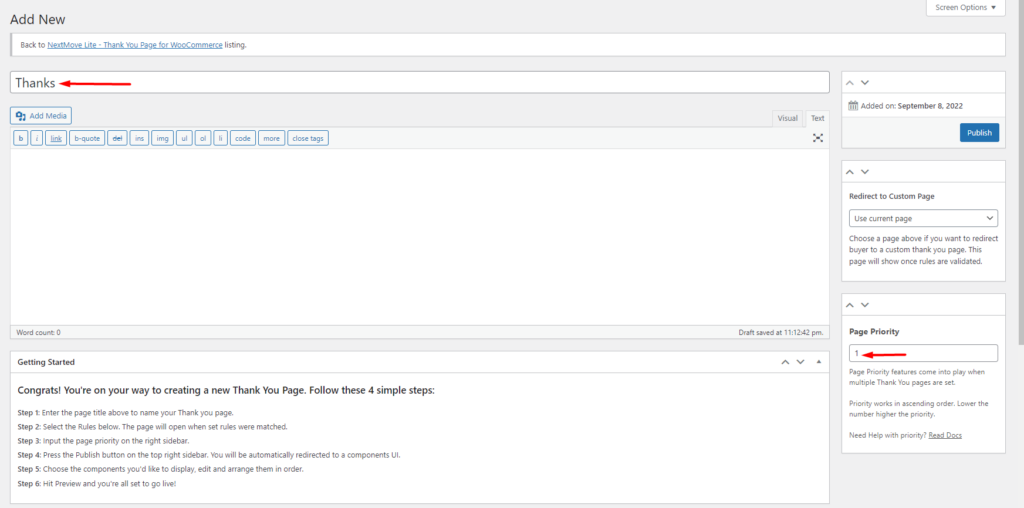
Once this is done, publish the page. You will then be redirected to the Thank You page customizer section. Here you will realize that there are some default components added to the page:
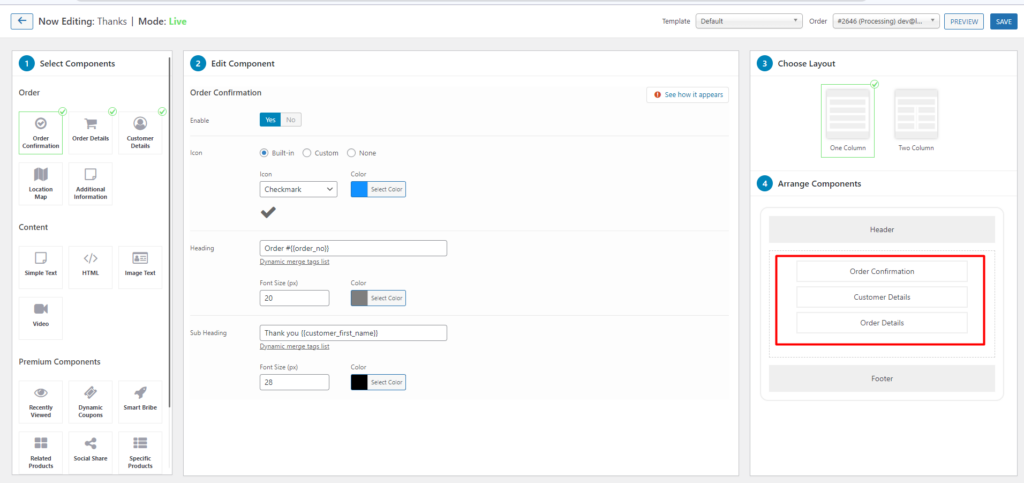
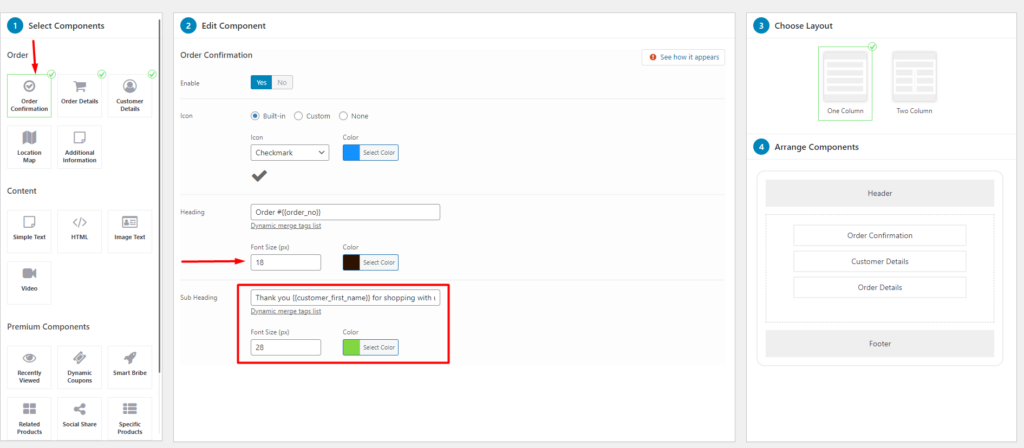
These are Order Confirmation, Customer Details and Order Details. You can customize various aspects of these components to your preference.
In order to customize each of them, you will need to click on the specific component from the “Arrange Components” section. The component will then be rendered within the “Edit Component” section where you can alter its various aspects.
In our case here, for the Order confirmation, we will customize the font size, color of the heading and subheading, as well as alter the subheading.
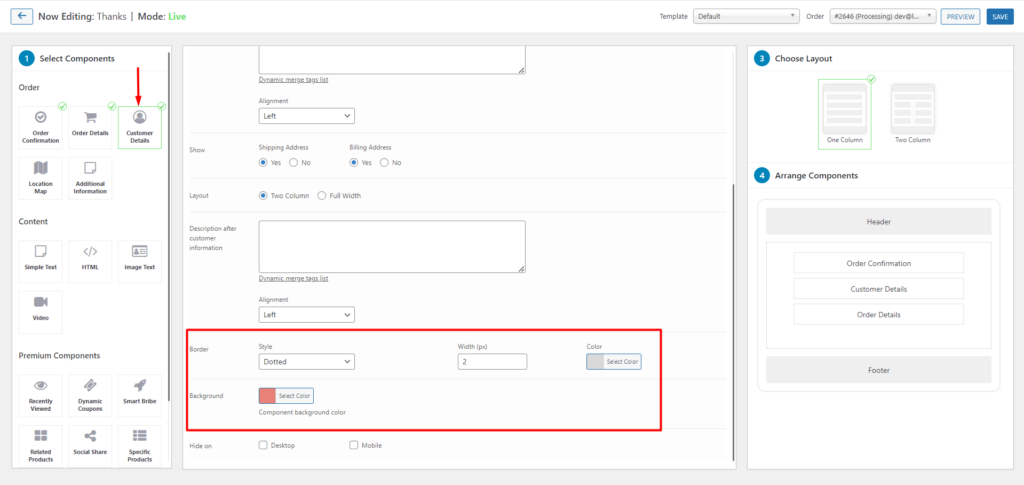
As for the Customer details component, we will alter the border and background as illustrated below:
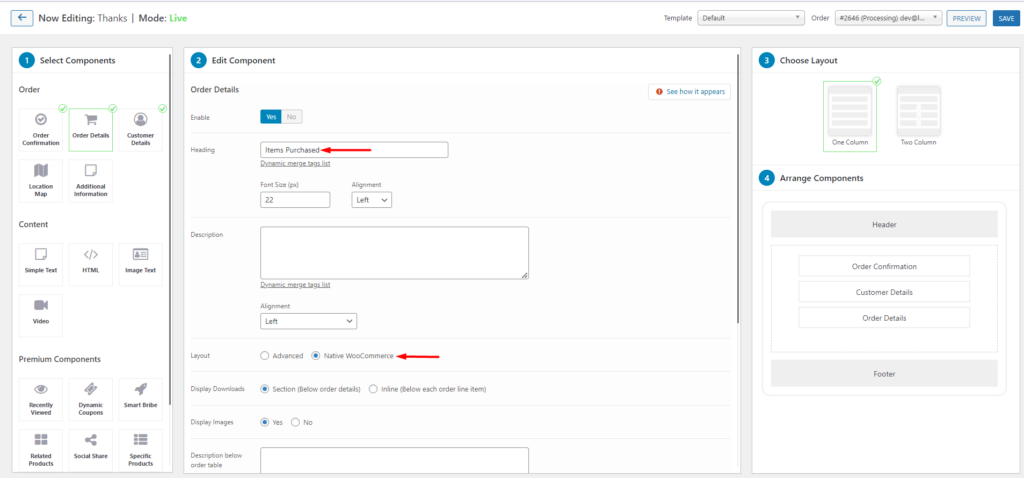
In regards to the order details section, we will customize the heading and layout as see below:
In addition to the above components, we will also add two extra components.
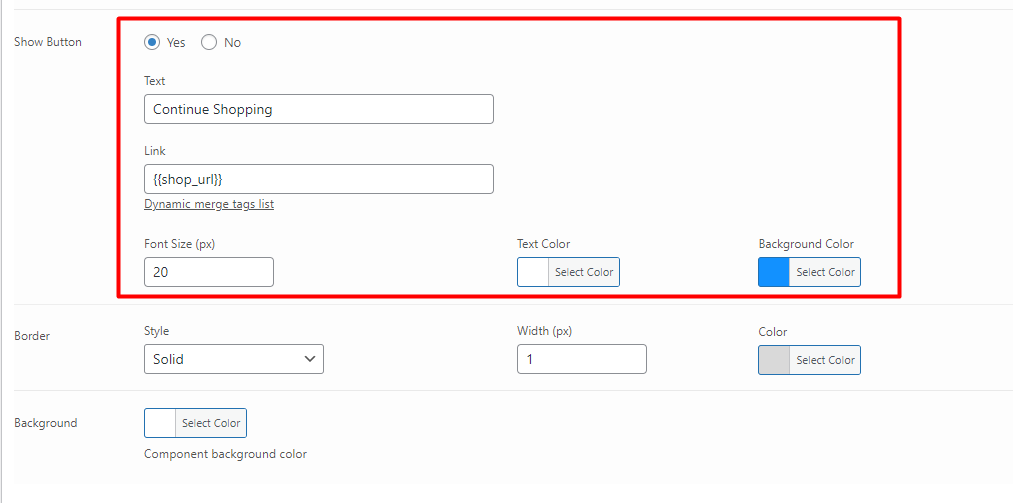
i) Image Text
As for this component, we will add an image as well as some promotional text to encourage customers to purchase another product.
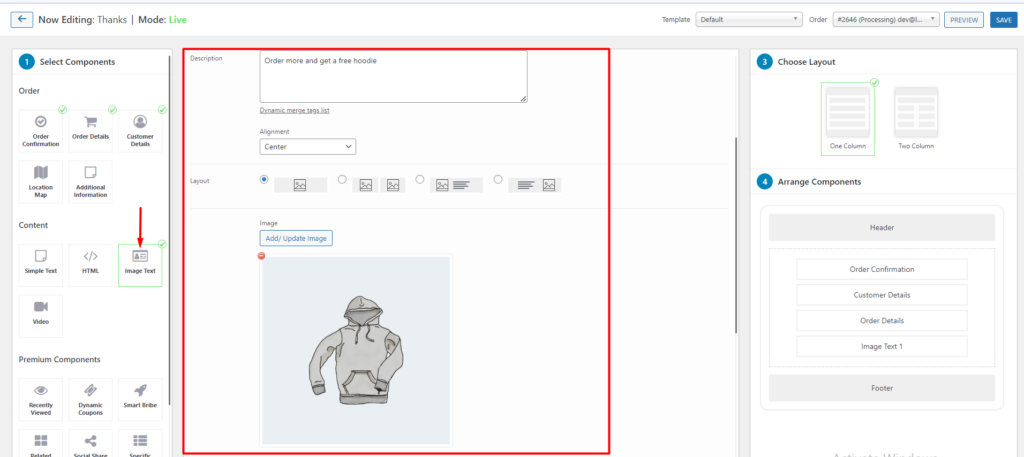
Within the component, we will also enable the display of a “continue shopping” button as illustrated in the screenshot below.
ii) Video
Within the page, we will also include a video that provides more information about the store products. You can include a Youtube or Vimeo video within the video source section.

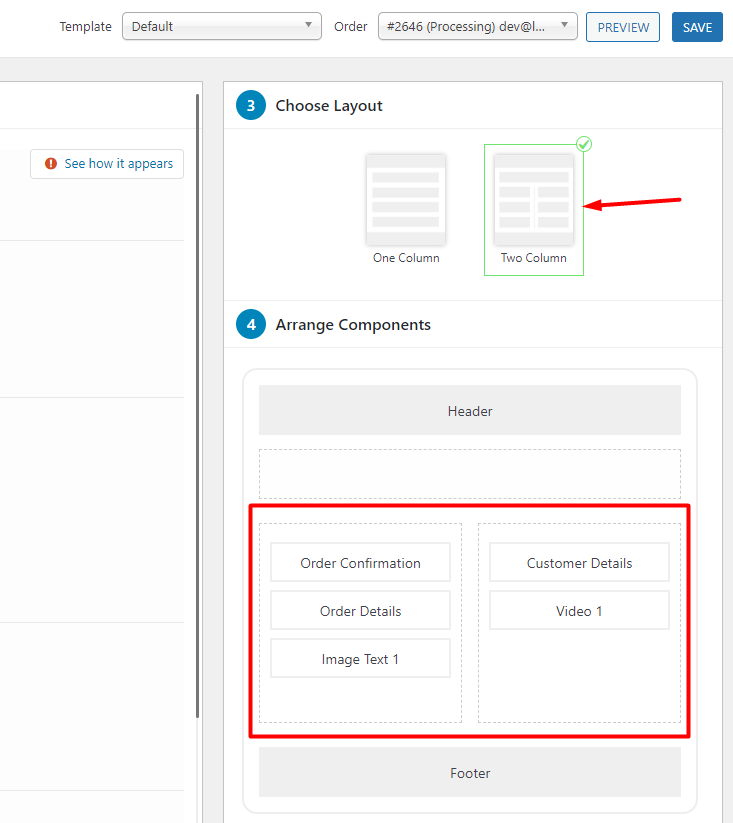
Once the above is carried out, we can then alter the layout and choose a “Two Column layout”. You can then group the components to your preference within the two columns.
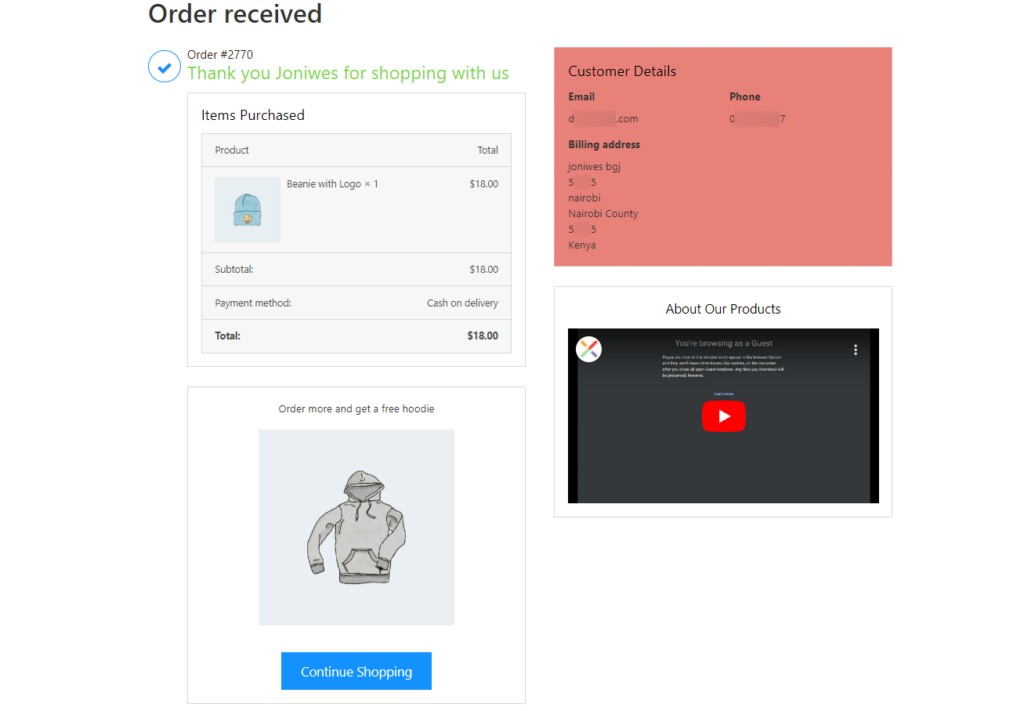
You may then preview your thank you page to ensure that the changes take effect. Below is a sample view from the changes carried out above:
Using Hooks
There are a number of WooCommerce hooks that can be used to customize the Thank you page. Here is a complete list of such hooks: Action and Filter Hook Reference .
These code customizations need to be added to the functions.php file within your child theme.
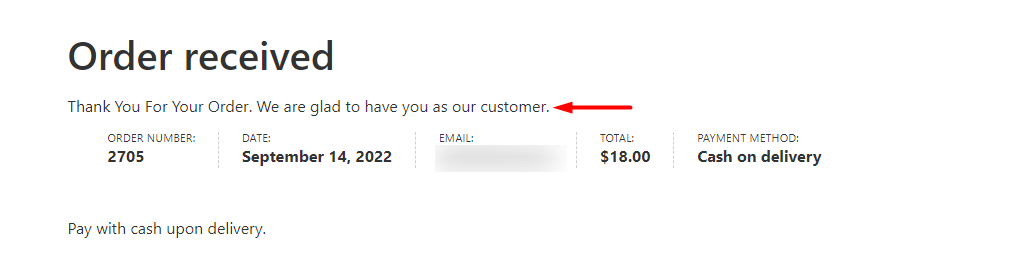
In order to for example change the Order received message, you can add the following code:
add_filter('woocommerce_thankyou_order_received_text', 'alter_order_received_text', 10, 2 );function alter_order_received_text( $newstr, $neworder ) { $new_text = 'Thank You For Your Order. We are glad to have you as our customer.'; return $new_text;}Below is the sample output illustration:
Manual Template Override
The WooCommerce Thank You page can also be customized via template override within your child theme.
In order to achieve this you will need to:
i) Navigate to the woocommerce > templates > checkout directory and copy the thankyou.php file
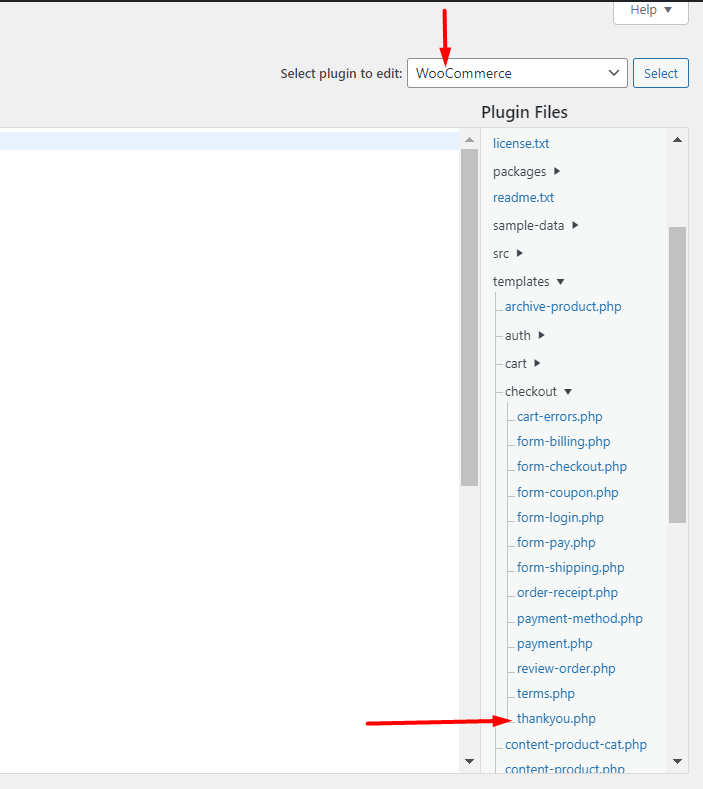
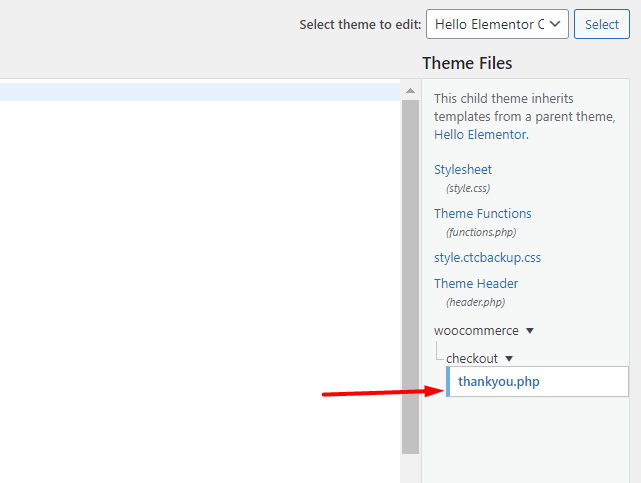
ii) Paste the file within your child theme, to the woocommerce > checkout directory path. Below is an illustration on this:
Once this is done, you can then customize the thankyou.php code to your preference.
In order to for example include the order date within the Thank You page, you will need to add the following code within the thankyou.php file:
<p class="woocommerce-order-date"> <?php _e( 'Order Date:', 'woocommerce' ); ?> <strong><?php echo date_i18n( get_option( 'date_format' ), $order->get_date_created() ); ?></strong> </p>The full code within the file will hence for example read as:
<?php/** * Thankyou page * * This template can be overridden by copying it to yourtheme/woocommerce/checkout/thankyou.php. * * HOWEVER, on occasion WooCommerce will need to update template files and you * (the theme developer) will need to copy the new files to your theme to * maintain compatibility. We try to do this as little as possible, but it does * happen. When this occurs the version of the template file will be bumped and * the readme will list any important changes. * * @see https://docs.woocommerce.com/document/template-structure/ * @package WooCommerce\Templates * @version 3.7.0 */
defined( 'ABSPATH' ) || exit;?>
<div class="woocommerce-order">
  <?php  if ( $order ) :
    do_action( 'woocommerce_before_thankyou', $order->get_id() );    ?>
    <?php if ( $order->has_status( 'failed' ) ) : ?>
      <p class="woocommerce-notice woocommerce-notice--error woocommerce-thankyou-order-failed"><?php esc_html_e( 'Unfortunately your order cannot be processed as the originating bank/merchant has declined your transaction. Please attempt your purchase again.', 'woocommerce' ); ?></p>
      <p class="woocommerce-notice woocommerce-notice--error woocommerce-thankyou-order-failed-actions">        <a href="<?php echo esc_url( $order->get_checkout_payment_url() ); ?>" class="button pay"><?php esc_html_e( 'Pay', 'woocommerce' ); ?></a>        <?php if ( is_user_logged_in() ) : ?>          <a href="<?php echo esc_url( wc_get_page_permalink( 'myaccount' ) ); ?>" class="button pay"><?php esc_html_e( 'My account', 'woocommerce' ); ?></a>        <?php endif; ?>      </p>
    <?php else : ?>
      <p class="woocommerce-notice woocommerce-notice--success woocommerce-thankyou-order-received"><?php echo apply_filters( 'woocommerce_thankyou_order_received_text', esc_html__( 'Thank you. Your order has been received now.', 'woocommerce' ), $order ); // phpcs:ignore WordPress.Security.EscapeOutput.OutputNotEscaped ?></p>        <p class="woocommerce-order-date">          <?php _e( 'Order Date:', 'woocommerce' ); ?>          <strong><?php echo date_i18n( get_option( 'date_format' ), $order->get_date_created() ); ?></strong>        </p>
    <?php endif; ?>
    <?php do_action( 'woocommerce_thankyou_' . $order->get_payment_method(), $order->get_id() ); ?>    <?php do_action( 'woocommerce_thankyou', $order->get_id() ); ?>
  <?php else : ?>
    <p class="woocommerce-notice woocommerce-notice--success woocommerce-thankyou-order-received"><?php echo apply_filters( 'woocommerce_thankyou_order_received_text', esc_html__( 'Thank you. Your order has been received now.', 'woocommerce' ), null ); // phpcs:ignore WordPress.Security.EscapeOutput.OutputNotEscaped ?></p>
  <?php endif; ?>
</div>
Conclusion
Saying “Thank You” to your customers after purchasing a product enhances an overall good customer experience. WooCommerce makes this possible by providing a Thank You page. There is however not much detail incorporated into it.
Within this guide, we have looked into how you can customize the default WooCommerce Thank You page. For a quick and easy way to customize the Thank You page, you can use the plugin approach. On the other hand, if you are not intimidated by code, you can use either of the other two approaches.
Should you have any questions or any contributions, please feel free to share them within the comments section below.