How to Setup a Staging Site in WordPress
Table of contents
A staging site provides a safe environment to carry out custom changes within your website. It enables you carry out carry out changes and tests before publishing them to the live site. Carrying out changes on your production site without first carrying out tests is a risky affair. This is because it may cause inconveniences to the site users. Staging sites come in handy in avoiding this.
Within this article, we will look into what a staging site is, its importance and how to setup one in WordPress.
What Is a WordPress Staging Site
A WordPress staging site is a clone or else a copy of your live WordPress site.
Staging sites are not visible to the site users. Any changes that you also carry out on a staging site are only visible within it and not the live site.
Staging environments provide a safe testing ground for new features, plugin updates and activations, custom code changes, custom site designs and many more. In the event that such changes cause any damage, the damage is not transferred to the live site. You are also in a position to troubleshoot such issues prior to pushing any changes to the production site.
Importance of a Staging Site
At a larger scale, having a staging site is of great value to a site owner. There are various reasons why you should consider using it. Some of these include:
i) It is not public facing: This enables you to implementing changes within the staging site with the live site users not having a view of the changes. You only get to push the changes to the live site once they are fully ready.
ii) It helps in risk reduction: Since changes are not carried out on the live site, any issues such as downtime that could have been accrued by carrying out changes on the live site are eliminated.
iii) Cost saving: In a situation where changes carried out on a live site cause damage to it or make the site inaccessible, a site owner is likely to incur costs in hiring a developer to fix the issue. If such changes could have first been implemented on a staging site, then this is a cost that could have been avoided since the issue could have first been replicated on it.
iv) Quality Assurance: Since code is first tested on a staging environment, staging sites help in ensuring that only quality code is deployed to the production site. Quality code would in turn help in better performance of your live site.
How To Create a Staging Site
There are a number of ways to setup a staging website environment. Here we will cover some of the ways that you can go about in achieving this. These include:
- Via your web host
- Using a plugin
- Manual setup
Creating a Staging site via your web host
A number of hosting providers offer an option to setup a staging site in a one-click fashion. This makes it fairly easy to setup a staging website.
For this method, it is appropriate to check with your hosting provider whether they provide an option to setup a staging site from the hosting panel. Some of the hosting providers that provide an option to setup a staging site include:
Each hosting provider provides different setup steps. In some hosting providers also, the staging functionality is provided in high tier plans.
Creating a Staging site with a plugin
It is also possible to set up a staging environment using a plugin. This provides an alternative method to set up your staging site if your host does not provide an in-built option for this. There are a number of plugins that you can use to setup a staging site. We do however recommend using the Wp Staging plugin.
In order to setup a staging environment using the plugin, you will need to carry out the steps below.
Install the WP Staging Plugin
The plugin can be installed by carrying out the following steps:
i) Navigate to the Plugins > Add New section within your WordPress dashboard
ii) Search For Wp Staging
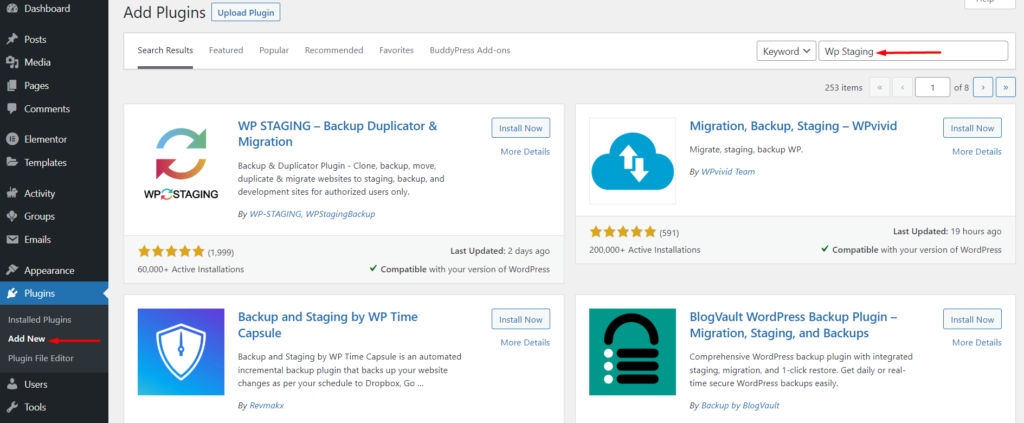
iii) Click on the “Install Now” button next to the plugin
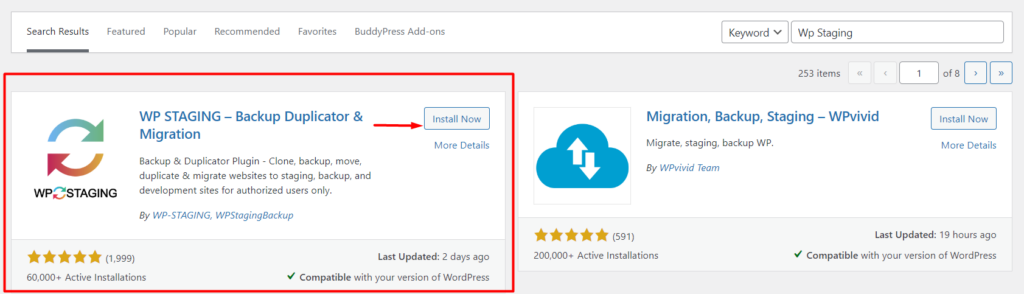
iv) Upon completion of the installation, activate the plugin
Creating a New Staging Site
To setup the staging site, you will need to:
i) Navigate to the Wp Staging > Staging Sites section within the WordPress dashboard

ii) Click on the “Create New Staging Site” button
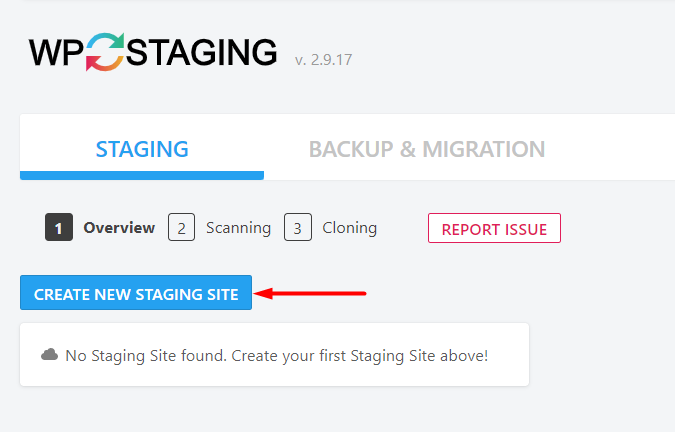
iii) Upon clicking on the “Create New Staging Site” button, this will redirect you to the scanning section. Within the field with the placeholder “Enter Site Name”, fill in your desired staging site name.
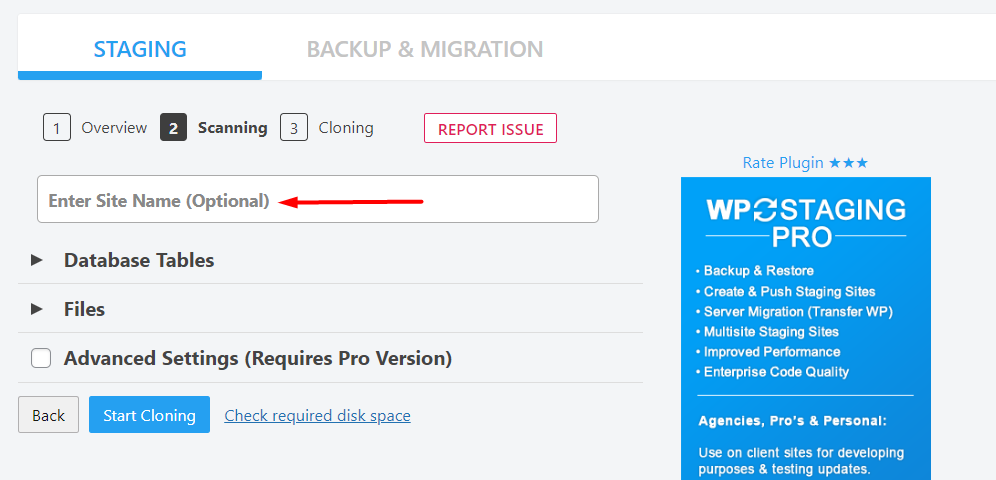
The section Database Tables indicates all database tables that you wish to clone. By default all tables are selected. You can also deselect tables that you do not wish to clone but we recommend leaving the selection to the default all tables selection for a proper match to the live site.
Onto the next pane “Files”, this indicates the folders that are to be cloned. Here we also recommend selecting all folders.
The “Advanced Settings (Requires Pro Version)” enables you to for example clone to a different database as well as setup a custom directory, among a few other features. These features are however available only available for the pro version of the plugin.
Next, click on the “Start Cloning” button. This will now start the cloning process as illustrated in the screenshot below:

The cloning process will take a couple of minutes to complete. The larger the original site, the longer it takes to complete.
Upon completion, you will have a “congratulations” message in place and a button “Open Staging site” to enable you access the staging site as seen below:
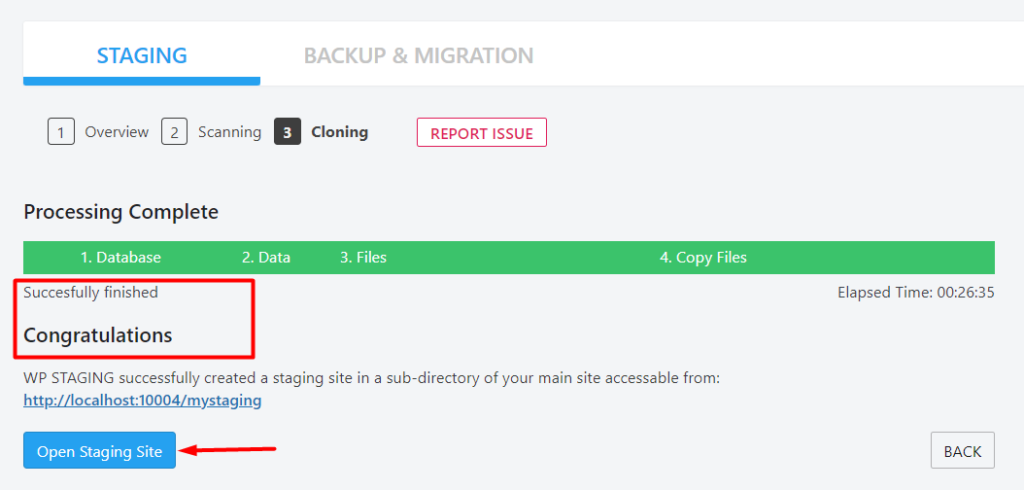
iv) Click on the “Open Staging site” button in order to access the staging site. You will then be required to fill in your login details (username and password) on the login screen.
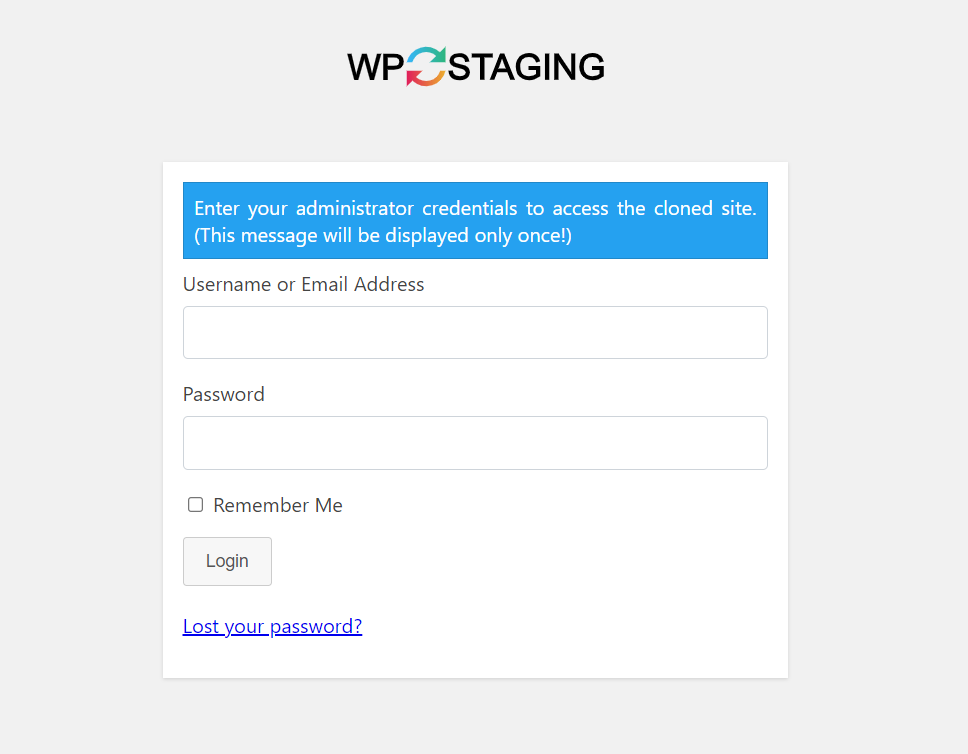
Upon a successful login, you will notice that the admin bar is now orange in color. This is an indication that you are now accessing or working on a staging site.

Creating a staging site manually
Setting up a staging environment manually is quite an involving process compared to all the other methods discussed above. This approach may turn out to be a bit challenging especially for beginners and is hence more appropriate for advanced WordPress users.
Within our guide here, we will be using cPanel as our hosting panel and Filezilla to access the site files.
To begin with, we will carry out the following:
1. Setup a Subdomain
First access the site via cPanel and select “subdomains”.

On the next screen, we will proceed to creating subdomain.
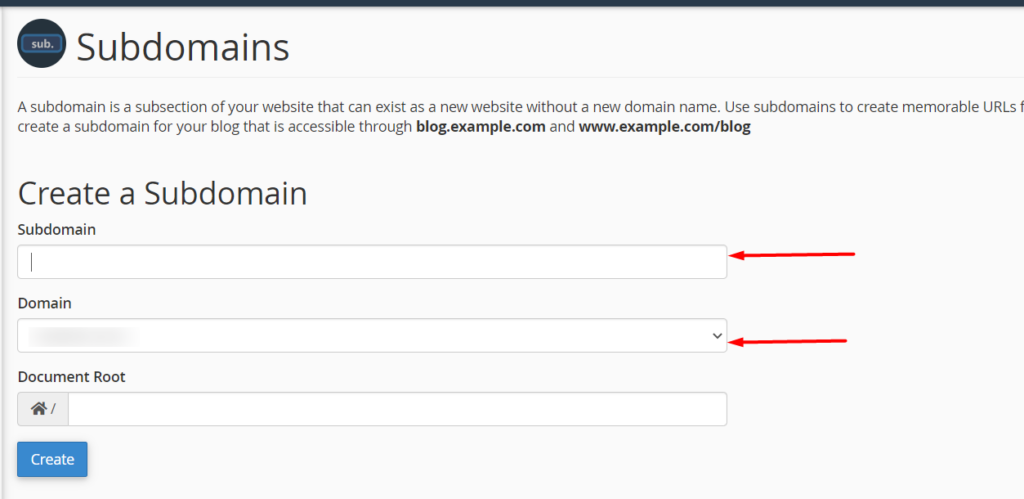
Here, you will need to specify a subdomain name of your preference as well as the main domain that you are creating the subdomain from. Once done click on the “Create” button.
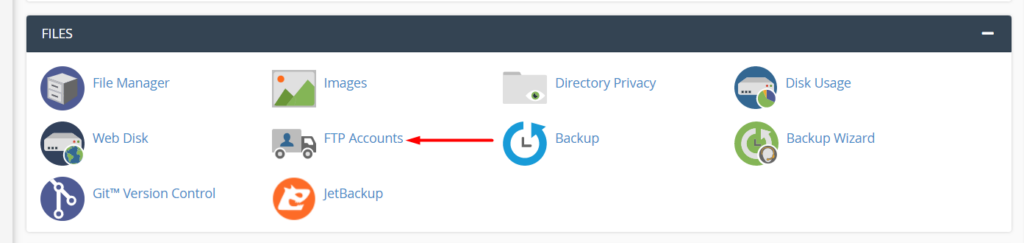
2. Create an FTP account for the staging site
In order to accomplish this, you will need to first access the cPanel dashboard and click on the “FTP Accounts” link.
On the next screen, add your FTP account details and ensure that the “Directory” matches the root subdomain.
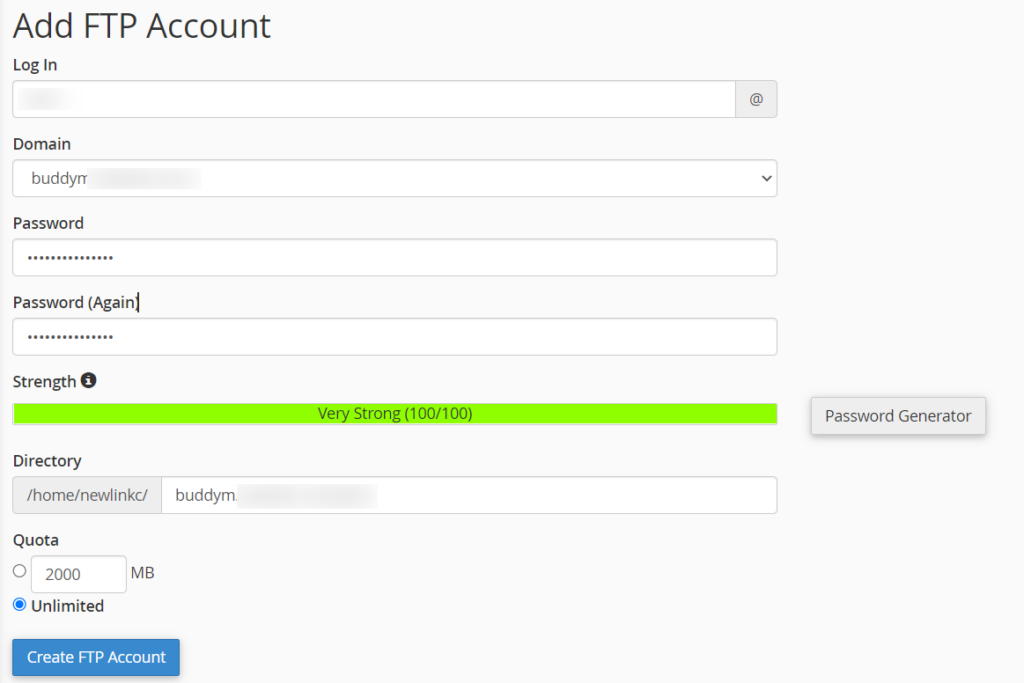
Once done, click on the “Create FTP Account”.
3. Download your live site files and folders and upload them to the staging site
Either via cPanel or still using FTP, you will need to now download the contents of the root directory of your live site. In most cases, the root directory is named public_html or www. This should generally contain your WordPress files.
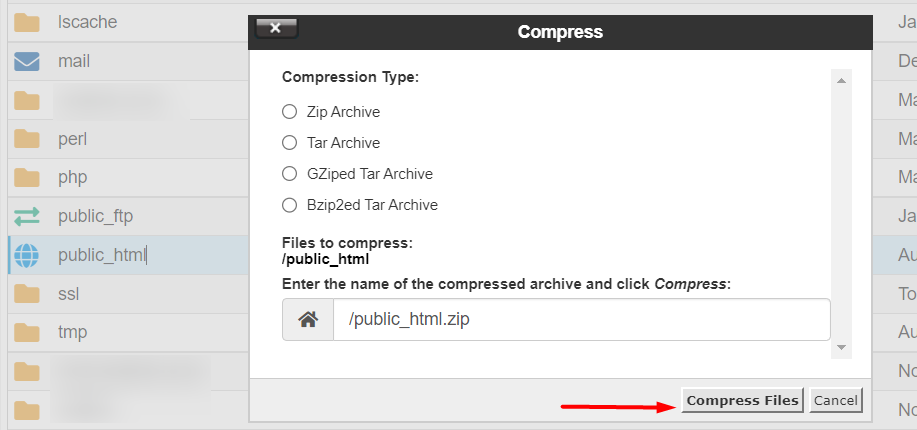
If you are using cPanel, you can compress the root directory upon right clicking on it and click on the “compress” option. Once this is done, select a zip archive option and click on the “Compress files” button. Upon completion of the compression, you can then download the zip file.
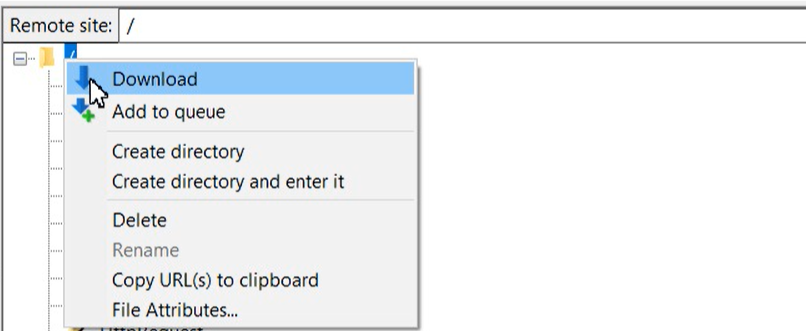
While using FTP, you can download the root folder upon right clicking on it as illustrated below:
Once the download is complete, you can now upload the downloaded files to the staging site. You can use FTP or cPanel for this. cPanel is however a bit much faster in carrying out this process as compared to upload via FTP.
4. Create a Staging site database
In order to create a staging site database, from your cPanel dashboard, navigate to the “Databases” section and click on “MySQL Databases”.

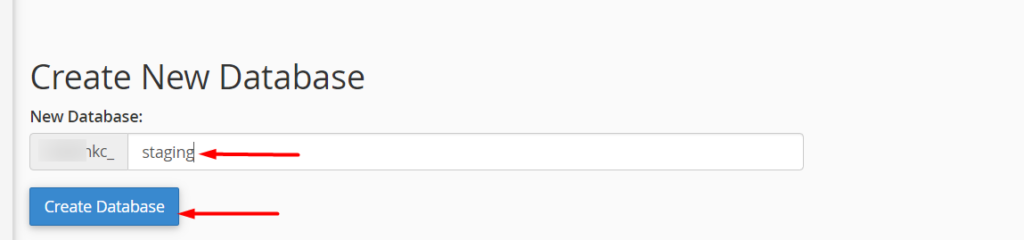
On the next screen, create a new database by filling in your desired staging site database name and click on the “Create Database” button as illustrated below:
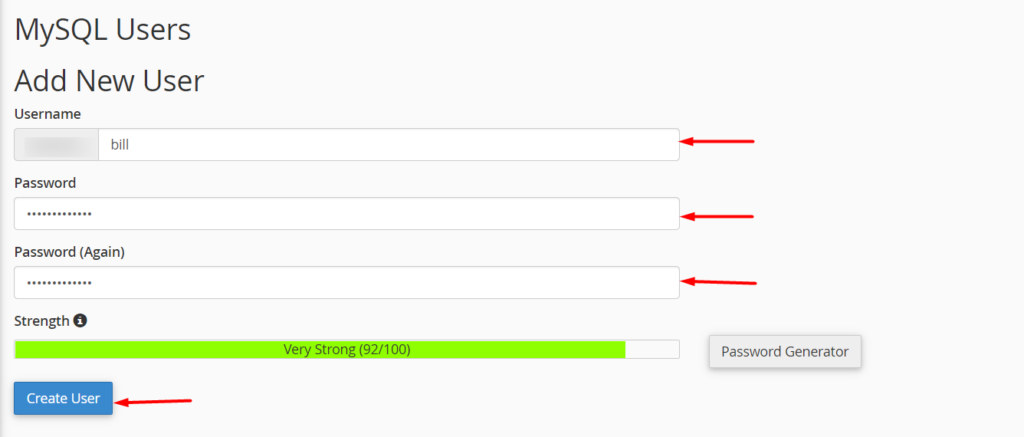
Upon doing so, still within the MySQL Databases section, create a new MySQL user from the “MySQL Users” segment by filling in your desired username and password as illustrated below:
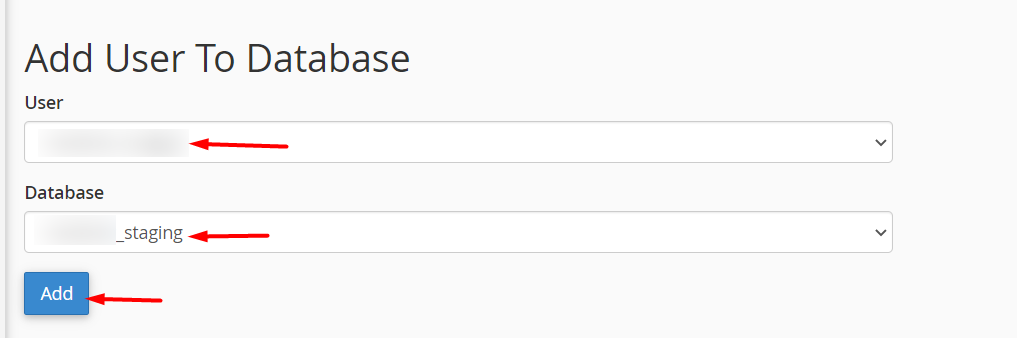
Next, add the new user to the staging site database:
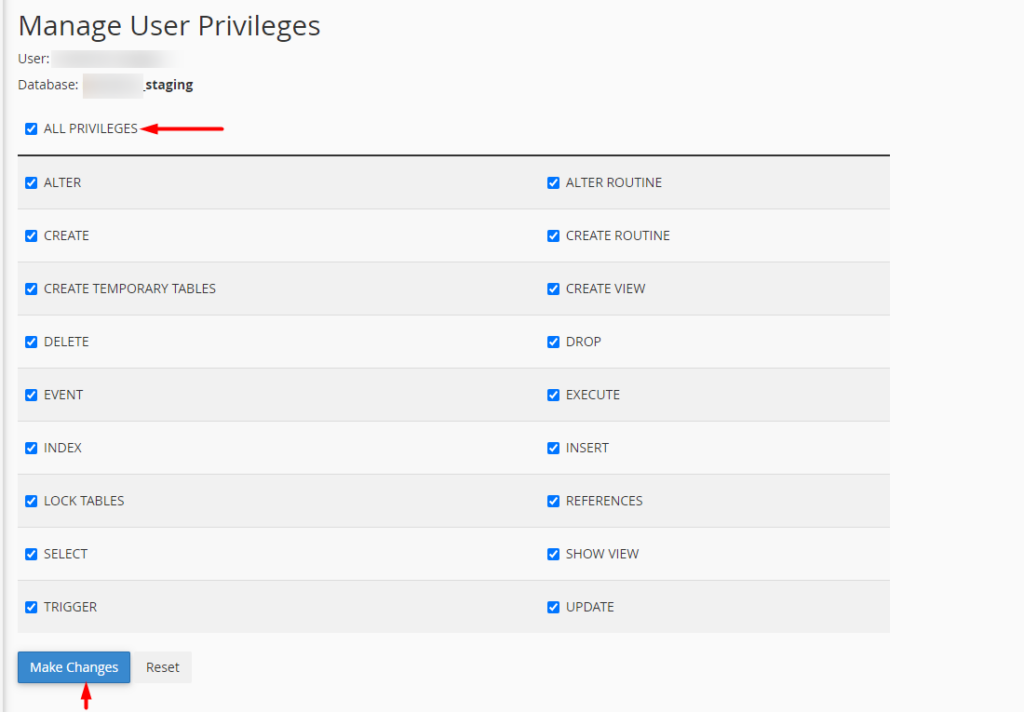
Upon doing so, you will be redirected to a page where you will now need to assign the privileges of the new user to the database. Here, you will need to select the option “All Privileges” and click on the “Make Changes” button.
5. Export / Import your Live Database
To begin with, you will need to first export your live database. This can be achieved by carrying out the following:
First click on the “phpMyAdmin” link within the “Databases” section.

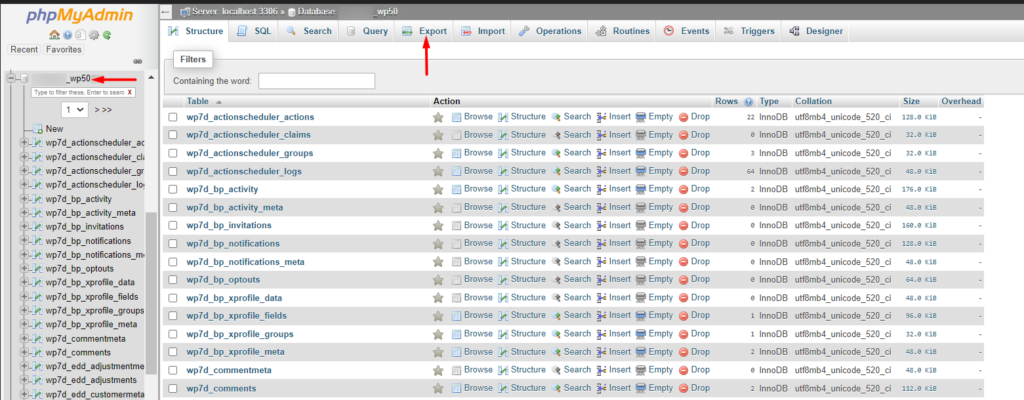
Next, select the live site database from the left pane and click on the “Export” link.
Within the next screen, click on the “Go” button.
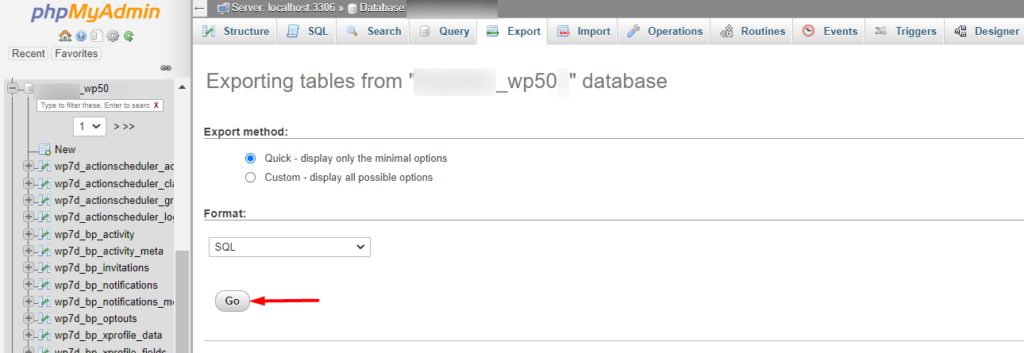
This will initiate the download of the live site database SQL file.
You will now need to import the downloaded database to the staging site database. To do so, select the staging site database on the left panel and click on the “Import” link.

Next, upload the SQL file we downloaded, and click on the “Go” button to begin the import process.
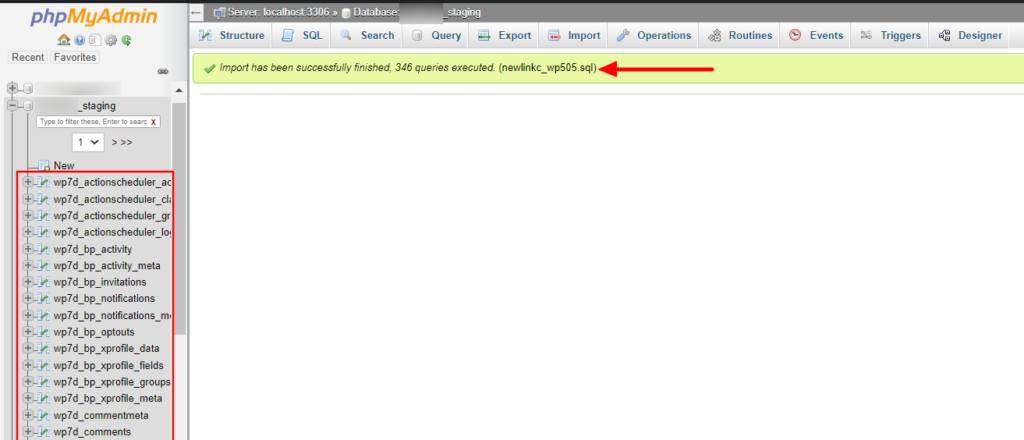
In a successful import, there will be a success message rendered and the tables will now be imported as seen in the screenshot example below:
6. Change the site and WordPress URL in the Database
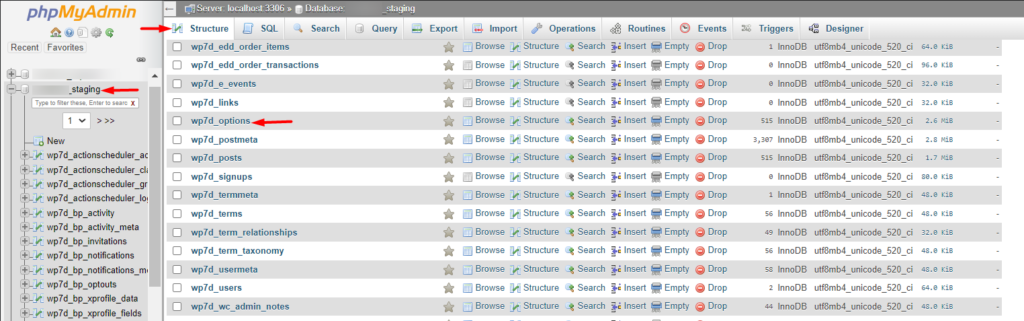
Still within the phpMyAdmin, select the new database, click on the structure tab and select the options table.
On the next screen, double-click on the option_value column values in the site_url and home option_name(s), and alter the URLs to the staging site URL.
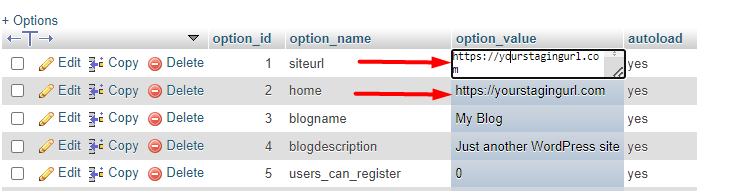
Ensure that you do not add a trailing slash to the end of the URLs.
7. Edit the Wp-Config.php file
In this step, we will need to edit the Wp-Config.php file and modify the Database details such as the database name, username and password so that they match those of the staging site.
In order to do so, you will need to access your staging site files via cPanel or FTP first. Next, within the root files, right click on the wp-config.php file and select to edit.
You will then need to replace the set database name, username and password with the staging site database name, username and password.
define( 'DB_NAME', '' );
/** MySQL database username */define( 'DB_USER', '' );
/** MySQL database password */define( 'DB_PASSWORD', '' );
The values should be added between the single quotes.
In some cases, you may also come across the following codes within the wp-config.php file as well.
define('WP_SITEURL', 'https:/yoursiteurl.com');define('WP_HOME', 'https://yoursiteurl.com');If the above codes exist in your wp-config.php file, you will need to replace the URLs with your staging site URLs.
8. Disable Indexing by search engines
At this particular point, you should now be in a position to access the staging site from your browser. Login to your site backend and navigate to the Settings > Reading section.
Here you will need to enable the option “Discourage search engines from indexing this site” as illustrated below:
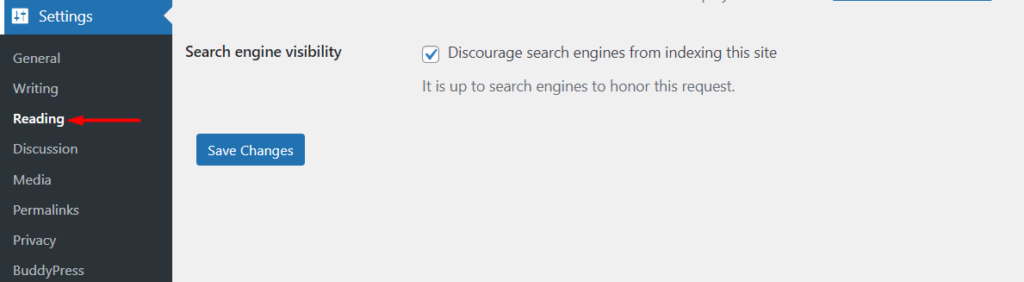
Once this is done, save your changes.
Conclusion
Implementing a staging site is quite vital for your website especially when it comes to testing updates, new features or even plugin compatibility tests.
Within this guide, we have looked into three ways that you can use to setup a staging environment The easiest approach is via your webhost. We recommend that when choosing a hosting provider, ensure that you choose a provider that provides an option of setting up a staging site. If however you already have a hosted site and the hosting provider does not provide a direct option to setup a staging site, you can consider setting up one using either of the other methods discussed.
We hope that this guide is informative enough to assist you in setting up a staging environment. Should you have any questions or comments, please feel free to utilize the comments section down below.