How To View And Manage WordPress Cron Jobs
Table of contents
Cron is a job scheduler which allows users run scheduled tasks in Linux or Unix-like operating systems.
WordPress has its own Cron known as WP-Cron. The WordPress Cron main purpose is to run core WordPress tasks. Within this article, we will cover what is WP-Cron, how to to view and manage the WordPress Cron jobs, as well as how to disable the WP-Cron within your website.
What Is WordPress Cron?
WordPress Cron (WP-Cron) refers to how WordPress facilitates the scheduling of tasks. These tasks are referred to as Cron jobs. Examples of Cron jobs include: publishing of scheduled posts, carrying out backups and update checks.
The WordPress Cron works based on scheduled tasks by checking what needs to be run, upon a page load. This however is a disadvantage at times since if there is no page load occurring at a time when there is a scheduled task, then this will result to an error. However, as much as this is a disadvantage, there is an assurance that the task will eventually run, at least until the next page load based on the queue position of the task.
How To Manage Cron Jobs
With the help of the WP Crontrol plugin, it is actually possible to view, add and modify the Cron jobs.
In order to utilize the plugin, navigate to the Plugins > Add New section within your WordPress dashboard and search for the WP Crontrol plugin.
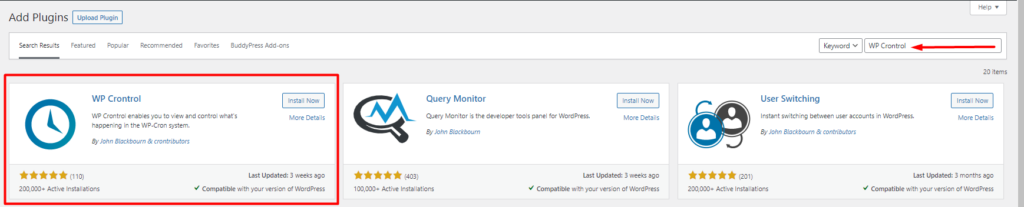
Next, install and activate the plugn.
Once you are done with the installation you can then proceed to managing Cron jobs in your WordPress site.
Viewing the WordPress Cron Events
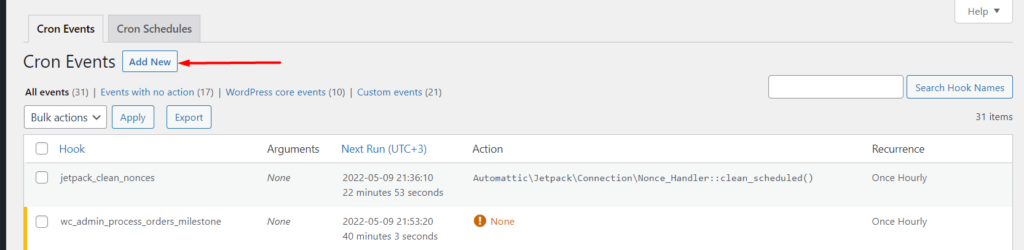
In order to view the WordPress Cron Events, navigate to the Tools > Cron Events section within your WordPress dashboard.
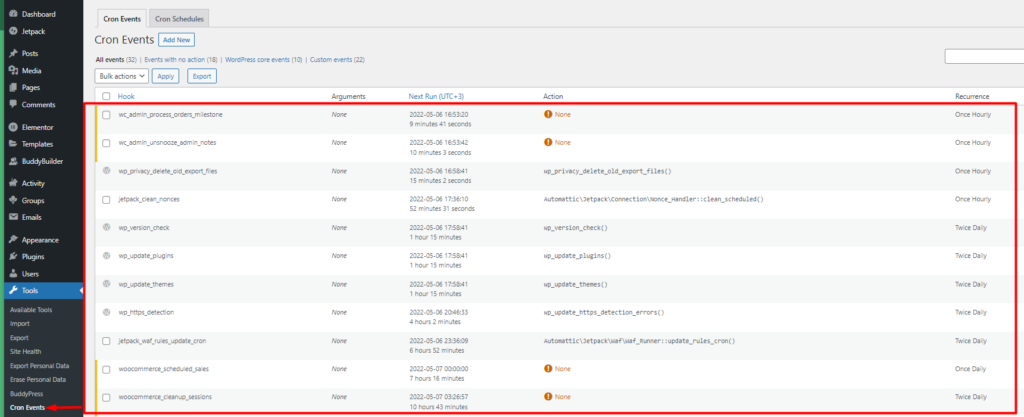
Here you can view all the events in place that are scheduled to run within your website.
The events are grouped under different categories:
- Events with no action
- WordPress core events
- Custom Events
Under the first column, you can have a view of the hooks that are used to run the Cron event. The hook name provides an idea of what the scheduled event does. Hooks with the prefix wp are WordPress core event hooks. These hooks cannot be deleted.
In the second column, there is the “Arguments” section. This column contains the arguments that are passed to the hook. If a hook does not contain an argument, then the “None” placeholder is rendered.
The third column is “Next Run”. This displays the next time that a Cron event will run as well as the time interval to the next run of the event.
The fourth column is “Action”. Here we have the actions that the Cron hooks will perform.
“Recurrence” is the final column. It contains a definition on as to when the event is repeated or the event reoccurs.
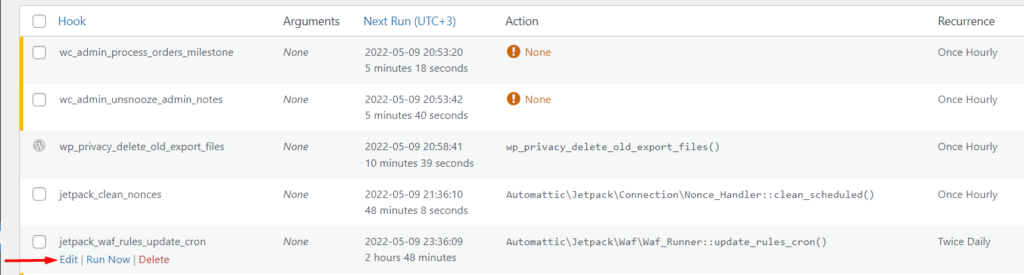
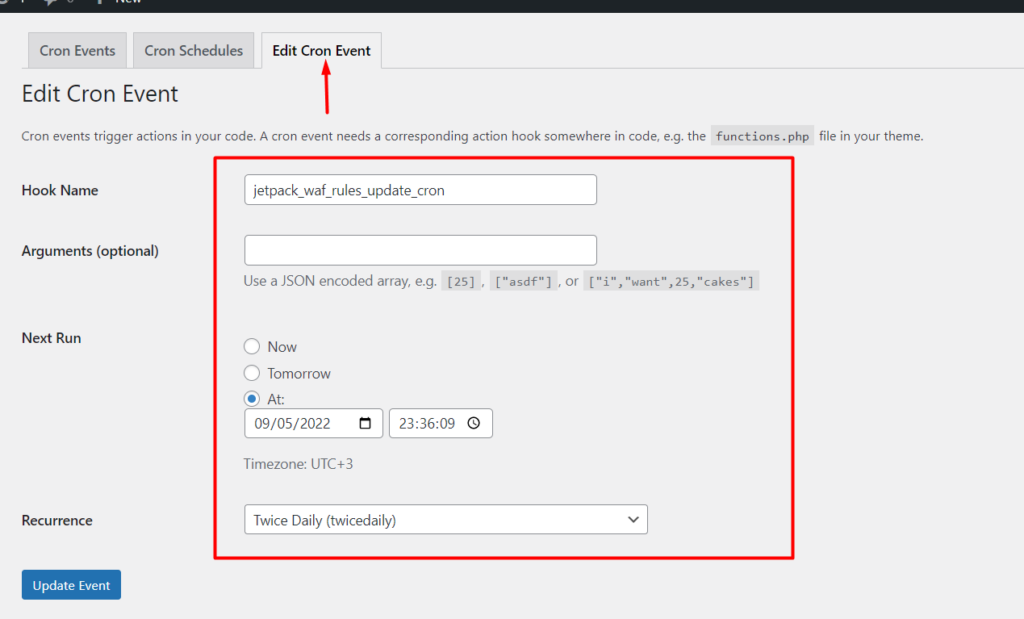
Editing Cron Events
In order to edit a Cron event, hover over the Cron event and and click on the edit link on the event.
You will then be redirected to the “Edit Cron Event” section. Here you can customize the event to your preference.
Adding a New Cron Event
Creating a new Cron event by clicking on the “Add New” button within the Cron Events section.
You will then be redirected to the next screen where you have the “Add Cron Event section”.
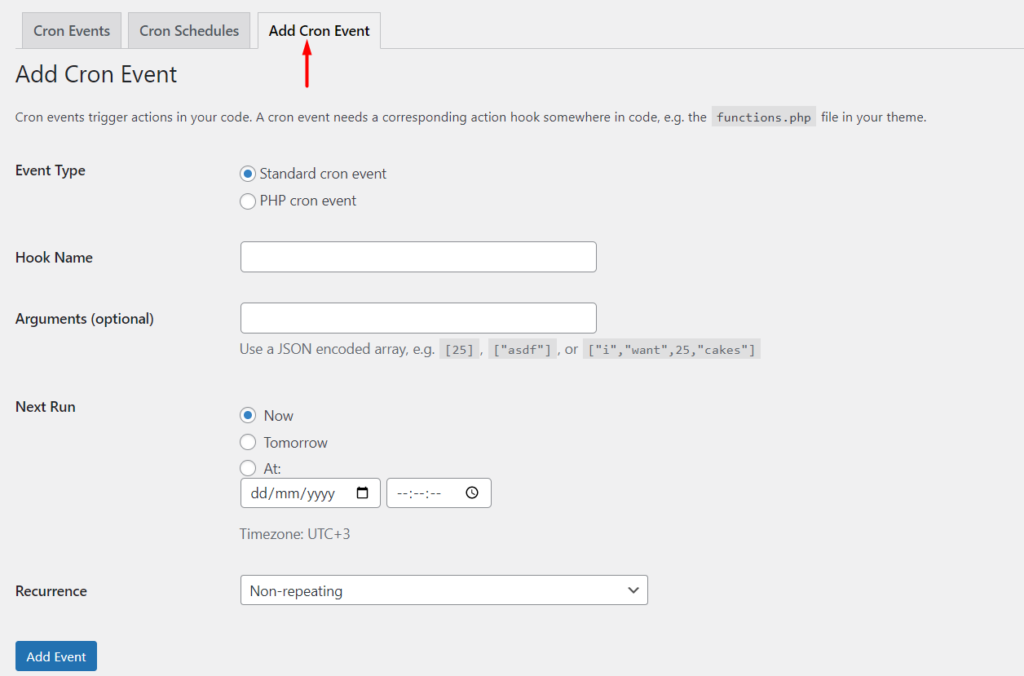
Within this section, specify the Event type (whether a standard or PHP Cron event).
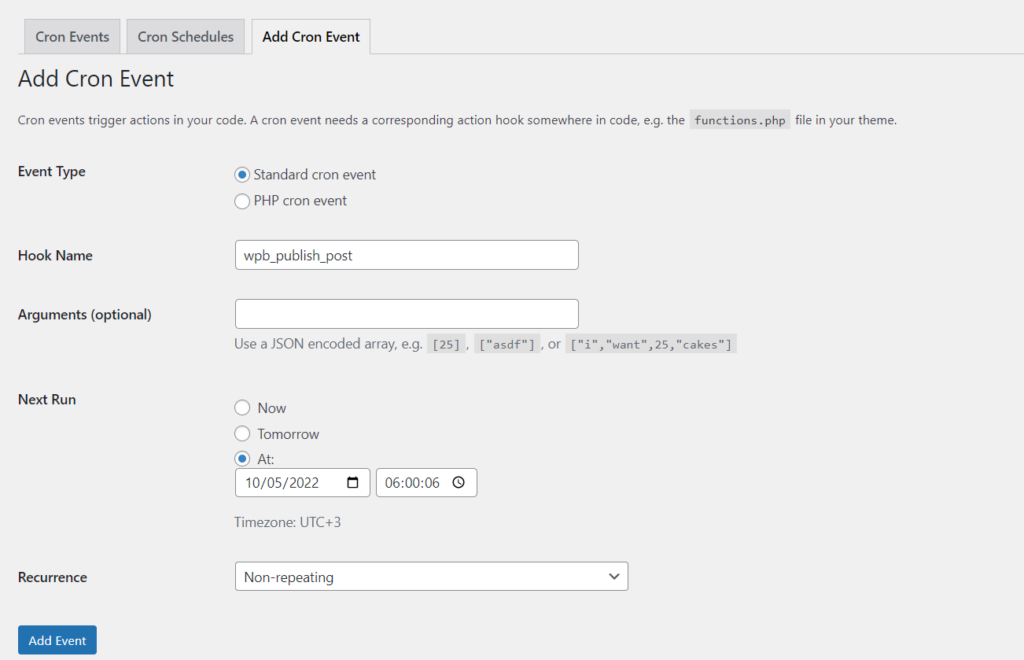
Next, specify a hook name. The hook name needs to follow the WordPress naming convention. In our case here, we will add the hook name “wpb_publish_post” .
In the arguments section you can fill in the arguments you need to add in the array. This is however optional.
Within the “Next Run” section, specify the time when the event will run and on the “Recurrence” section, specify how frequent the event will run.
Below is a sample illustration of the details we will specify in our case here:
Upon adding the event, we will have a view of the event from the events list as seen below:
Now, add the PHP code that determines what the hook does, to your themes’ functions.php file.
In our case here, we will add the code to publish a specific post. To do so, you will need to add the following code:
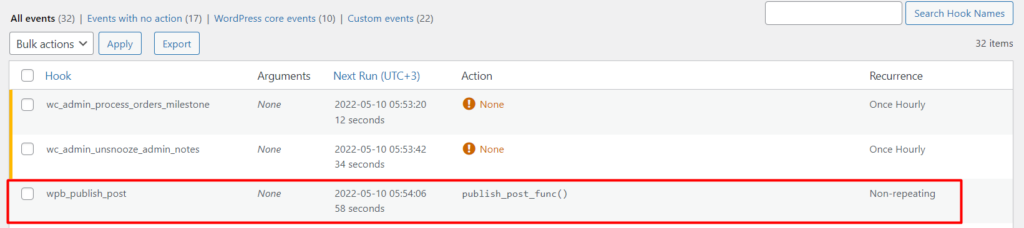
function publish_post_func(){//Assign your Post ID$post = 717;//Run the publish post function$result = wp_publish_post($post);}add_action( 'wpb_publish_post', 'publish_post_func' );What this code will do is publish one of our posts, of which is the post ID 717. You can use a post ID of your preference based on the available posts in your website.
Note that the event recurrence we specified is “Non-repeating” since you can only publish a post once.
Once the set “Next Run” time is arrived at, the post will then be published. Below is an illustration on this:
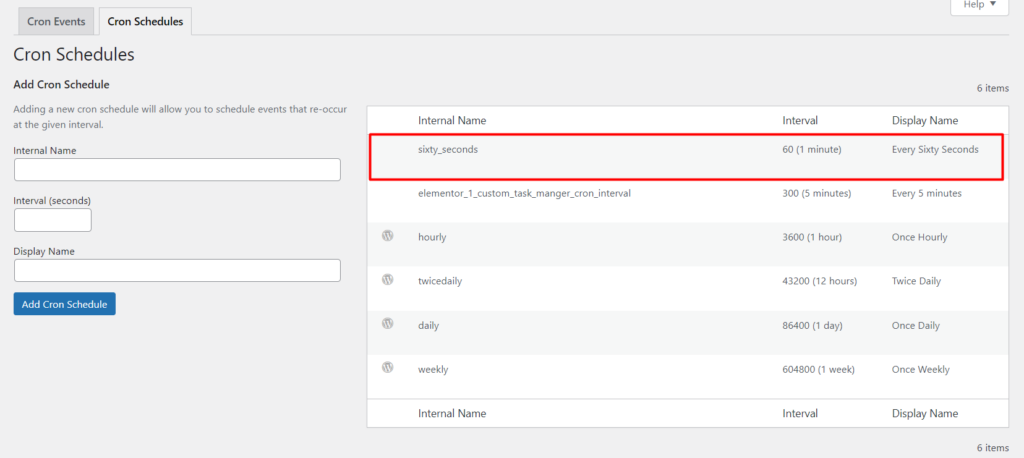
Cron Schedules
The WP Crontrol plugin contains default Cron schedules. These can be identified from the Settings > Cron Schedules section within your WordPress dashboard. If you have plugins that add custom schedules, then these will also be reflected in this section. You can also add your own custom schedules within the section. Below is a sample illustration on this section:

If you wish to add the schedules manually via code, this is also achievable. Below is a sample code to add a Cron interval of sixty seconds. You can add the code to your themes’ function.php file:
add_filter( 'cron_schedules', 'cron_interval' );function cron_interval( $schedules ) { $schedules['sixty_seconds'] = array( 'interval' => 60, 'display' => esc_html__( 'Every Sixty Seconds' ), );return $schedules; }Once added, you will have a view of the schedule within the Cron Schedules list:
Disabling Wp Cron
In high traffic sites, the WordPress Cron may have a negative performance impact on your website, especially when it comes to page load. In such cases, it it would make sense to disable the WordPress Cron and instead use the Server Cron.
In order to disable the default WordPress Cron, you will need to carry out the following:
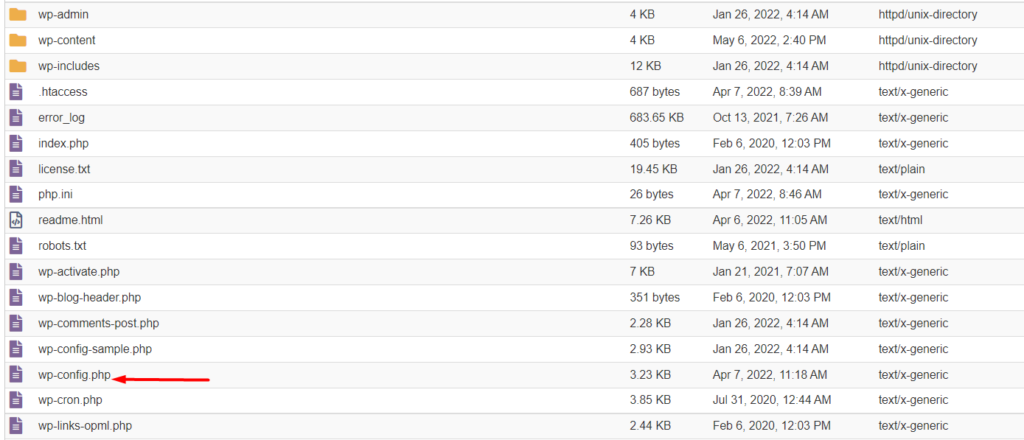
Access your site files via FTP. You can do so using an FTP software such as Filezilla or a panel such as cPanel provided by your host.
Navigate to the root of your WordPress files and select to edit the wp-config.php file.
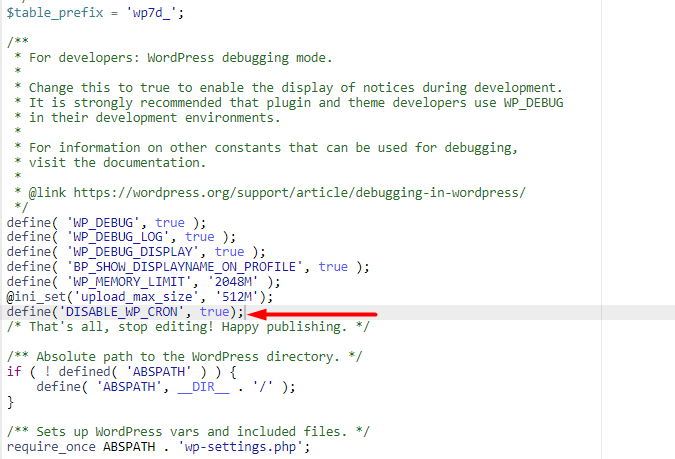
Within the file, add the code below just above the line “/* That’s all, stop editing! Happy publishing. */”.
define('DISABLE_WP_CRON', true);Below is a sample screenshot on this:
Once this is done, save your changes.
Conclusion
With the WordPress Cron, you can schedule Cron events pretty easily. Within this article, we covered what are Cron jobs, how to manage them using the WP Crontrol plugin as well as how to go about disabling the WordPress Cron.
We hope that this article was helpful in providing insights on how to manage WordPress Cron events. Should you have any questions or suggestions, please feel free to leave a comment below.