How To Create Custom BuddyPress Member Profile Layouts
Table of contents
Creating custom BuddyPress Member Profile Layouts is a commonly asked question by users setting up BuddyPress based websites.
Website owners are in a position to quickly generate the default BuddyPress Pages. However, customizing the default components such as the member profile layout may not be possible by default.
Different website owners may want different designs of the Member profile.
BuddyBuilder plugin provides you with the ability to customize the default BuddyPress Member Profile layout and build your own stunning profile layout.
In addition, Elementor plugin which is a versatile page builder properly integrates with BuddyBuilder to help you easily create these layouts, via a drag and drop interface.Elementor is hence a vital component to help in designing the layouts.
Within this article, we will focus on how to create a custom Member Profile Layout.
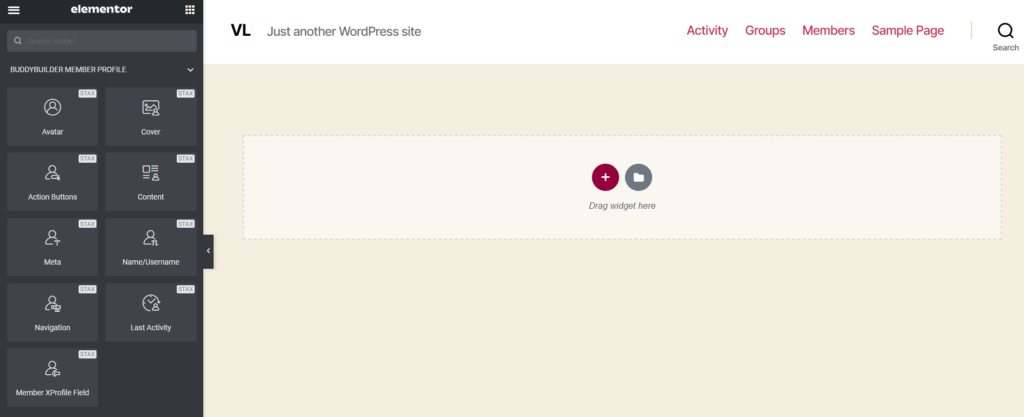
Core BuddyBuilder Elements Used to Create Custom Member Profile Layouts
BuddyBuilder plugin provides a number of Elements that can be used to build a custom profile for your site users.
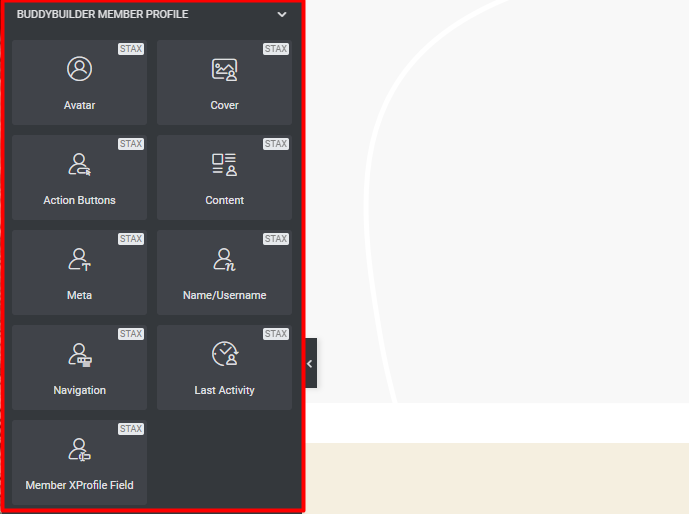
Avatar: Renders the Member Profile picture
Cover: Renders a background to user Profile content
Action Buttons: Helps members carry out functionalities such as adding a friend and sending messages
Content: Used to display member specific content
Meta: Displays the last active timeline
Name / Username: Displays the username to the current member
Navigation: Provides a unique navigation to the member profile
Last Activity: Displays the last activity of the member
Member XProfile Field: Renders the members’ XProfile Fields
Users may also incorporate the General Elementor elements within the profile templates.
Creating a Custom Member Profile Layout
Site owners can setup custom member profile layouts by carrying out either of the following:
- Importing the default BuddyBuilder Templates
- Creating a custom layout from scratch
i) Importing the default BuddyBuilder Templates
In order to import the default BuddyBuilder Templates, the site owner will need to navigate to the BuddyBuilder >Templates Section and select a template to import:
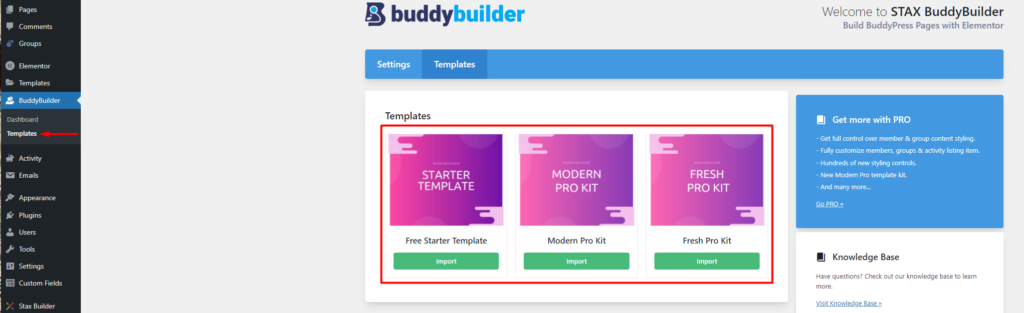
The Modern Pro and Fresh Pro are only available while using the pro version of the plugin.
Once imported, the template is by default set within the “Member Profile” segment, under the BuddyBuilder > Dashboard section as can be seen below:

From the above template, once a user accesses his profile, the layout would be similar to the below:
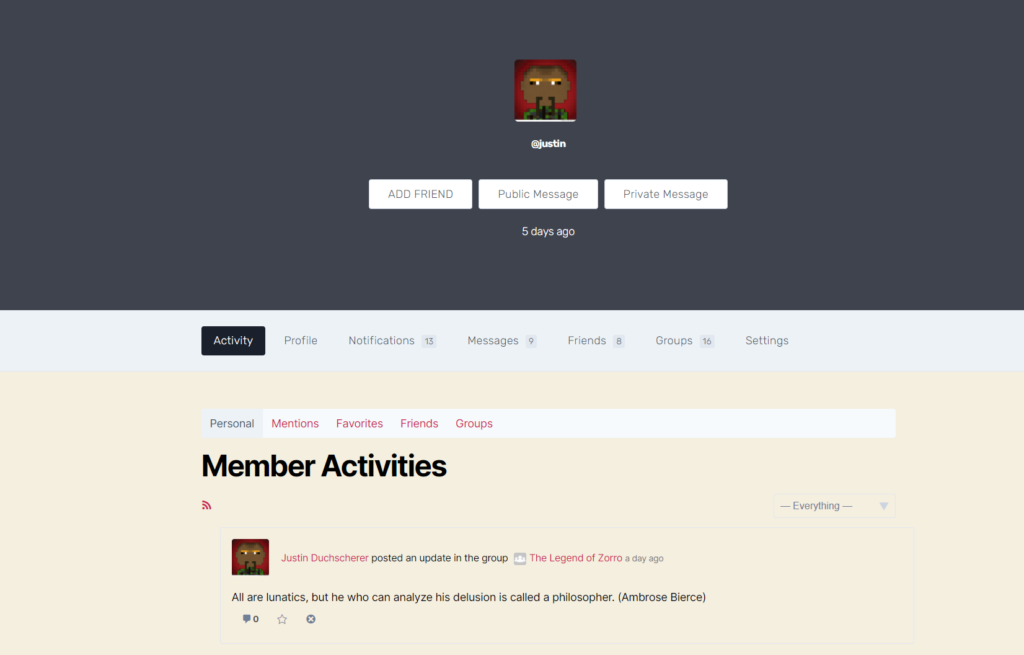
Site owners can also further customize the layout and display of the elements.
ii) Creating a custom layout from scratch
Similar to the Elementor Template creation process, creating a Member Profile Template follows this same process. In order to accomplish this, the site owner needs to:
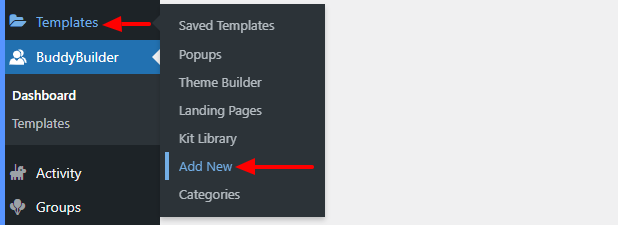
Navigate to the Templates > Add New section within the WordPress dashboard
Within the popup, select the “BuddyPress” template type
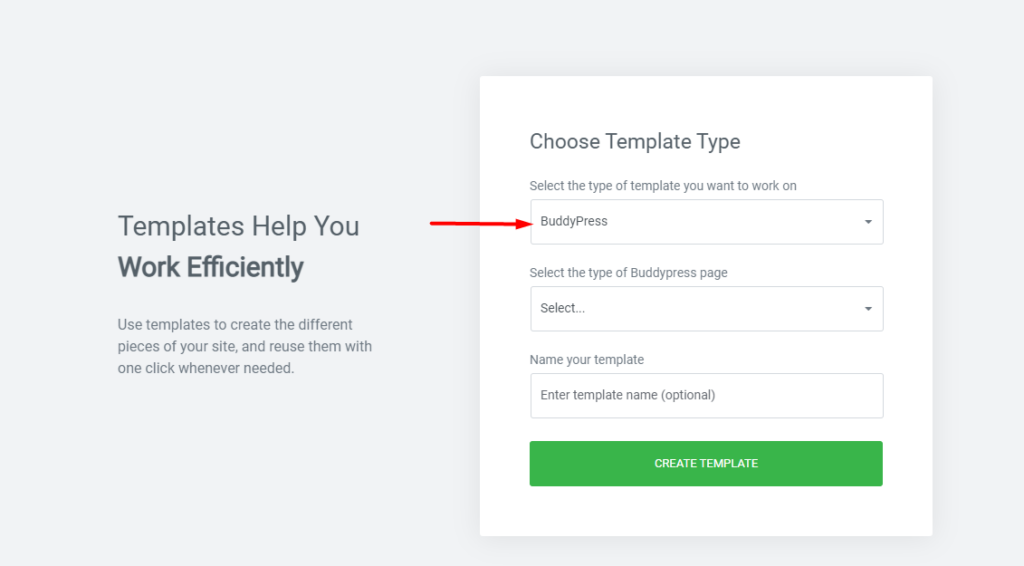
On the type of BuddyPress Page section, select “Member Profile”

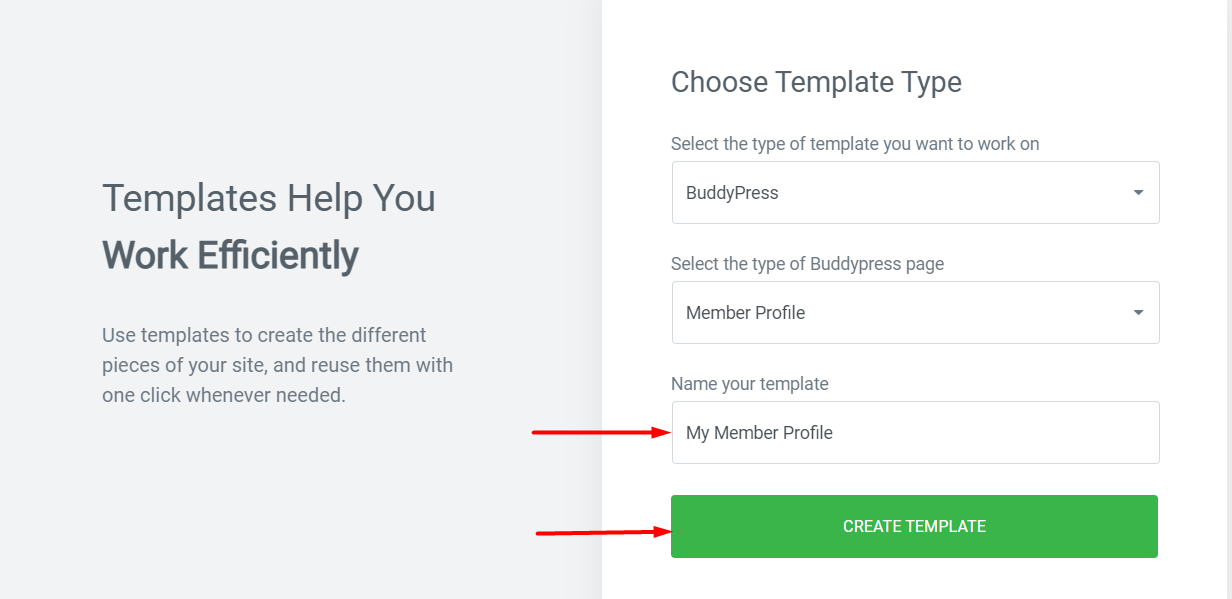
You can then provide the template your desired name and click on the “Create Template” button
On the next screen, if you had imported the default BuddyBuilder templates as mentioned in our “Importing the default BuddyBuilder Templates” segment, you can find the templates within the “My Templates” section, and you can insert the specific member profile template here.

Else, if you wish to proceed to creating your own template, you can just close the popup and proceed to adding your own elements to your new template. Below is a sample default view:
Conclusion
BuddyBuilder Comes in handy in creating a custom member Profile for your site using Elementor. Due to its flexible nature and packed features, site owners are in a position to create user friendly profile layouts for their websites.
For more details on Member profiles, this can be found within the documentation here.