How To Create Custom BuddyPress Group Profile Layouts
Table of contents
BuddyPress group profiles are by default rendered using the default BuddyPress template layout. If a site owner intends to alter the layout, he is often forced to carry out customizations that will override the default templates. This can be a challenge to site owners with little or limited coding knowledge.
BuddyBuilder comes to the rescue in such instances. The plugin easily integrates with Elementor, to provide site owners with the ability to easily customize the default layouts, in a drag and drop approach.
Within this article, we will focus on how to create a custom Group Profile Layout.
The Main BuddyBuilder Elements Used to Create Custom Member Profile Layouts
There are a number of elements specifically from BuddyBuilder that help in designing custom Group Profile templates.
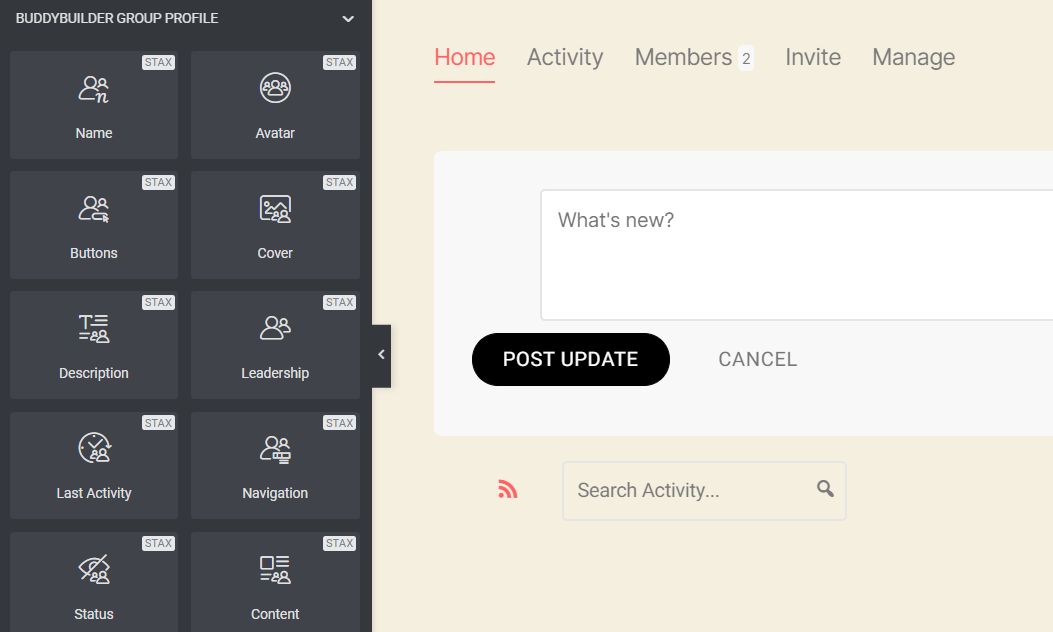
Name: Displays the group name
Avatar: Displays the set Group avatar
Buttons: Buttons represent a set of actions that users can carry out within a group
Cover: Used as a background to a set of content
Description: Renders details about the group
LeaderShip: Displays the owner and group admins to the group
Last Activity: Renders the timeline within which there was an activity within the group
Navigation: Displays the navigation sections of a group
Status: Displays information about the group in regards to whether it is Public, Private, or Hidden
Content: Displays the general content and activity for the specific group
It is also important to note that site owners can use other Elementor widgets and add them to their template based on their preference.
Creating a BuddyPress Custom Group Profile Layout
Creation of a Group profile is now easy using the BudyBuider plugin. There are two approaches that this an be achieved:
1. Importation of the BuddyBuilder Templates
2. Designing from Scratch
Importation of the BuddyBuilder Templates
In order to accomplish this, navigate to the BuddyBuilder > Templates section and select a template to import
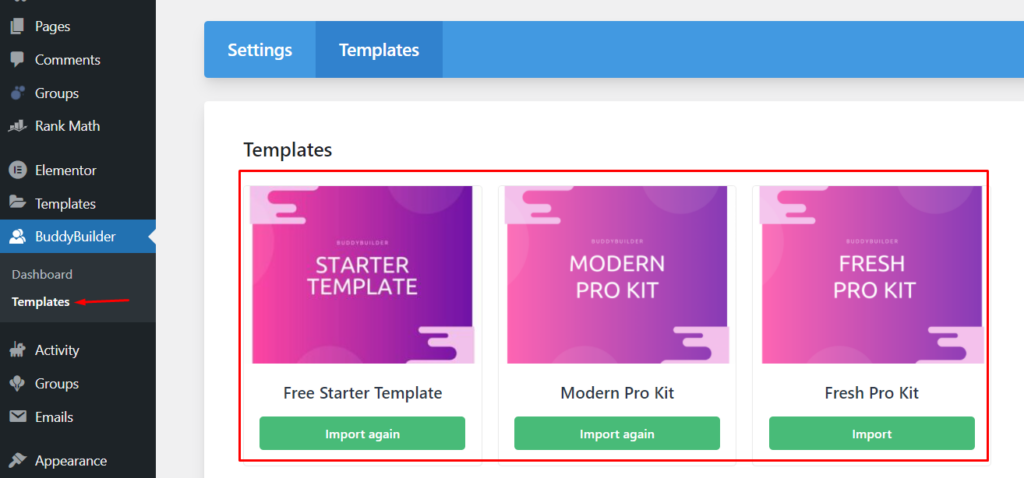
With the import done, you should then have the imported Group Profile template assigned within the “Group Profile” section. Below is a screenshot on this:

Once a user then visits the a group, the template layout will then be applied.Below is a sample display:

Designing from Scratch
Another way to create custom Group profile layouts is having them designed from scratch. In order to do so, one would need to:
Navigate to the Templates > Add New section within the WordPress dashboard
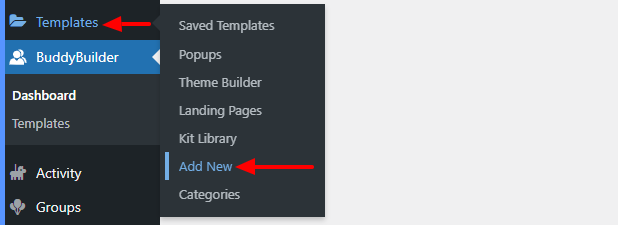
Within the popup, select the “BuddyPress” template type

On the type of BuddyPress Page section, select “Group Profile”
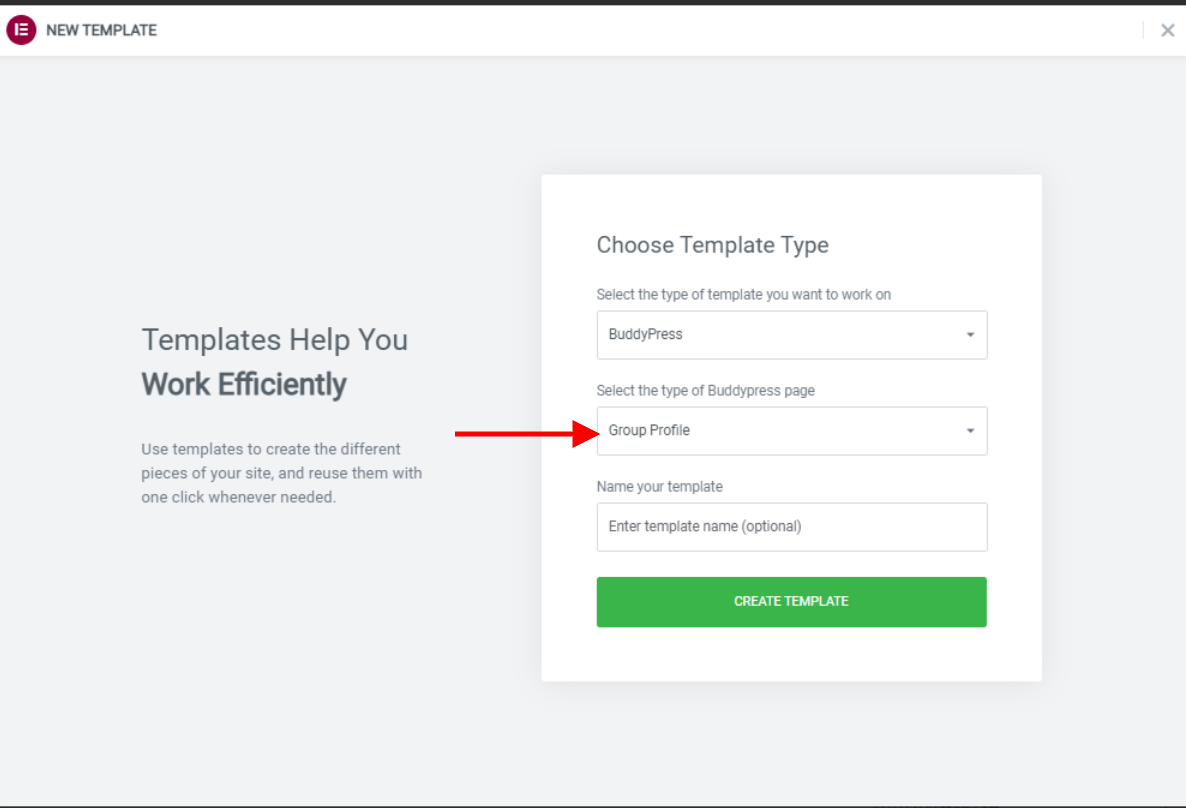
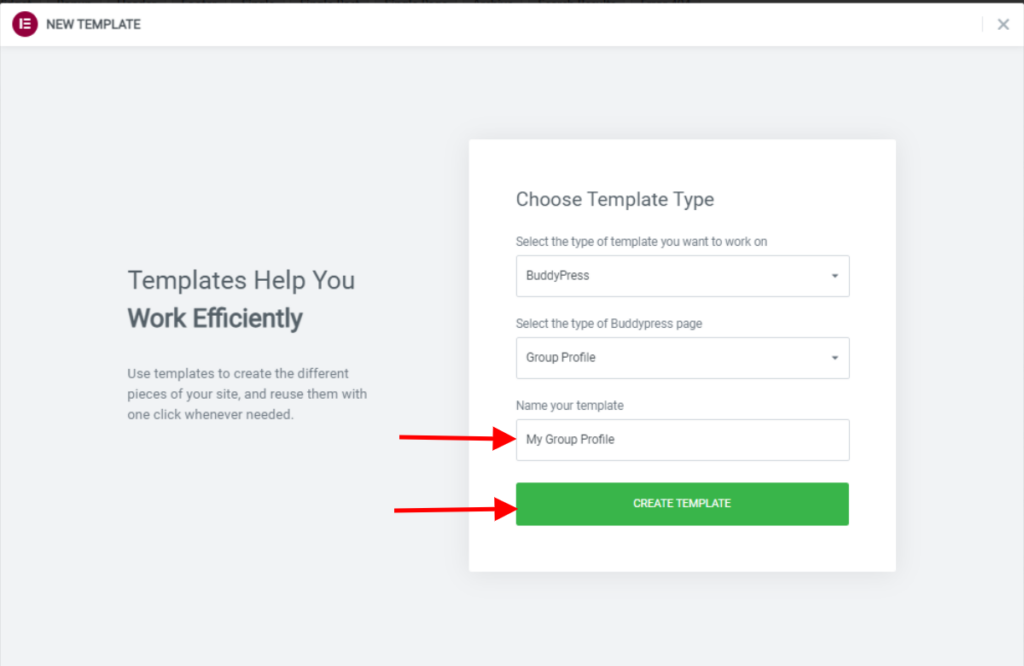
You may then fill in the desired name to the template and click on the “Create Template” button:
Within the next screen, in case you had imported the default BuddyBuilder templates as mentioned in our “Importation of the BuddyBuilder Templates” segment, you can find the templates within the “My Templates” section, and you can insert the Group profile template here. Below is an illustration on this:

On the other hand, if you wish to design your own template from scratch, you may close the popup and begin the template design by dragging and dropping the provided elements to the new template.

Conclusion
With the help of the BuddyBuilder plugin, site admins can easily create custom layouts for the Group profiles with no coding requirements. This makes it easy even for novice site users to easily design the profile layout, as long as they do have some Elementor knowledge.