How to Easily Scan for Malware in WordPress
Table of contents
Carrying out a malware scan for your WordPress site is quite crucial. Despite the fact that WordPress implements various security measures to ensure that your website is secure, a 100% guarantee on a perfectly secure WordPress system is close to impossible. The truth of the matter is that your WordPress site is still prone to security vulnerabilities. One of these vulnerabilities is malware injection.
Usage of nulled themes and plugins is one of the most common ways that malware is injected into WordPress sites. Purchasing of themes and plugins from untrusted sellers also is a contributing factors to having Malware on a WordPress site if such sellers add malicious codes to the products. A malware scan can help in identifying suspicious code or malware in such products.
Within this article, we will look into what Malware is, how to carry out a malware scan and actions to take after discovering Malware in your WordPress website.
What Is Malware
Malware refers to intrusive software or file meant to cause harm to your website.
There are various types of malware such as Trojans, Spyware, Adware, Ransomware and many more.
Malware can cause adverse effects to your website security and performance. If your site is infected with Malware, you are likely to notice some issues within the site such as:
- The website performance decreases. You may especially notice changes in speed.
- High server resource usage
- Poor SEO performance
- Website blacklisting by Google
- Display of shady ads and popups
At times, you may however be having malware running within your site but none of these signs are presented within your site. This is why it is important to regularly carry out a malware scan on your website.
How to scan for malware
A malware scan will help you in identifying suspicious code or malware within your website. Carrying out a malware scan on your WordPress website is made easy by the use of security plugins.
Here, will look into how you can use some of the best and most common security plugins to to carry out a malware scan.
iThemes Security
Upon setting up the iThemes Security plugin, you will need to carry out the following:
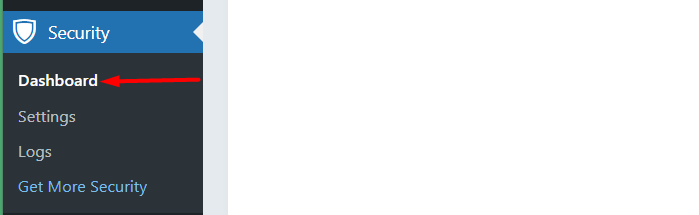
i) Navigate to the Security > Dashboard section
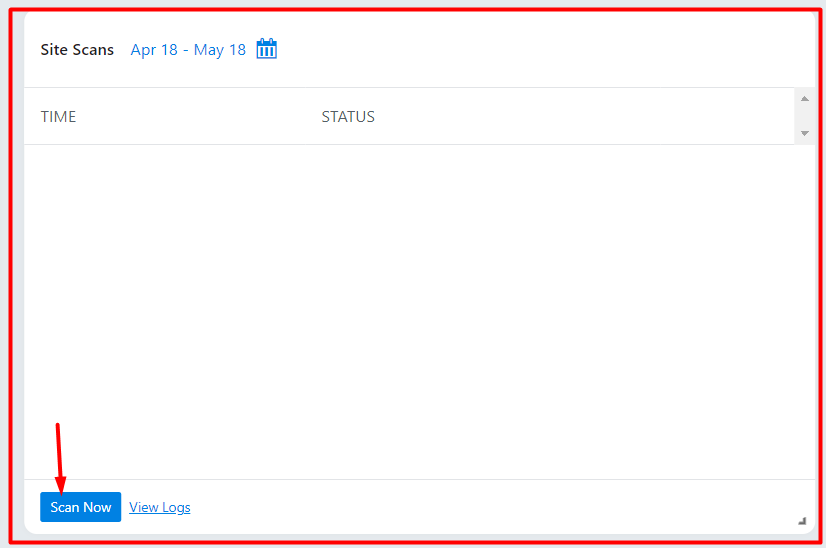
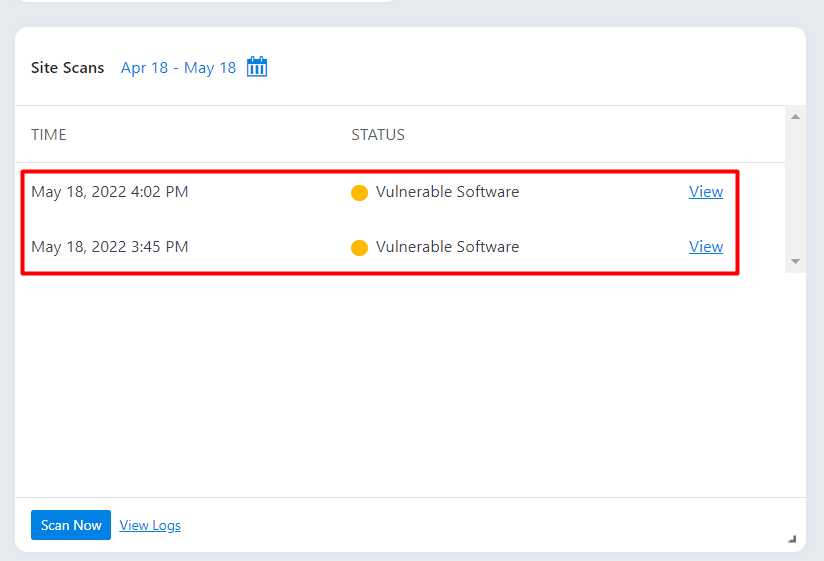
ii) Access the “Site Scans” section within the dashboard and click on the “Scan Now” button
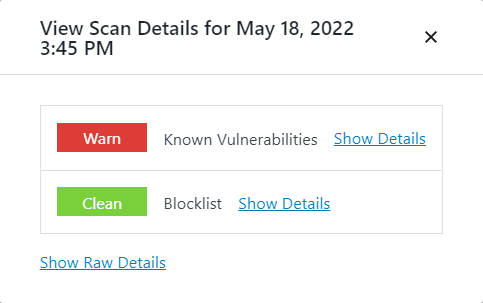
Once the scan is complete, you will have a popup rendered with some summary on the scan results:
Within the “Site Scans” section within the dashboard, you will have a view of the scans that you have carried out.
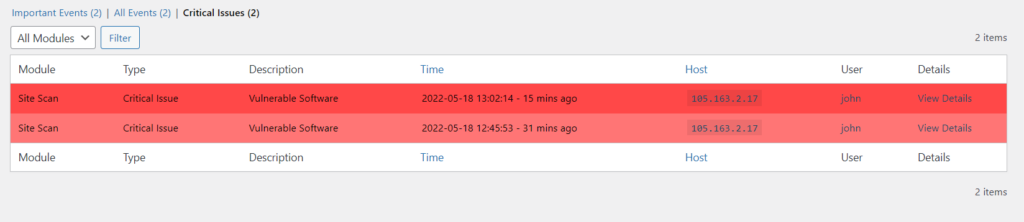
Upon clicking the “view logs” link still within the “Site Scans” section, you will be redirected to the logs section (Security > Logs). Here, you will have a view of logs from all your site scans and details of issues, if any were found, as seen in the screenshot below.
WordFence
With the WordFence plugin installed, the plugin will automatically carry out a scan on your website. However, at times you can opt to initiate a manual scan, of which upon running it will also carry out a malware scan of your website. To do you will need to carry out the following:
i) Navigate to the WordFence > Scan section within your WordPress dashboard.
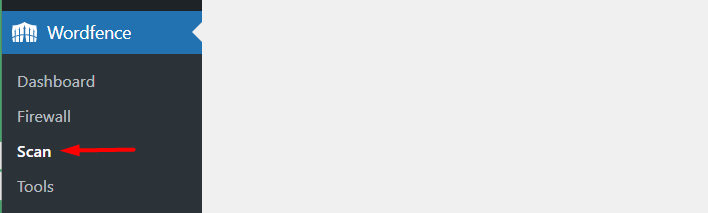
ii) In the section click on the “Start New Scan” button.
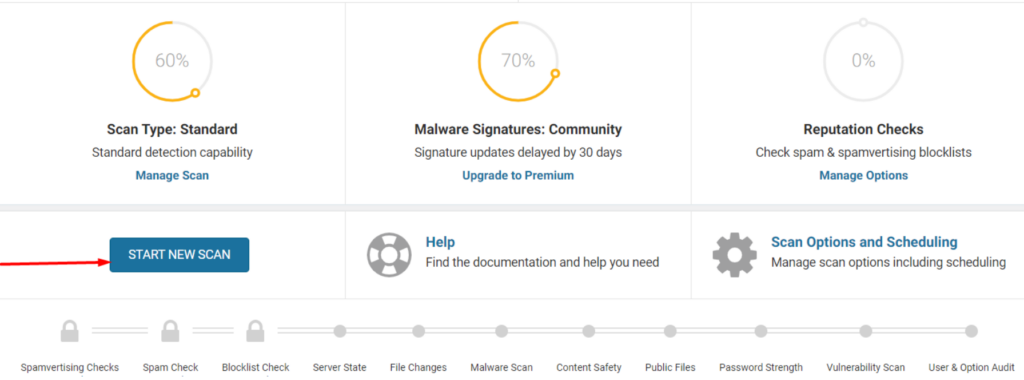
Allow the scan to run, and upon completion you will have a view of the scan results.
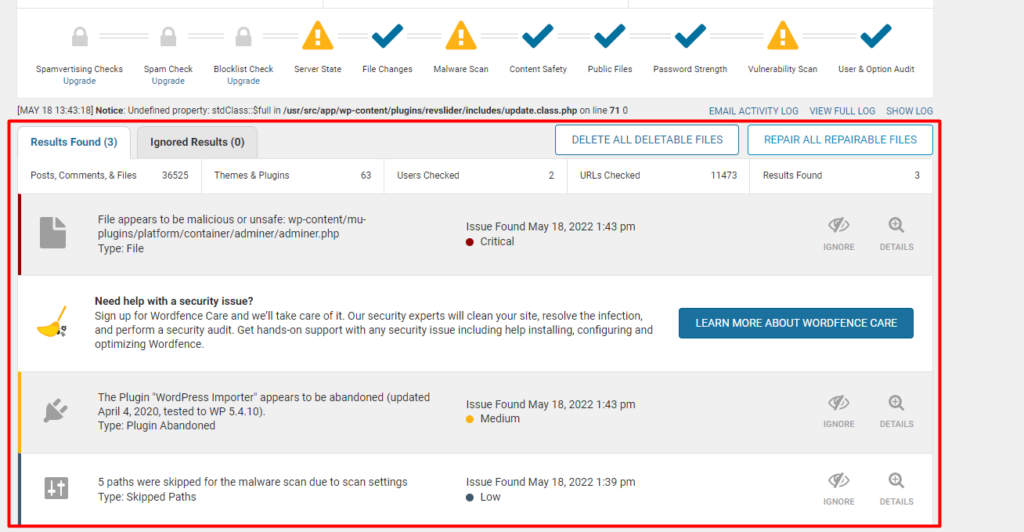
The security issues identified are rendered within this log. They are grouped based on priority, with critical issues being rendered first.
Upon clicking on a suspicious malware issue, you will have a course of action that you can carry out. Below is a sample screenshot on this:
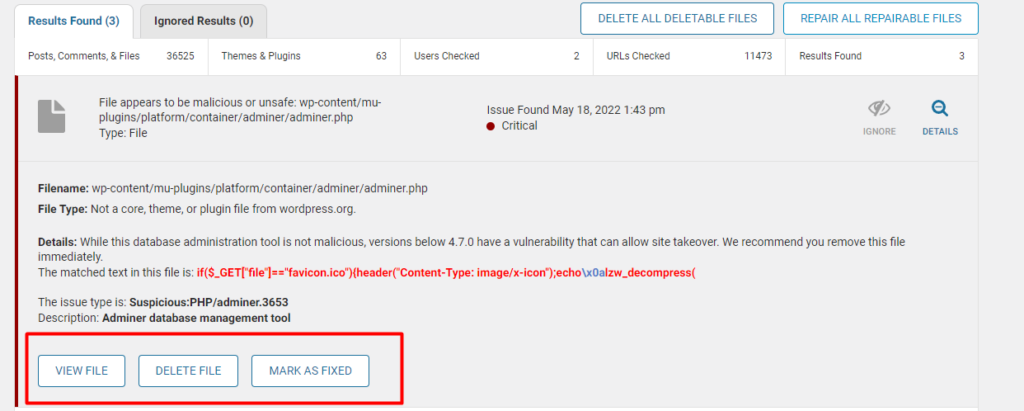
You can choose to fix or delete a file if you are certain it’s a malware. You however need to carry out a backup to the site prior to doing so.
Sucuri Security
Once you have the Sucuri plugin installed, it will scan your site automatically. The plugin has a remote website scanner known as SiteCheck, that helps in identifying any malicious code or malware.
It will also check for changed WordPress Files by comparing the contents of the files within your site with the official WordPress files.

With the free plan, the scan may not detect for example phishing pages and Backdoors or any changes not rendered externally. To utilize such core features you will need to sign up for a premium plan.
Within the Sucuri Security > Dashboard section you can have a view of the results of the most recent scan.

A key benefit of Sucuri is that if you have signed up for a plan and any malware is identified in the scan, Sucuri experts will actually help you in removing the malware with no limitations or additional costs in place.
WP Cerber Security
WP Cerber Security plugin incorporates a powerful scanning tool that checks the integrity of your site files and folders to ensure that no malware is present.
WP Cerber also supports automated and manual scans. In order to carry out a manual scan, you will need to carry out the following:
Navigate to the Wp Cerber > Site Integrity section
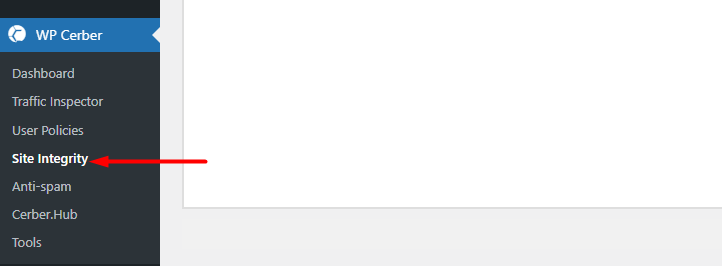
Within the section, click on the “Start Quick Scan” or ” Start Full Scan” button based on your preference:
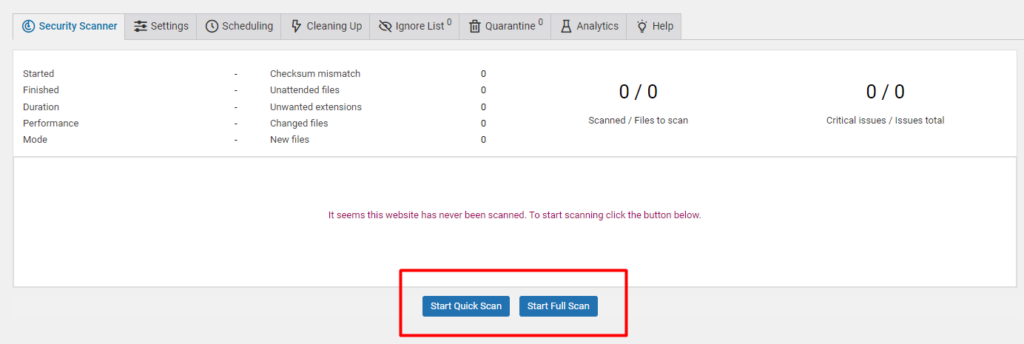
Start Quick Scan: When this option is selected, the plugin scans and inspects the code of files with executable extensions only and checks their integrity.
Start Full Scan: Upon selecting this option, the plugin scans all files within the site and checks their integrity.
Once the scan is complete, you will have a summary of the scan details as well as an outline of files that were verified and files with suspicious code if any were found.
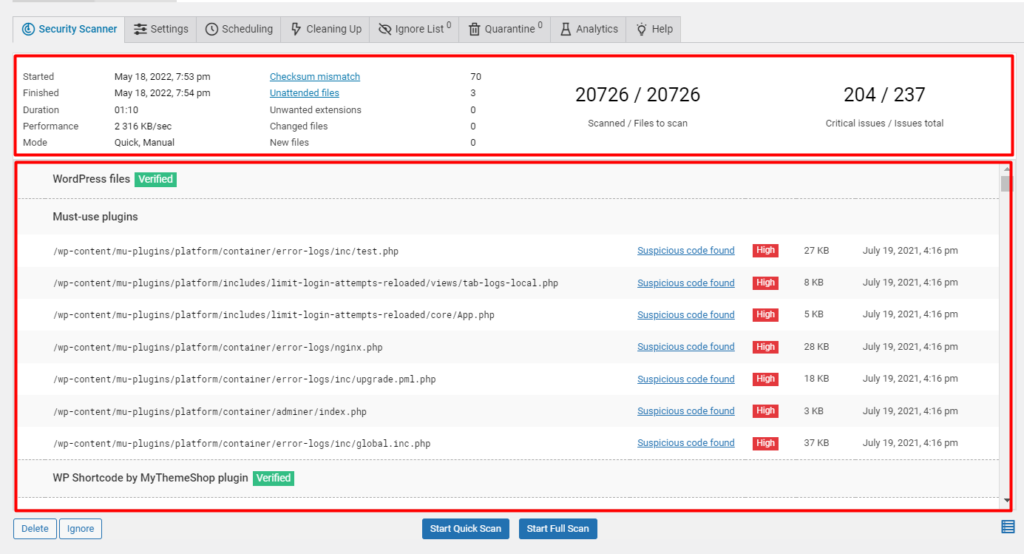
With this information, you can begin by fixing issues with the “High” priority badge assigned to them.
If there are no integrity issues on an item, the “Verified” badge will be rendered next to it.
The plugin does enable you to easily deal with suspicious or malicious files. For example if a checkbox is available on the outer row of a suspicious file, you can opt to delete the file.
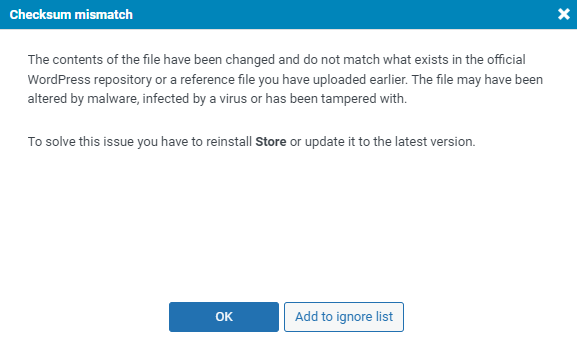
In the case of “Checksum mismatch” (where the contents of the file are altered and do not match those within the WordPress repository), you will also have a notice about this and you will need to restore or update the files.
Titan Anti-spam & Security
Titan Anti-Spam plugin includes a malware scan functionality that helps in checking your websites’ system files, themes and plugins, backdoors, malicious code injections and SEO Spam.
In the free version of the plugin, the plugin has basic scanning using more than 1000 signatures, whereas in the pro version it uses over 6000 signatures.
Upon installing the plugin, you can initiate the scan by carrying out the following:
Navigate to the Titan Anti-Spam section within your WordPress dashboard and on the Dashboard section, click on the “Start Scan” button.
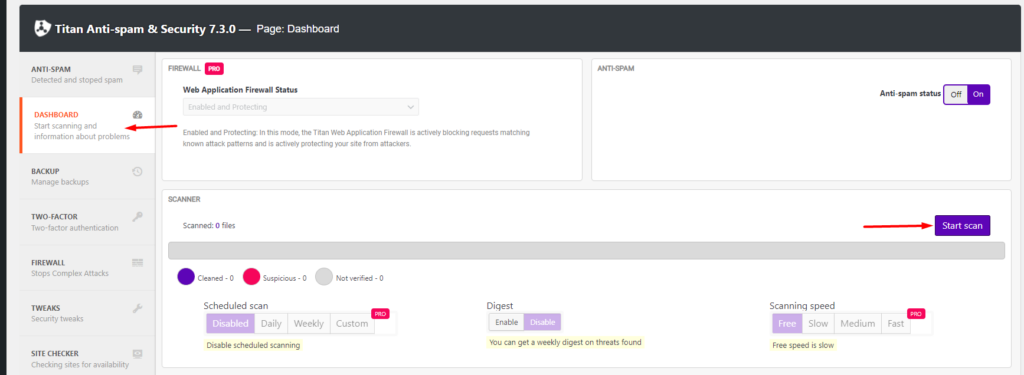
The malware scan may take quite quite some time depending on your files size, in the free version.
Once the malware scan is complete, you will have an audit of the malware found if any, within the “Malware” section.

Actions To take after discovering Malware
In cases where malware within your site is identified upon carrying out a malware scan, you will need to carry out various action to minimize the risk of further damage to your site.
Some of the security plugins we have discussed above provide insights on how to deal with the identified malware or even their security experts can assist you in fixing the identified malware issues upon carrying out a malware scan.
However, in cases where you wish to carry out a manual malware removal or wish to reduce the risk of further exploitation, you will need to carry out either of the following depending on the nature of the malware:
- Backup Your Website
Carrying out a backup to your website will help in easy malware identification by comparing the file contents with previously carried out backups.
Here is a guide on how to carry out backups to your site.
2. Website restriction
Website restriction is also an approach you can consider. This is especially helpful if visitors on your site are exploited or their data misused.
In such cases, you can deny other site visitors from accessing your website. To do so, this can be achieved from the .htaccess file.
The .htaccess is a file located within the root of your WordPress files. You can access it by logging into your site via FTP , with the help of an FTP software such as Filezilla or else you can utilize your hosting panel to access the site files.
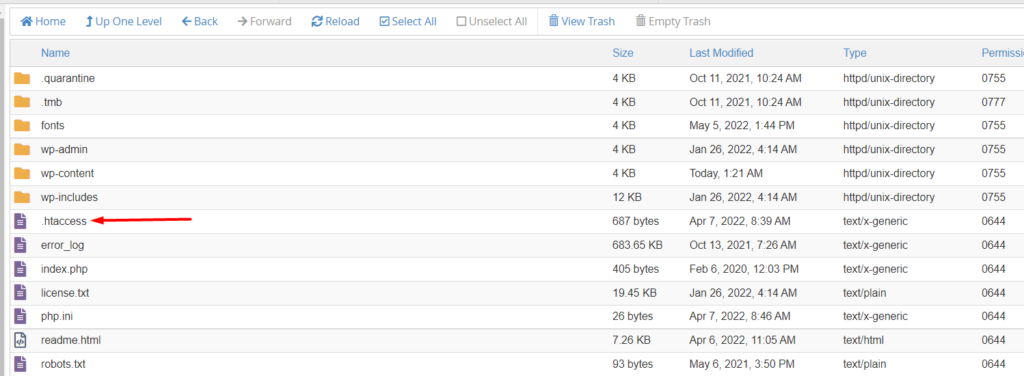
Next, select to edit the file and add the following code to the top of the file:
order deny,allowdeny from allallow from <your IP>You will then need to replace “your IP” with your actual static IP address.
3. Re-install affected files and WordPress core files
If the files with the suspicious malware are your theme and plugin files, you will need to re-upload fresh files to replace the previous affected files.
Once this is done, also ensure that you re-install WordPress. You can carry out this process via FTP as well but you will need to only replace the wp-admin and wp-includes folder since these do not contain any user files.
As for the rest of the WordPress files such as .htacces, wp-config.php, index.php and the rest of the root files, you will need to inspect them individually.
4. Inspect Your Uploads Folder
Still while accessing your site files via FTP or your hosting panel, check on the contents of your uploads directory and ensure that there are no PHP or executable files.
5. Inspect your Database Tables
If there was suspicious malware flagged within your database, you will need to inspect your database tables for suspicious contents. The most affected tables are usually “wp_options” and “wp_posts”. You may hence begin by checking on these.
For any suspicious content, you will need to manually delete the content.
6. Check and remove backdoors
Backdoors serve as a means to create or cause the security vulnerabilities.
You need to scan your site files for any Backdoors. Some common backdoor keywords used in site files or even your uploads folder include: exec, eval, stripslashes, base64_decode, preg_replace, system and many more.
It is also important to ensure that there are no gaps or loopholes in code as this can also serve as a backdoor.
7. Re-Scan the Website
Once you are done making all changes and re-uploading the correct files, carry out a malware scan of your site once again using your security plugin and check whether the issue is resolved, or else whether the malware is completely removed.
8. Update your User Accounts
Upon verifying that the Malware is no more, you need to secure all your access accounts . This can be done by changing all your access details. Examples of these details include your FTP details, WordPress admin credentials and SSH account details.
If your hosting provider does also not provide sufficient security measures, it would be great to shift to a better hosting solution with adequate security measures in place.
It is also important to check whether there any any accounts in place that seem suspicious and have them removed.
Conclusion
As much as malware removal is possible, it is much better to minimize the risk of having Malware within your site. We recommend using a security plugin within your WordPress website in order to reduce this risk.
With the help of either of the above mentioned security plugins, we do also recommend carrying out regular malware scans of your website. Regular malware scans will enable you address identified issues quick enough, as soon as they are identified.
In the event that you are not able to resolve Malware issues within your website, you can consider having a website security expert checking into your website.
We hope that this article provides insights on the importance of a malware scan, how you can carry out a Malware scan for your website, as well as some of the actions you can take after discovering malware within your WordPress website.