How To Use ACF Fields To Determine Content Visibility

Table of contents
ACF fields can be added to your website with the help of the Advanced Custom Fields (ACF) plugin. Content visibility on the other hand can be applied with the help of the Visibility Logic For Elementor plugin. These two plugins can actually work hand in hand to implement content visibility. It is however important to note that the Visibility Logic plugin needs to be used alongside the Elementor plugin and hence it is required that you do also install the Elementor plugin. To widen the scope of where you can apply the visibility settings, it is recommendable to also install the Visibility Logic Pro plugin.
Within this article, we will look into an example of how we can implement content Visibility using ACF fields by adding a custom field to posts and applying the settings in a single post template.
This article assumes that you already have the Visibility Logic plugin (free and pro), as well as the Elementor plugin, installed.
Installing The ACF Plugin
In order to install the ACF plugin, navigate to the Plugins > Add New section within your WordPress dashboard and search for “Advanced Custom Fields”.
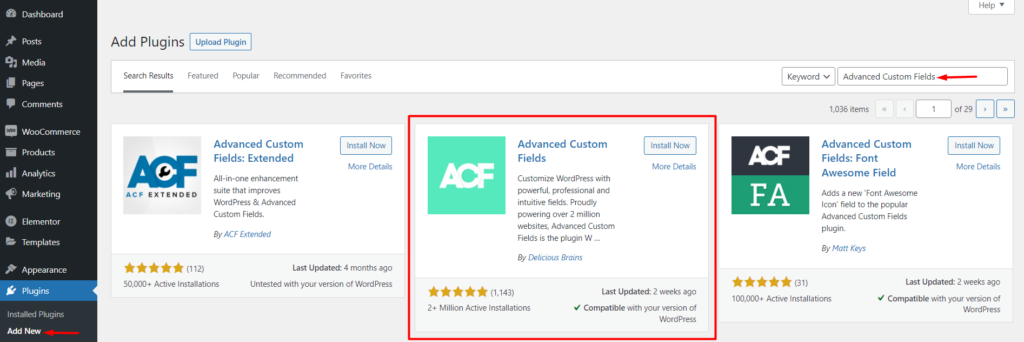
Next, install and activate the Advanced Custom Fields plugin by Delicious Brains.
Setting Up a Custom Field To a Post
Adding a Custom Field
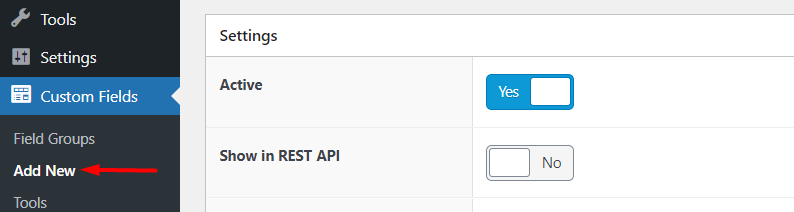
Upon activation of the plugin, navigate to the Custom Fields > Add New section within your WordPress dashboard.
Within the next screen you will be presented with a number of custom data fields to fill in as seen below:
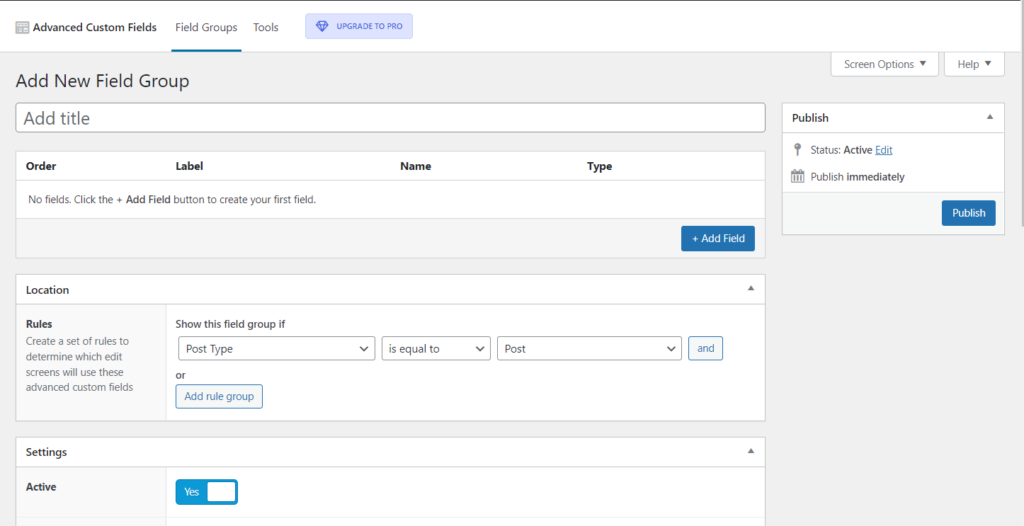
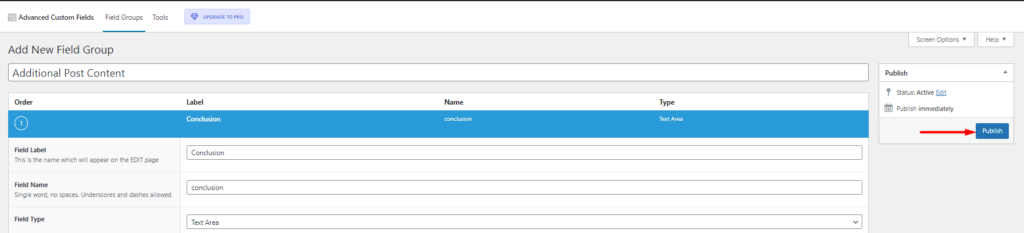
Within the “Add New Field Group”, here you can fill in your desired field Group title. In our case here, we will have it as “Additional Post Content”.
Next, click on the “Add Field” to begin adding your first field.

Doing so will generate a field section where you will now fill in your field details.
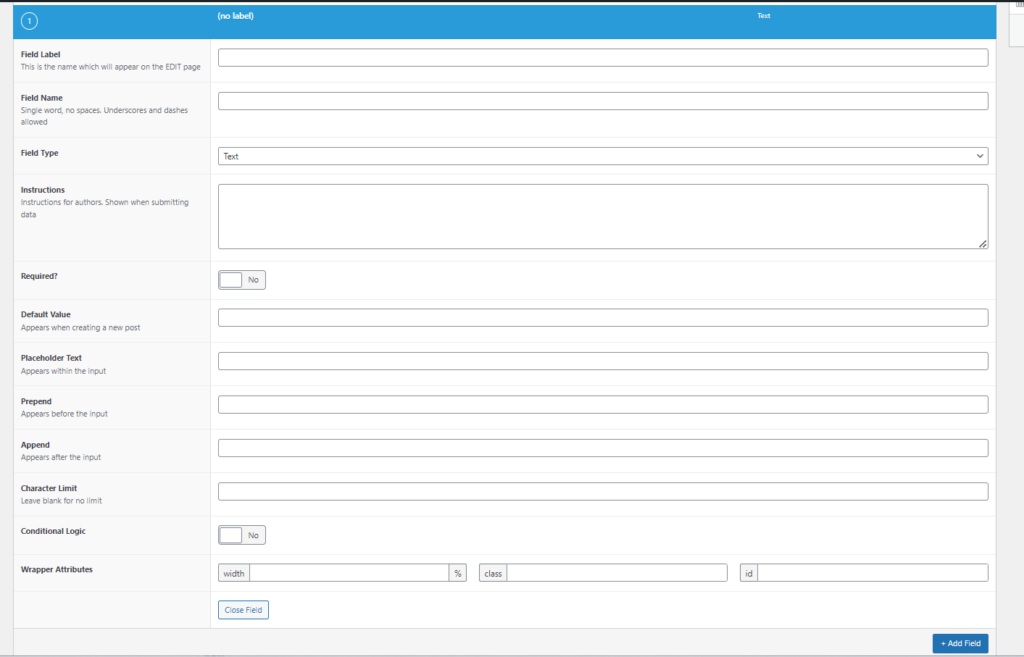
Field Label: Fill in the wording to be used to identify the field. In our case here, we have set it to “conclusion”.
Field: Name This field will be automatically filled upon adding the field label.
Field Type: Set the type of field you want to have for your custom field. In our case here, this is set to “Text Area”.
Instructions: Here you can set some guiding content that the post authors will see when submitting the field data .
Required: Set this to yes or no based on whether you need this field to always be filled or not. In our case, we will set this to “No”.
Default Value: Within this field you can set a pre-existing value that appears when creating the post. This is optional and hence in our case here we’ve left this blank.
Placeholder Text: Here you can specify the text that is rendered within the input field.
Character Limit: Here you can specify the maximum count f characters that the field can hold. In our case, we will leave this blank as we don’t intend to add any character limitation.
Rows & New Lines: These fields availability is based on the field type selected. For example in our case, we selected “text area” which is why the fields are rendered. Within them, you can set the number of rows that the text area will contain as well formatting to be applied in new lines.
Conditional Logic: Here you can opt to set a display logic for the field or not. In our case here, we will not set any display logic.
Wrapper Attributes: This field allows you to add the width to the field wrapper. In our case we set this to 50%. You can as well add the class and ID to the wrapper, for CSS purposes. Adding these is however optional.
Next, within the location segment, set a rule on as to where the field group is to appear. In our case, we will set this to the posts post type.

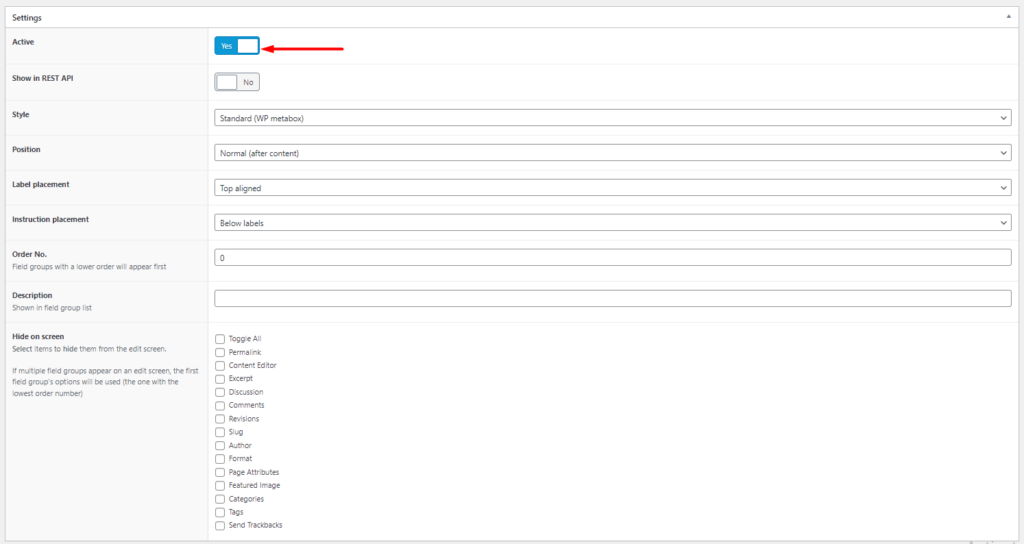
Within the “Settings” segment, ensure that you have the field group as “active”. You can leave the rest of the settings within the segment to the default settings or alter them based on your preference.
Once the above is carried out, you can then publish the field group .
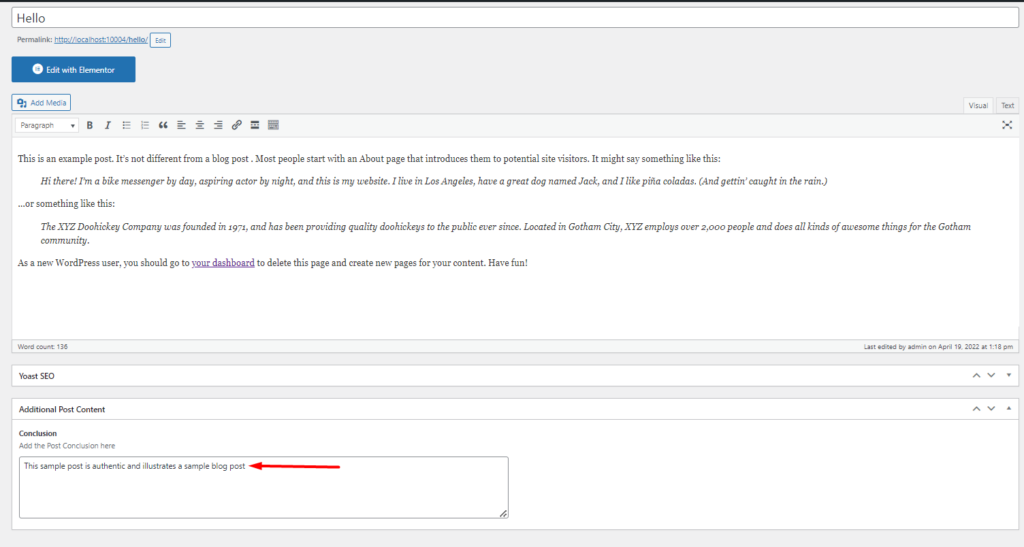
Viewing and adding content to the Custom Field
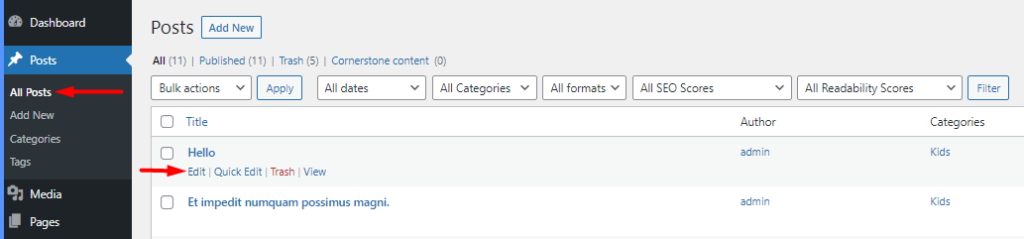
Navigate to the Posts section within your WordPress dashboard and select to edit one of your posts.
Within the Post edit screen, you will now notice a new field “Conclusion” in our case.
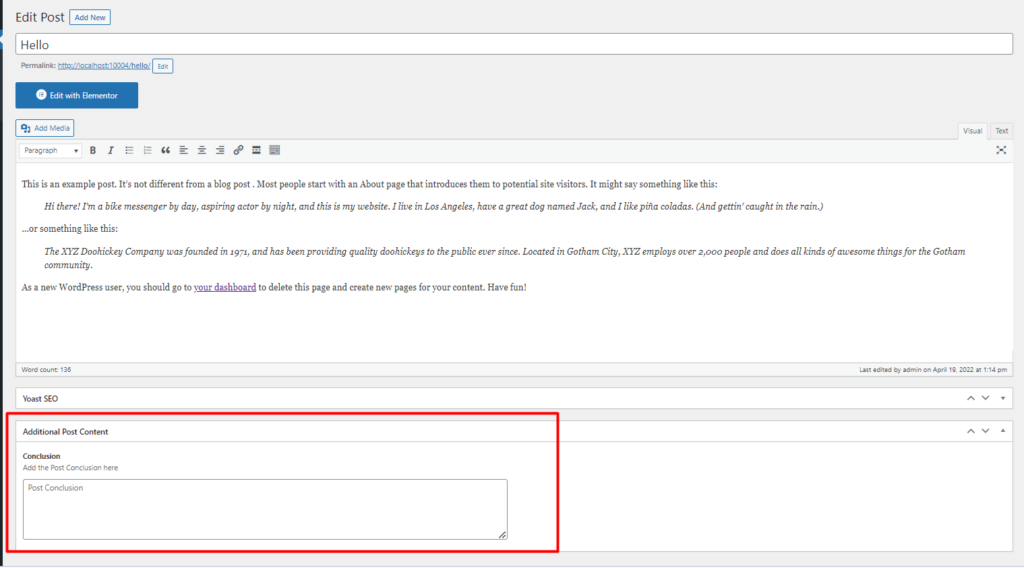
Within this field, you can now add some conclusion content and save your changes
Creating a Single Post Template
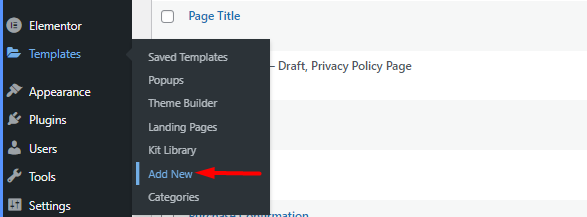
We will then create an Elementor template that we can use for all posts within our website. To do so, navigate to the Templates > Add New section within your WordPress dashboard.
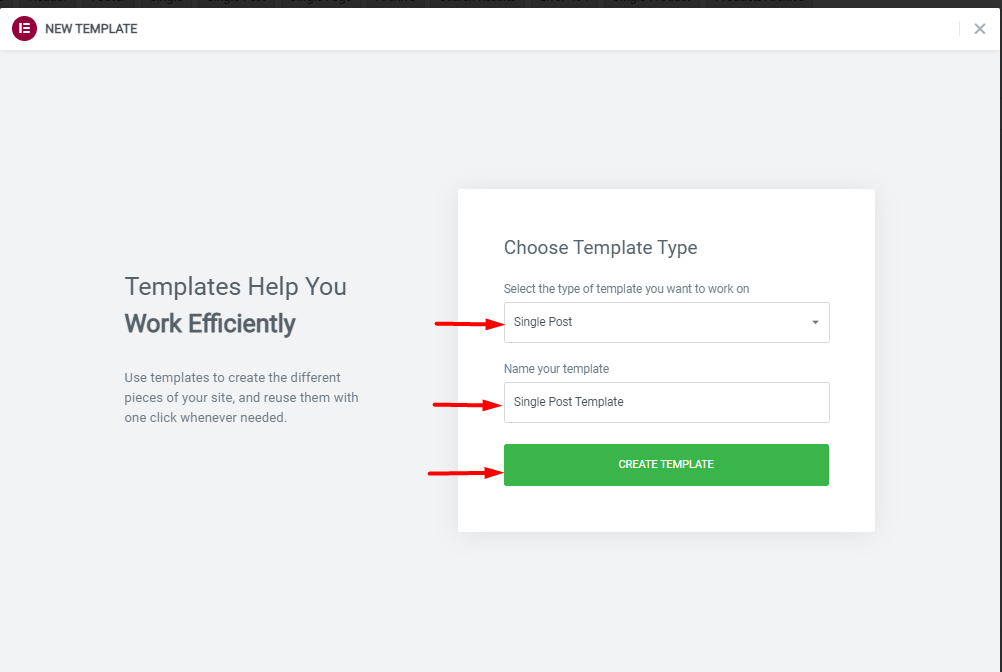
Within the popup rendered, set the template type to “Single Post”, add the template name and proceed to creating it.
Next, you can add sections and the single post widgets that you wish to have within your post.

Once done, click publish and set the display condition to “posts”.
Below is an illustration of this:
Configuring Visibility Settings
Next, we will need to set the visibility setting based on the ACF field we created. In our example here, we will add a setting to hide the “author box” on posts with a conclusion.
To do so, select to edit the Single Post Elementor template we had earlier on created. Within it, select to edit the “Author box”.
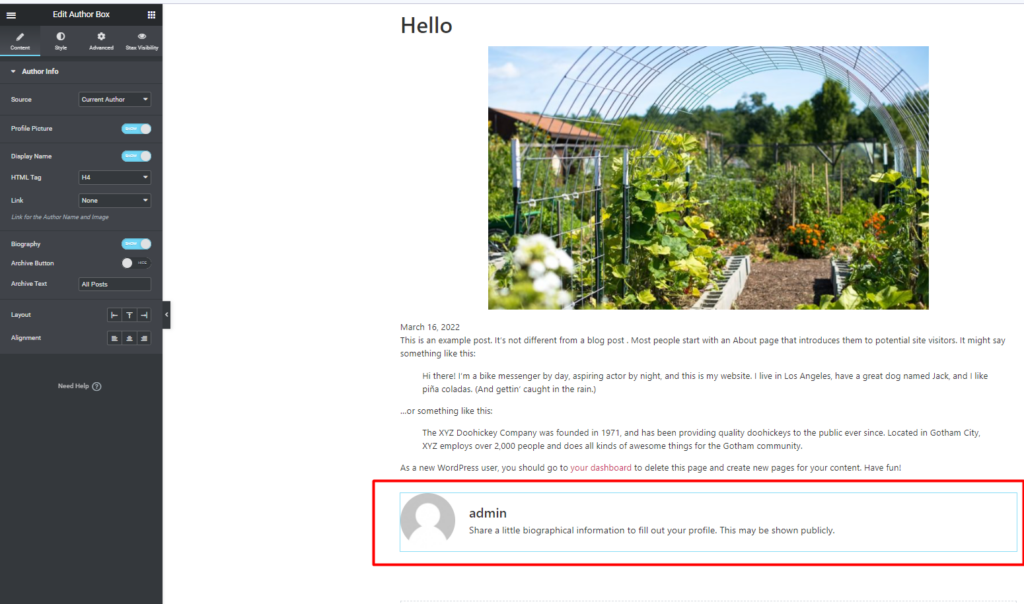
Click on the “Stax Visibility” tab on the left panel.
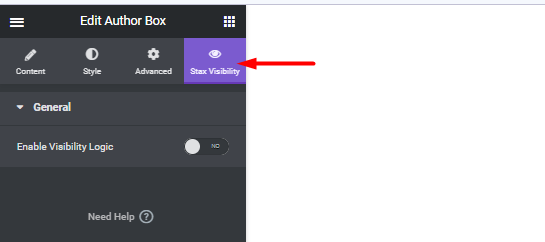
“Enable the Visibility Logic” setting and you should then have a number of visibility segments in place.
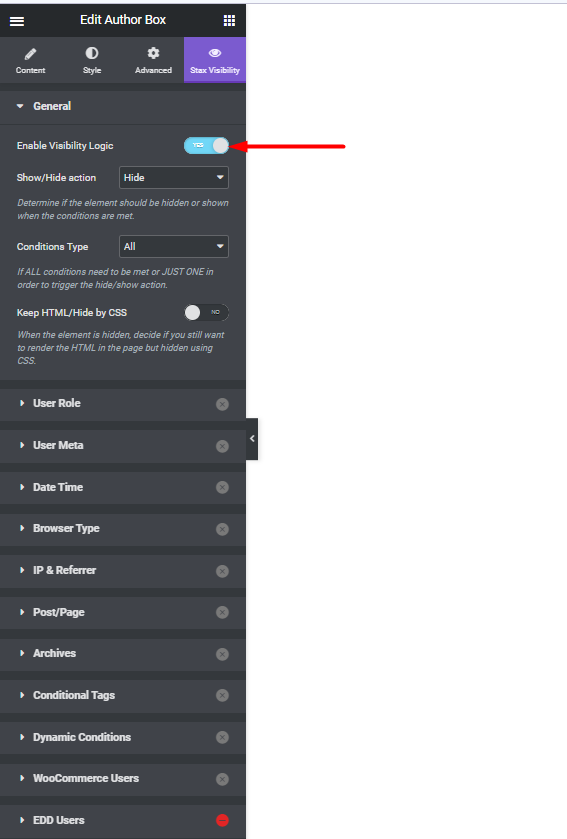
Within the “General” Settings, specify the following:
- Show/Hide: Hide
- Conditions Type: All
On the Post/Page segment, enable Post/Page and set the following:
- Custom Post Type: Posts
- Meta: conclusion
- Meta Condition: Not Empty
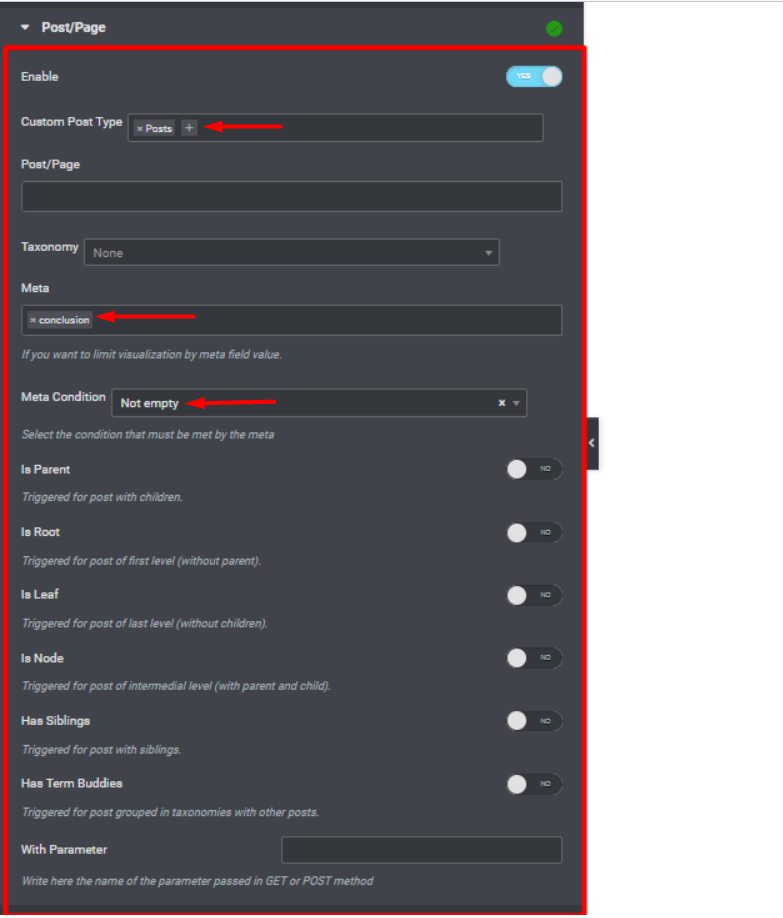
The meta is “conclusion” is from the ACF field we created.
Once this is done, update your changes.
Previewing The Post
We can now check the post of which we added the conclusion and within this post, we should not have a view of the author box, compared to other posts that do not have a conclusion
Below is a sample illustration:
Conclusion
While creating custom fields within your site, you may wish to apply visibility settings to sections or elements rendering the fields. The above guide covers an example scenario on how you can easily achieve this.
These configurations can also be applied to any post type you may have within your site. For example in Ecommerce stores, this can be useful if you wish to hide or show a particular custom field data for users who have purchased a product within the store.