How To Fix 404 Error On Your WordPress Site
Table of contents
Error 404 is an error that most WordPress users run into. It is considered a common error when accessing posts and pages that don’t exist within a website.
For site visitors, error 404 can be quite frustrating leading to a negative user experience and also potentially high bounce rates on your website. It is hence vital to consider fixing 404 errors within your WordPress site.
Within this article, we will look into what the error 404 is about , how to fix it as well as how to effectively monitor 404 errors within your WordPress website.
What Is Error 404
Error 404 means that the server cannot locate the requested resource, be it a page, post or file in your WordPress website. This simply means that a user submits a request via the browser, which is sent to the server upon successful connection, but the server is unable to locate the resource.
Below is a sample illustration on the error upon visiting such a URL: https://staxwp.com/mypost/
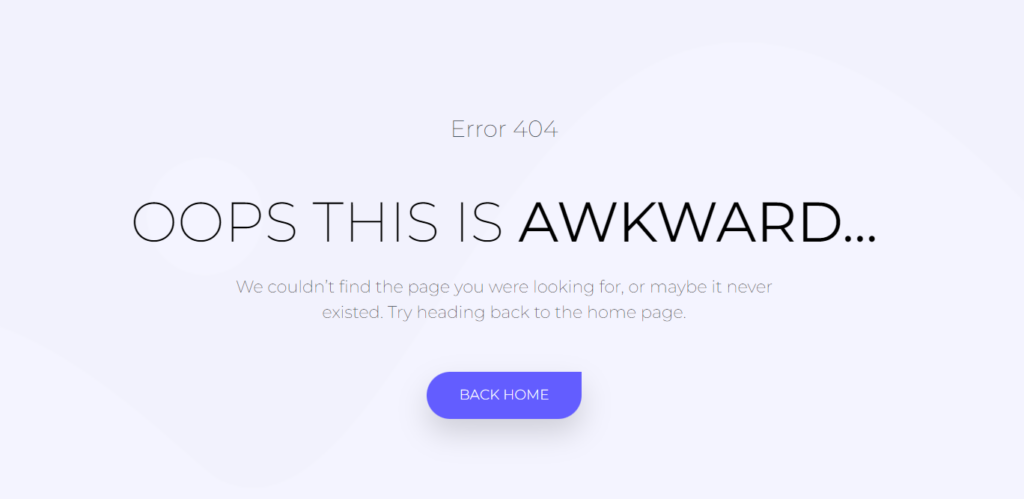
A site visitor would encounter the error 404 above because the URL doesn’t exist.
What Causes Error 404
The error 404 can be caused by a number of issues. Some of these include:
i) The URL simply does not exist.
This is for example the case in our test URL above.
ii) Mistyped URLs
A minimal mistype in a site URL is likely to result to an error 404 if the final URL does not exist.
iii) Caching issues
At times the browser can cache the URLs hence rendering an error 404 till the URL can be traced.
iv) Deleted Content
If the content within the site such as a post is deleted, upon accessing its previous URL, you will encounter the error 404.
v) The content was moved to a different URL
If you for example have a page that you have altered its URL or moved it to a different URL with no proper redirection carried out and site visitors accesses the previous URL, they are likely encounter the error 404.
v) Server Issues
This is not a common cause but your server at times could be having issues such as disabled modules.
In your WordPress content, error 404 is in most cases an issue with your website permalinks or slugs not being updated and server issues.
How to Fix Error 404
Prior to fixing the error 404, we recommend clearing your site cache in order to ensure that the error 404 is not as a result of caching.
Once this is verified, you may then proceed to carrying out the provided fix below.
Resetting Your Permalinks
Permalink reset can be carried out either automatically or manually.
Automatically Resetting Permalinks
In order to automatically reset the set permalink, you will need to carry out the following:
Navigate to the Settings > Permalinks section within your WordPress dashboard and check on the setting you currently have in place.
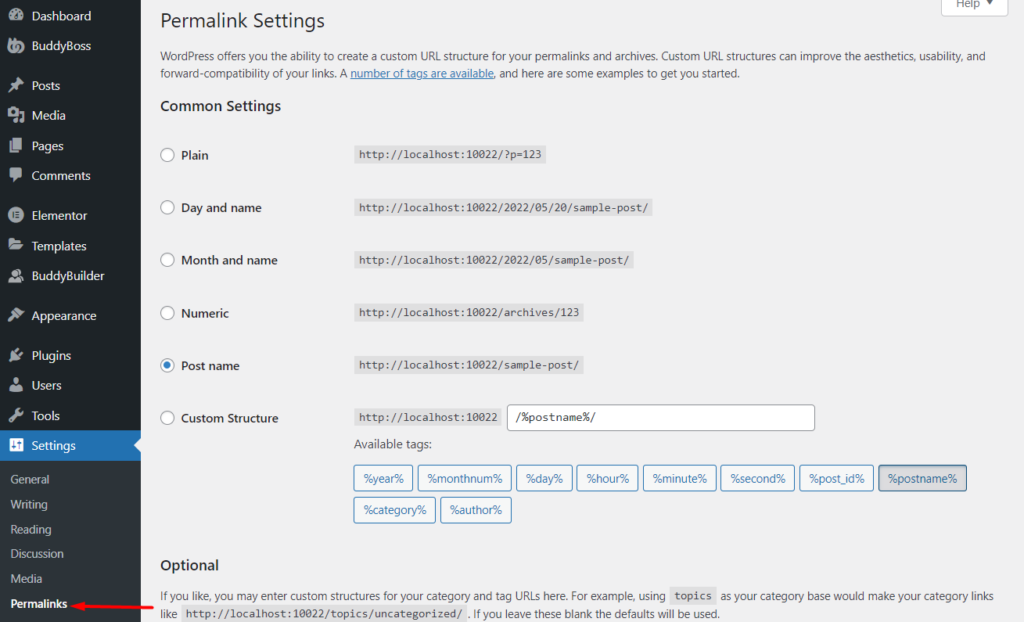
Next, select the “Plain” setting.

Once this is done save your changes by clicking on the “Save Changes” button.
With this done, now select the setting that you previously had and save your changes once again.
Upon completion, you can then check whether the error 404 is resolved on your URL.
Manually Resetting Permalinks
In order to manually reset your permalinks, you will need to modify the .htaccess file. To do so, access your site files via FTP using a program such as Filezilla or your hosting panel.
The .htaccess file is located within the root of your site files.
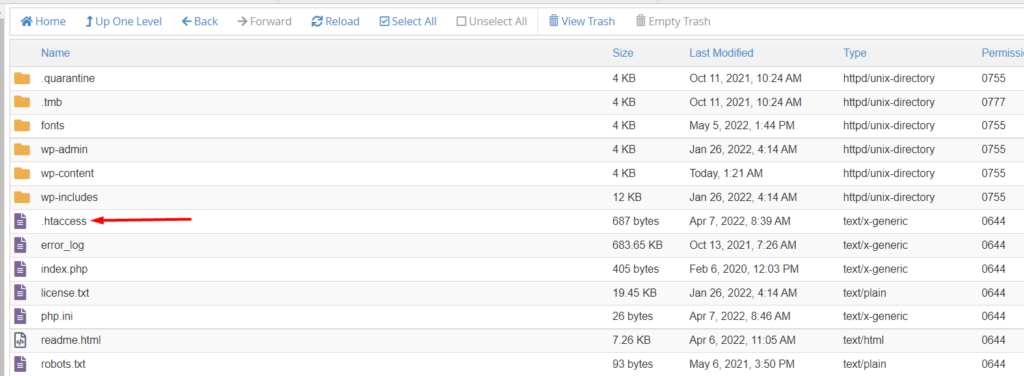
Upon tracing the file, carry out a backup of the file to your local computer.
Next, select to edit the file and replace it’s contents as follows:
i) For an install within the main domain.
A sample main domain would be of the structure yourdomain.com
For such a domain you will need to replace the contents with:
# BEGIN WordPress <IfModule mod_rewrite.c> RewriteEngine On RewriteBase / RewriteRule ^index\.php$ - [L] RewriteCond %{REQUEST_FILENAME} !-f RewriteCond %{REQUEST_FILENAME} !-d RewriteRule . /index.php [L] </IfModule> # END WordPressii) For an install within the sub-domain,.
A subdomain would be of the format blog.yourdomain.com
For the subdomains, you will need to replace the contents with:
RewriteEngine On RewriteBase / RewriteRule ^index\.php$ - [L] RewriteRule ^wp-admin$ wp-admin/ [R=301,L] RewriteCond %{REQUEST_FILENAME} -f [OR] RewriteCond %{REQUEST_FILENAME} -d RewriteRule ^ - [L] RewriteRule ^(wp-(content|admin|includes).*) $1 [L] RewriteRule ^(.*\.php)$ $1 [L] RewriteRule . index.php [L]iii) For an install within the sub-directory.
Subdirectories would be of the structure yourdomain.com/blog. In subdirectories, you will need to replace the contents with:
RewriteEngine On RewriteBase / RewriteRule ^index\.php$ - [L] RewriteRule ^([_0-9a-zA-Z-]+/)?wp-admin$ $1wp-admin/ [R=301,L] RewriteCond %{REQUEST_FILENAME} -f [OR] RewriteCond %{REQUEST_FILENAME} -d RewriteRule ^ - [L] RewriteRule ^([_0-9a-zA-Z-]+/)?(wp-(content|admin|includes).*) $2 [L] RewriteRule ^([_0-9a-zA-Z-]+/)?(.*\.php)$ $2 [L] RewriteRule . index.php [L]Once you have replaced the contents, save your changes and now visit your page or post URL where you had the error 404 rendered, in order to check whether it is now resolved.
Configuring Redirects For Renamed or Moved Content
Redirects are meant to remap incorrect URLs within your website. You can configure redirects within your WordPress site with the help of a redirects plugin. We suggest using the Redirection plugin available within the WordPress repository.
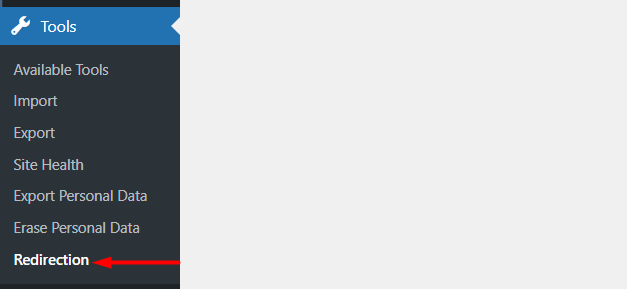
Upon installing the plugin, navigate to the Tools > Redirection section within your WordPress dashoard.
Next, click on the “Add New” and add the URL details.
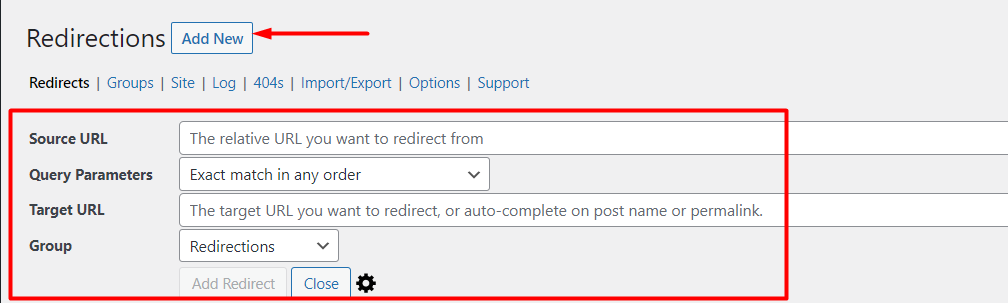
Source URL: This is the original URL that you want to carry out the redirect from.
Query Parameters: You can leave this to the default setting “Exact match in any order”.
Target URL: This is the URL that you want to redirect to.
Group: Allows you to specify whether it is just a redirection or a redirection as a result of modified posts.
Once you have the redirect added, check whether it now properly works.
How To Monitor 404 Errors
Monitoring 404 errors within your website is essential so that you are in a position to track ad fix the errors early enough.
There are a number of ways that you can track 404 errors within your website. Some of these include:
i) Using the Redirection Plugin
With the help of the Redirection plugin that we had earlier on mentioned, you can easily monitor 404 errors from the Tools > Redirection > 404s section within your WordPress dashboard.
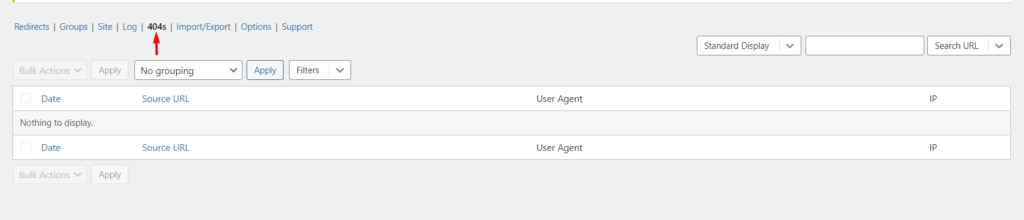
If there any 404 errors present within the site, these will be rendered in the 404s section illustrated in the screenshot above.
ii) Google Search Console
You can have a view of the 404 errors from the Google Search Console under the Crawl > Crawl Errors section.
This method however requires you to first have verified your site with Google as outlined here. You will also need to have submitted a sitemap as outlined here.
iii) Using a Broken Link Checker Tool
There are a number of broken link checker tools available. Some of these tools include SiteLiner, Ahrefs broken link checker, and SiteBulb.
With some of these tools, you can even setup scheduled crawling for regular checks and monitoring purposes.
Conclusion
404 errors can have a negative impact to your users as well as your site performance. We hope that the insights shared within this article will be of help to you when it comes to identifying, fixing and monitoring 404 errors within your website.
Should you have any other suggestions to fix the 404 errors, please feel free to leave a comment below.