Upon carrying out actions such as SSL certificate installation or migration of your website, you are may encounter mixed content warnings in your website. These warnings can be easily traced within the browser console.
Within this guide we will look into what are mixed content warnings and how to go about fixing them.
Table Of Contents
What is the Mixed Content Error in WordPress
How To Check For Mixed Content Errors
How To Fix Mixed Content Errors
What is the Mixed Content Error in WordPress
Mixed Content is an error that occurs when the HTML content in a page is loaded on HTTPS but other resources within the page are loaded via HTTP. These resources could for example be CSS files, JavaScript files or images.
When browsing a page within your website, the browser will render these errors within the console.
How To Check For Mixed Content Errors
Upon migrating your site or installing an SSL certificate, we recommend checking your site for mixed content errors. There are a number of ways that this can be easily accomplished. These include:
- Using Browser Inspector Tools
- Using a free online tool
Using Browser Inspector Tools
This method is applicable to most modern browsers. To utilize this method, you will need to access your site page and using your Keyboard, open the inspector tools using the following keys:
- MacOS : Cmd + Opt + I
- Windows: F12 or CTRL + Shift + I
You can also alternatively right-click on the page and click on “Inspect…”, depending on the browser you use.
Once this is done, click on the “Console” tab.

Within the tab, you will have a view of the mixed content warnings. Below is a sample display:

One limitation to this method is that you the warnings rendered are only specific to the page currently being inspected.
Using a Free Online Tool
There are a number of free online tools that can be used to test your site for Mixed Content error. Some examples of these tools include:
Why No Paddlock
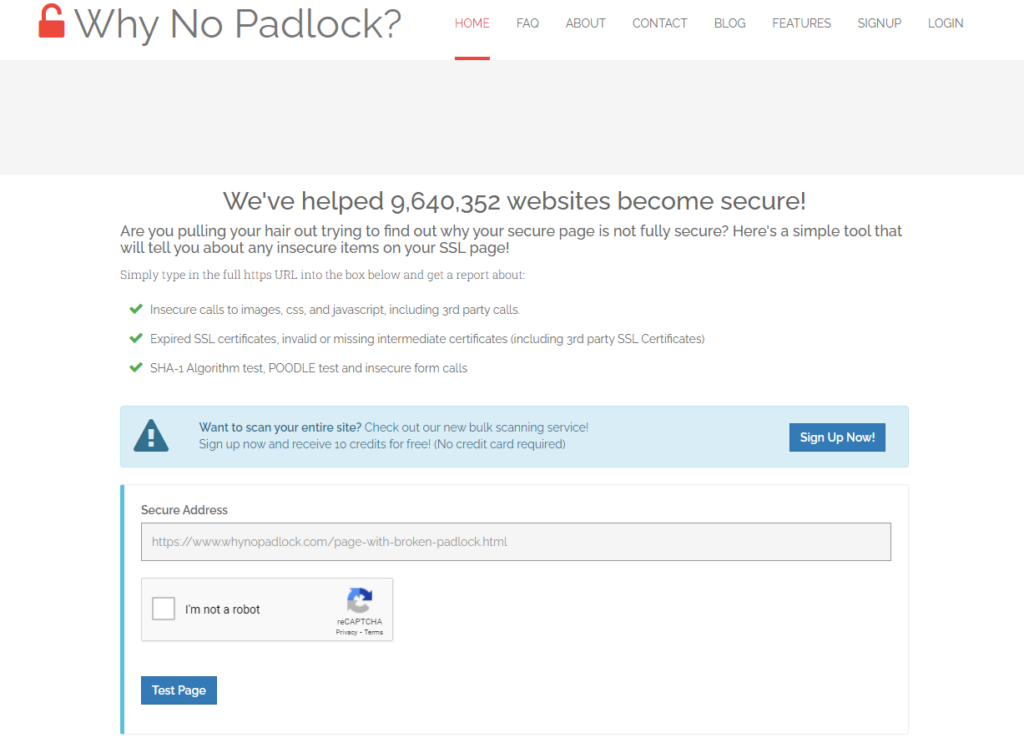
In this tool, you will need to carry out the following:
- Fill in your site URL within the “Secure Address” field
- Select the Captcha
- Click the “Test Page” button
SSL Check by Jit Bit

As for this tool, you will need to:
- Fill in your site URL within the “Root URL” field
- Click on the “Check For SSL Errors” to begin the test
How To Fix Mixed Content Errors
To resolve mixed content errors, you need to first ensure your SSL is properly configured and not expired. You can confirm this by clicking on the “Paddlock” icon illustrated below:

You also need to ensure that both your site URL and WordPress URL are set to the HTTPS URL within the Settings > General section:

If the above checks are okay and the errors still exist, there are a number of ways to resolve the errors that can be applied. These include:
- Using WordPress plugins
- By Modifying the .htaccess file
Using WordPress Plugins
There are a number of plugins that can be used to solve Mixed content errors. In this guide, we will look into two of these plugins:
Really Simple SSL
To use the plugin, navigate to the Plugins > Add New section within your WordPress dashboard, search for “Really Simple SSL” and have the plugin installed.

Once you have the plugin activated, you do not need to configure any other settings. The plugin should fix the mixed content errors by default.
Better Search Replace
In order to utilize the Better Search Replace plugin, navigate to the Plugins > Add New, search for “Better Search Replace” and have it installed.

Once activated, navigate to the Tools > Better Search Replace section:
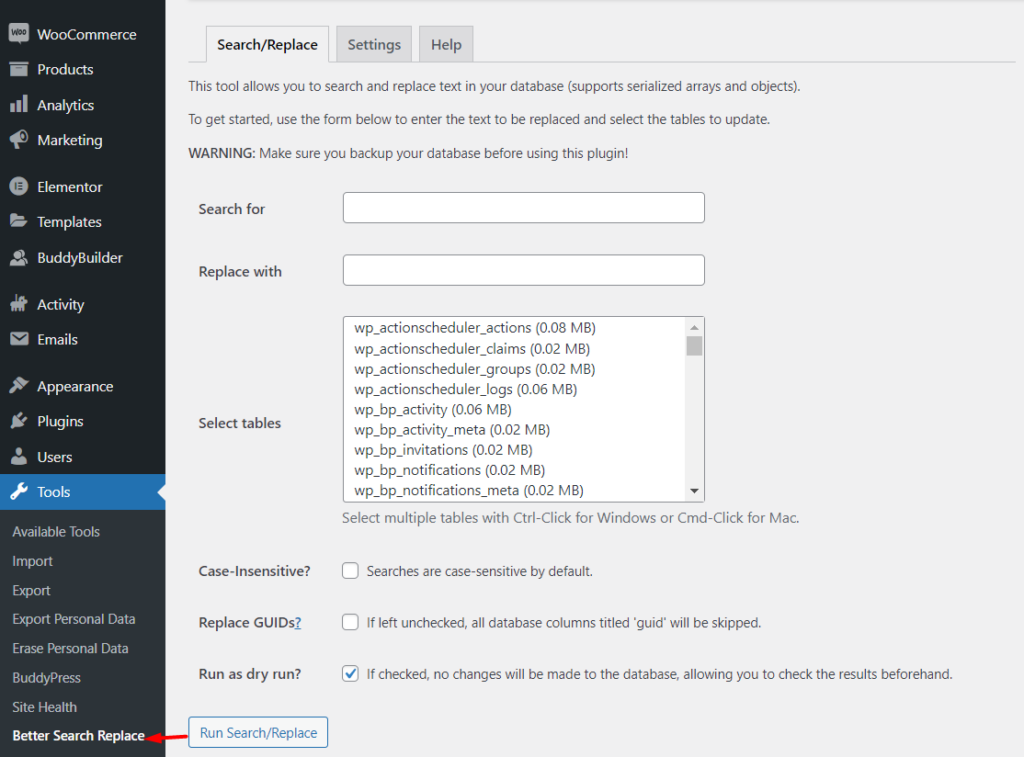
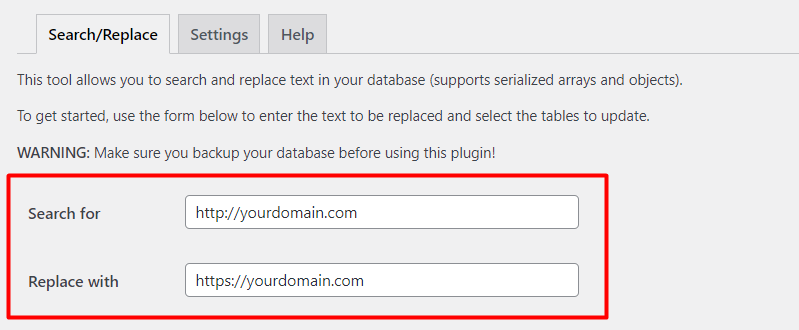
Within this section, you can now begin carrying out the search and replace action. The “search for field” will be used to hold the incorrect URL and the “Replace With” field will be used to add the correct URL. Below is a sample screenshot illustration:
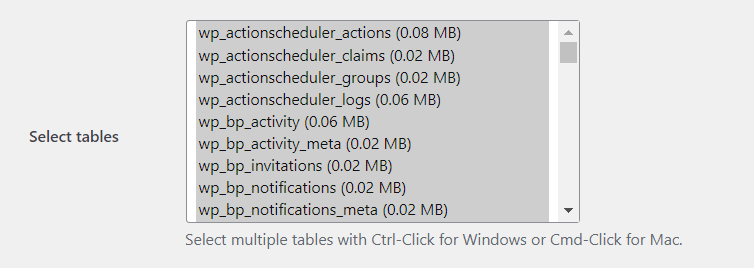
Within the “select tables” field, select the tables to update. If your are carrying out an update to the main URL similar to what we have in the above screenshot, select all the tables.
Once you have the tables selected, select the option “Run as dry run?” so that you are in a position to review the changes first before executing them.
You may then proceed to running the action by clicking on the “Run Search/Replace” button. Upon finishing the process, you will have a notice on the findings. Below is a sample screenshot on this:

If you are okay with the changes to be carried out, uncheck the “Run as dry run?” and click on the on the “Run Search/Replace” button to now fully carry out the action.
By Modifying the .htaccess file
To access your .htaccess file, you will need to access your site files via an FTP program such as Filezilla or a hosting panel such as CPanel.
Once this is done, navigate to the root of your files and here you will find the .htaccess file. Below is a sample illustration:
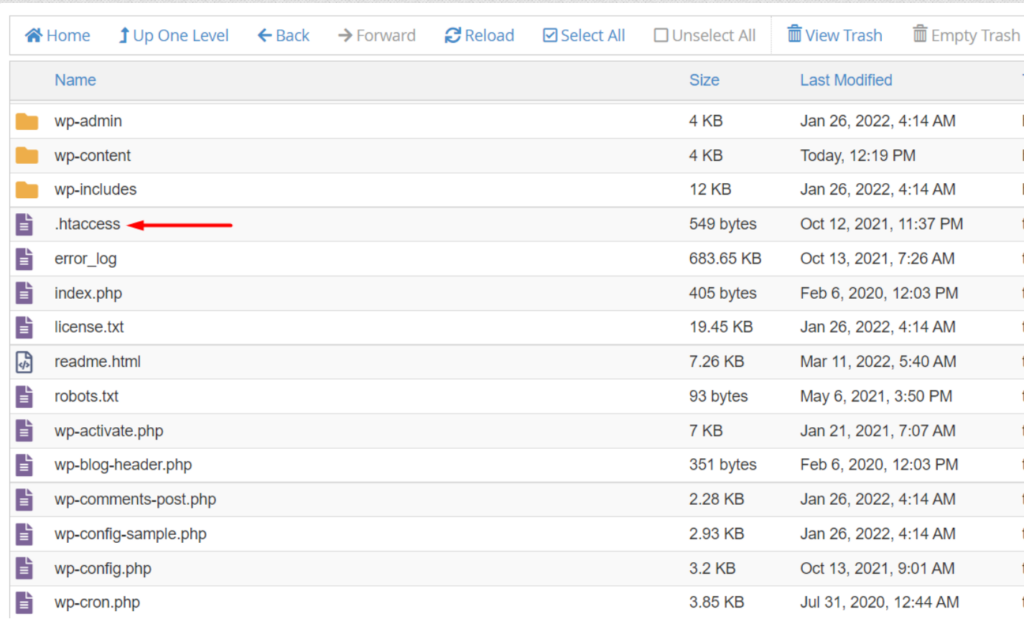
First carry out a backup to the file by downloading it to your local computer. Once this is done, select to edit the file and add the code below before the # BEGIN WordPress line.
RewriteEngine On
RewriteCond %{SERVER_PORT} 80
RewriteRule ^(.*)$ https://yourdomain.com/$1 [R=301,L,NE]
Header always set Content-Security-Policy "upgrade-insecure-requests;"
You will need to replace “https://yourdomain.com” with your own site URL.
Here is a sample final output:
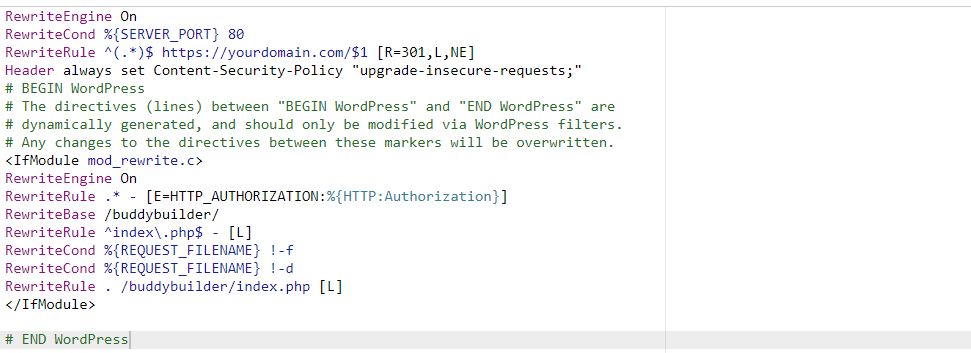
Once this is done, save your changes.
Conclusion
In the event that you encounter Mixed Content errors within your website, fixing them is pretty easy especially with the help of the plugins discussed above.
It is vital to have these errors to avoid security issues within your website as well as high bounce rates that may later on affect your site’s ranking.




No Comments
Leave a comment Cancel