How to create a custom BuddyPress Registration Template
Table of contents
Customizing the default BuddyPress registration template can turn out to be quite challenging in a case where one has no coding knowledge. The default BuddyPress Registration page is generated by BuddyPress in a site once installed, if user registration is enabled within the site. The page will contain fields for the account details and profile details respectively.
This page can however be customized for an even better appearance. This is achievable with the help of the BuddyBuilder pro version and Elementor plugins.
Within this article, we will cover how to create a custom registration template that will be applied in the default BuddyPress registration page. You however need to first ensure that you have installed the free versions of the BuddyBuilder and Elementor plugins.
Installing BuddyBuilder Pro
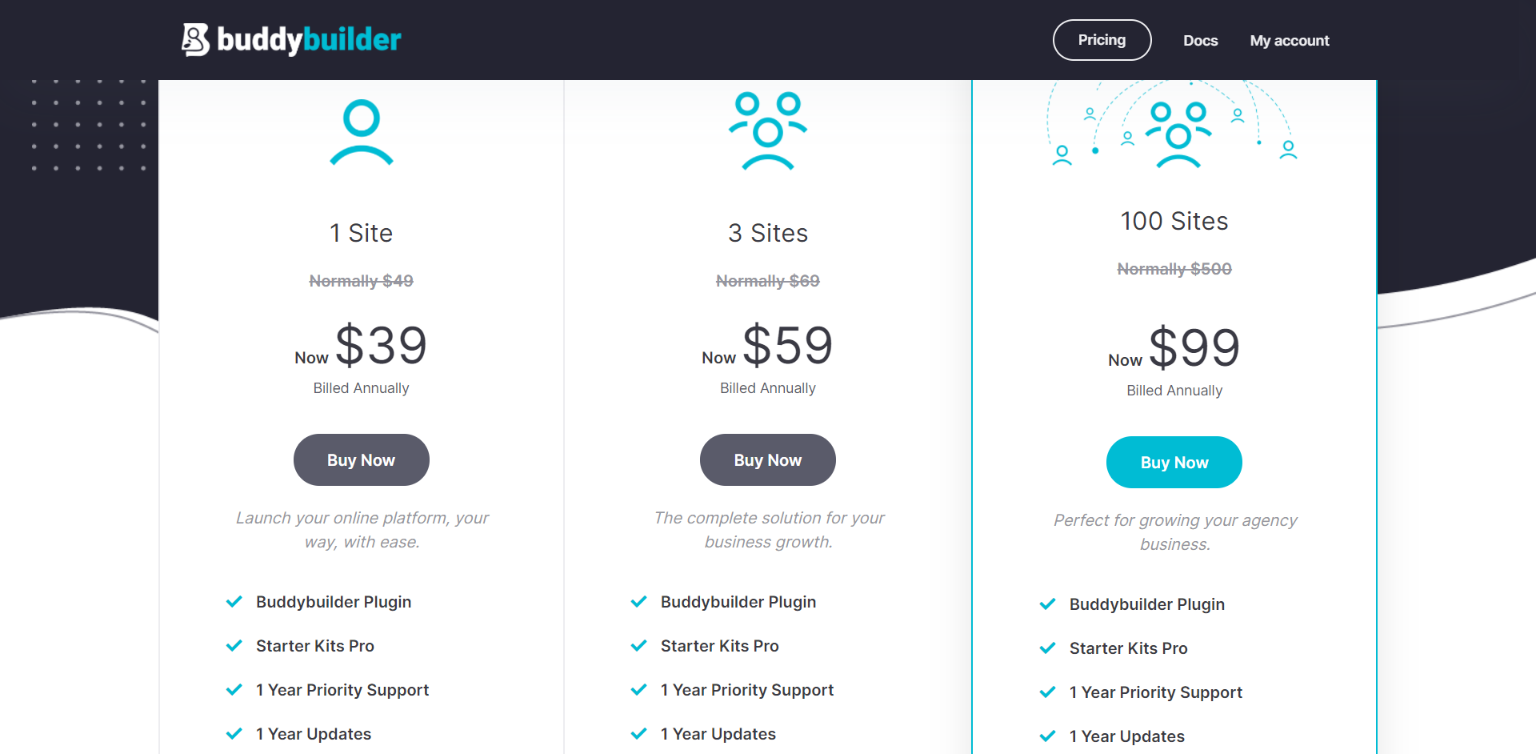
In order to download BuddyBuilder Pro, you will need to access this link: here and purchase your desired package based on the number of sites you intend to use the plugin on.
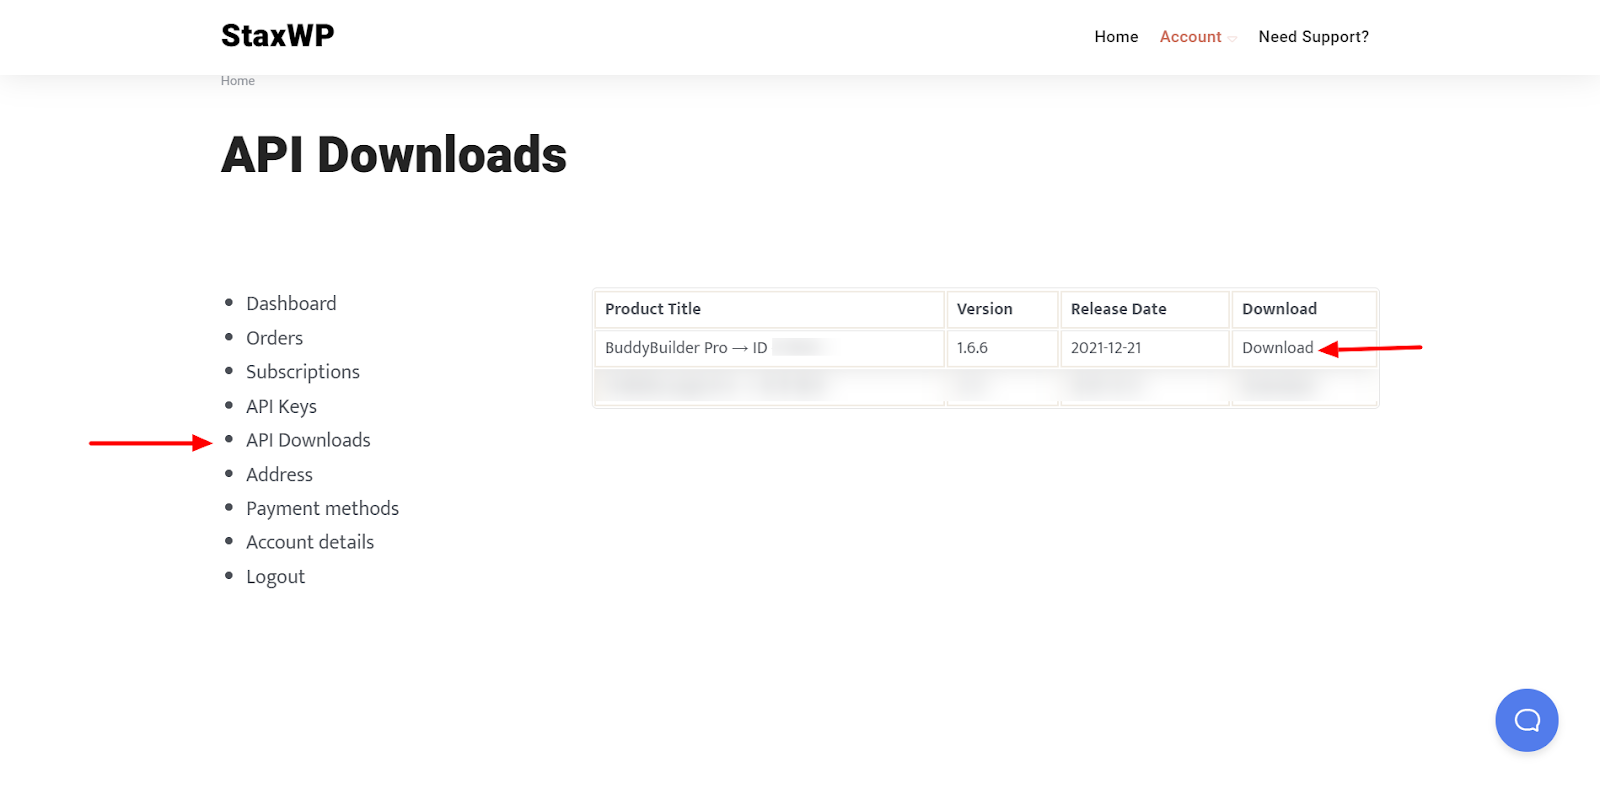
From your downloads segment on your StaxWp account here, you can then download the zip file to the plugin.
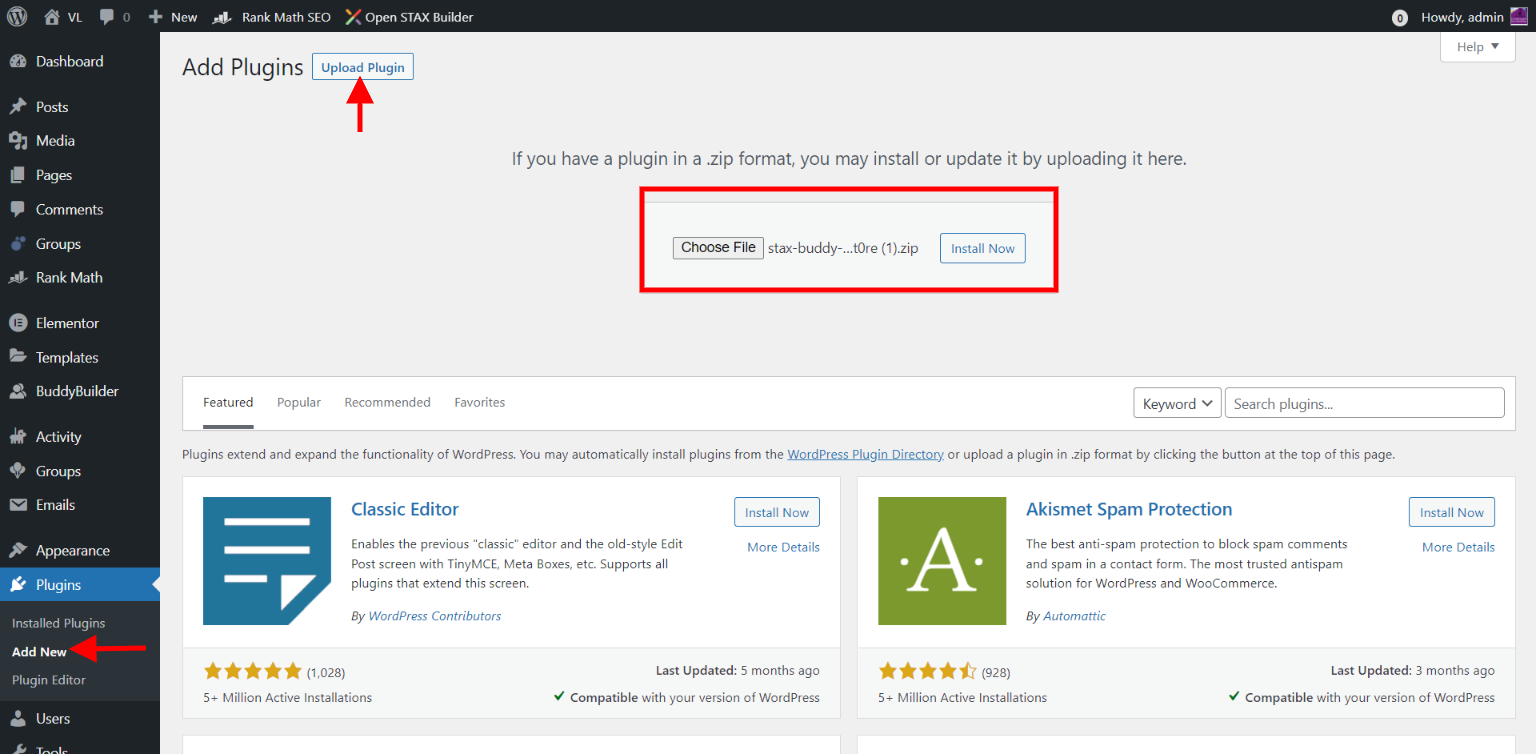
Once you have the zip file downloaded, navigate to the Plugins > Add New section within your WordPress dashboard and upload the zip file you downloaded.
Once uploaded and the plugin is active, navigate to the Settings > BuddyBuilder Activation within your dashboard, fill in your API key and save your changes.
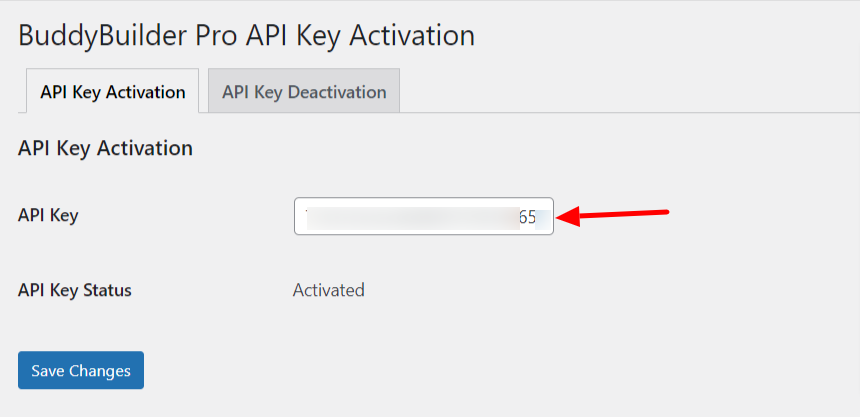
Please do note that you can find your API key within your StaxWp “API Keys” segment.

Creating a BuddyPress Registration Template
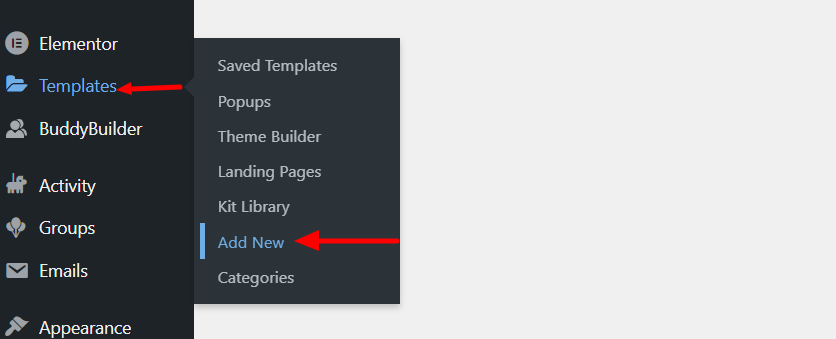
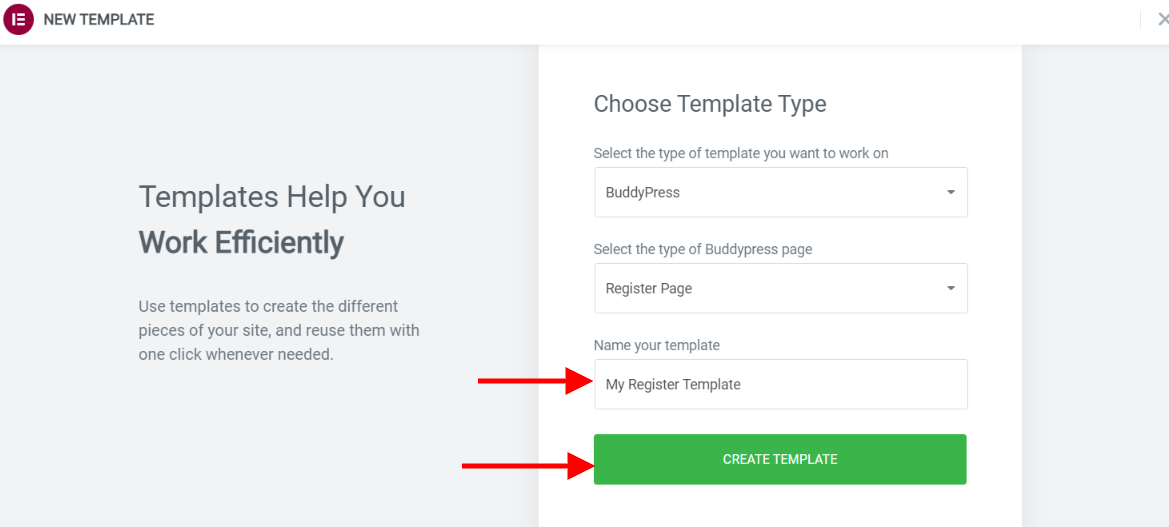
In order to create a registration template, navigate to the Templates > Add New section within the WordPress dashboard
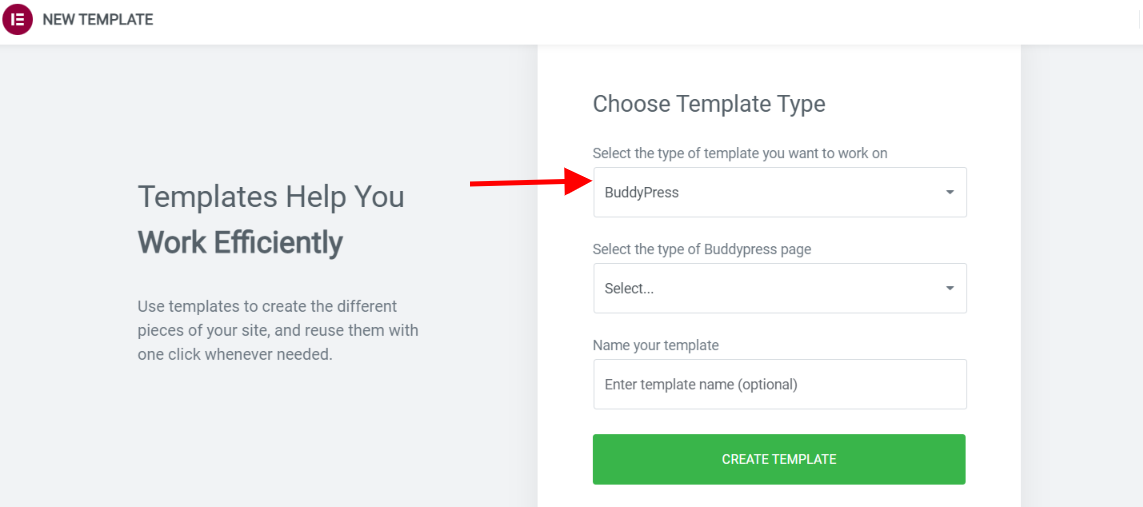
On the rendered popup, select “BuddyPress” as the template type
Within the BuddyPress page section, select “Register page”
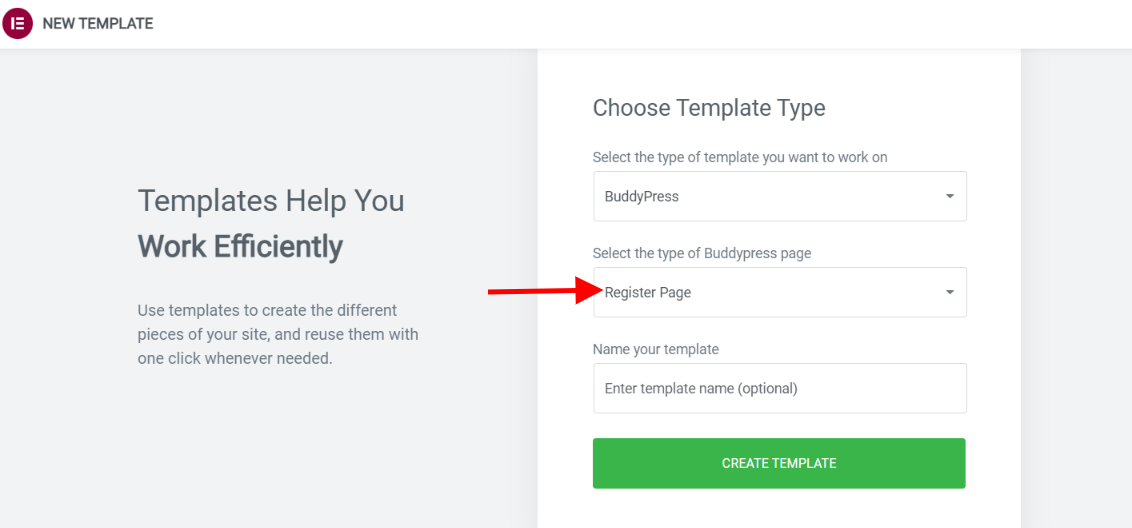
You may then proceed to filling in your desired register template name an click on the “Create Template” button.
On the next screen, you may insert a default BuddyBuilder template of your preference if you have imported the default BuddyBuilder templates.
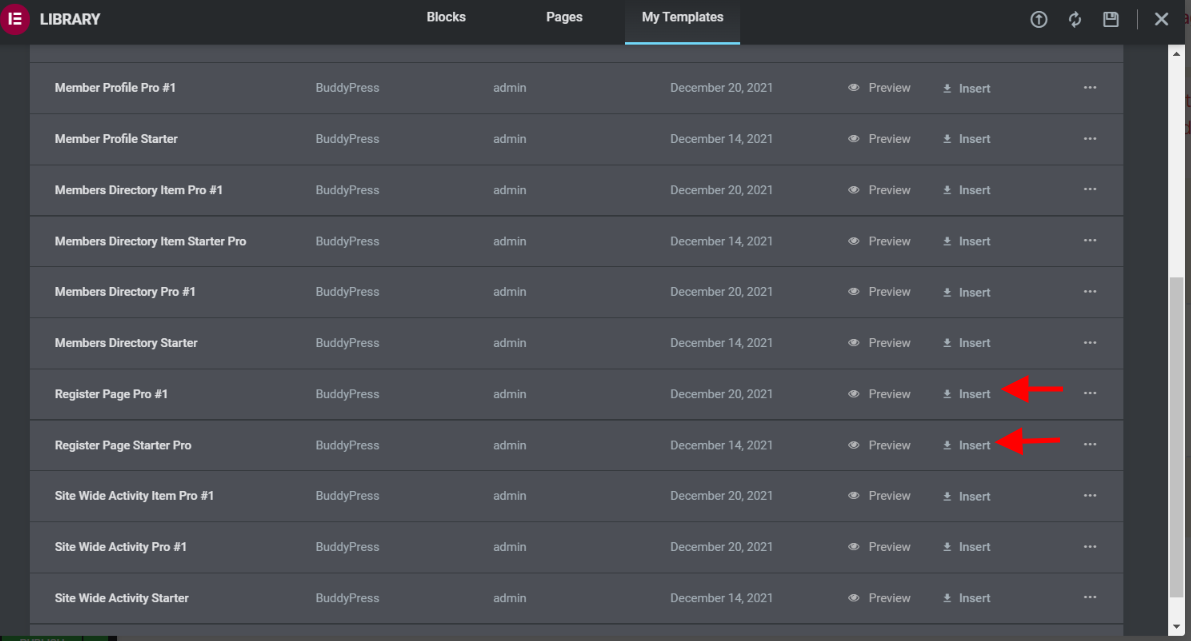
If not and you would wish to create the template from scratch, please close the popup and proceed to adding elements to your template.
The registration page uses multiple widgets: “Account Details”, “Profile Details”, “Site Details”, “Submit Button” and “feedback Notice”.
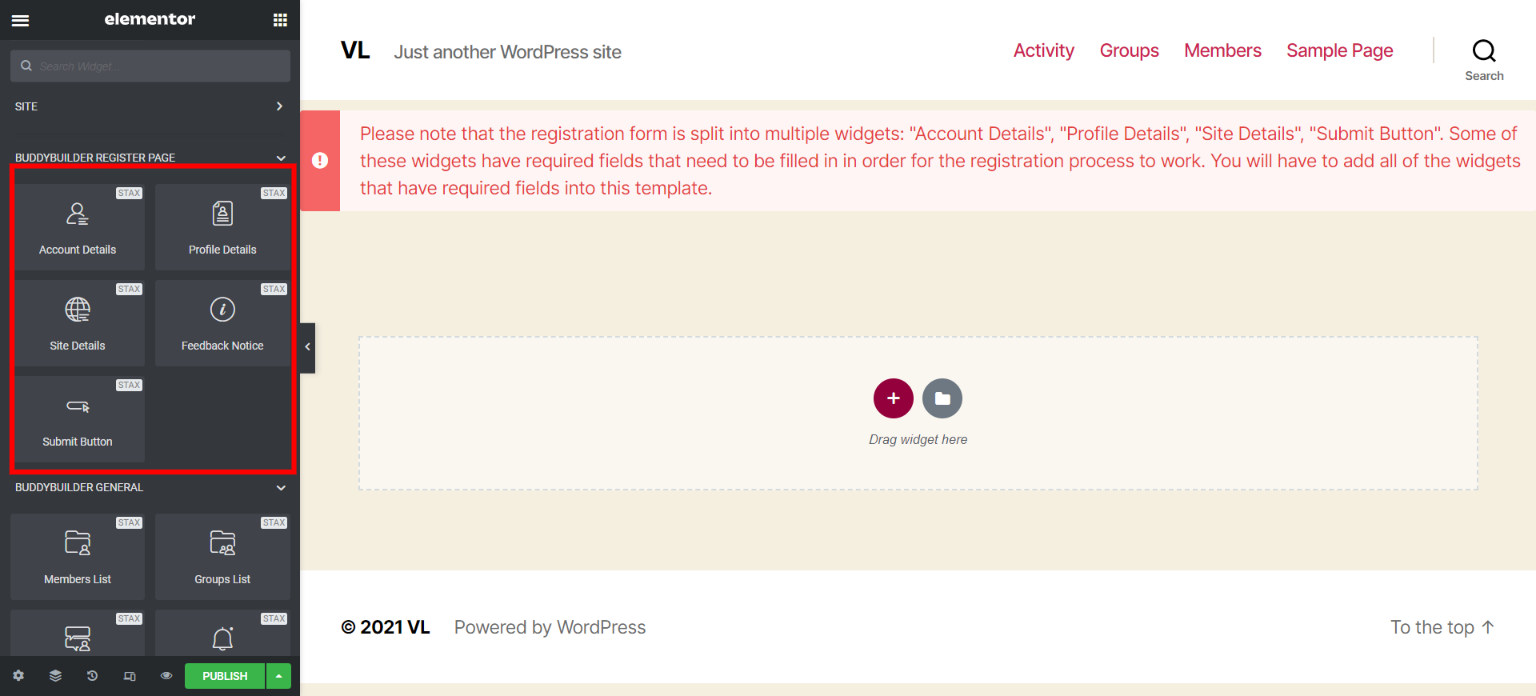
Account Details: Renders a form that outputs the user account details needed during sign up. These details would incorporate data such as the Username, Email and Password.
Profile Details: Displays a form that provides fields that users can use to provide additional profile data such as the Nickname and last name.
Site Details: This widget is only used in a multisite setup to register new sites to the multisite.
Submit Button: Used to submit the registration form details filled in within the forms
Feedback Notice: This is a widget that helps in displaying any notice to users prior to registration within the site.
The widgets “Account Details”, “Profile Details” and “Button” are a must use within the template.
Other Elementor widgets can also be used within the template based on once preference.
Conclusion
Creating a custom BuddyPress registration page template for your BuddyPress powered site should not be that tedious task. With BuddyBuilder pro, this is made seemingly easy such that one can create a custom layout from scratch or use the ready BuddyBuilder templates after import.