Stax theme can be installed in two different ways. Either from the WordPress admin dashboard, or via FTP. Within this segment, we will cover how you can install the Stax theme via FTP.
FTP Overview
FTP stands for File Transfer Protocol, which is a standard network protocol that is utilized for the transmission of files between a client and a server within a network.
In order to utilize FTP, you will need the following credentials:
- Host
- Username
- Password
- Port Number
If you are not in a position trace these details from your hosting panel, we recommend consulting your hosting provider to assist you in tracing these details.
FTP Software
In order to facilitate the transfer, you will need to use an FTP software. There are a number of FTP Softwares available such as Filezilla, Cyberduck, WinSCP and Macfusion . However, we recommend using Filezilla.
Within this guide we will see you we can install the Stax theme using Filezilla.
Downloading and Uploading the Theme
In order to install the theme on your server, we recommend carrying out the following steps:
- Download the theme
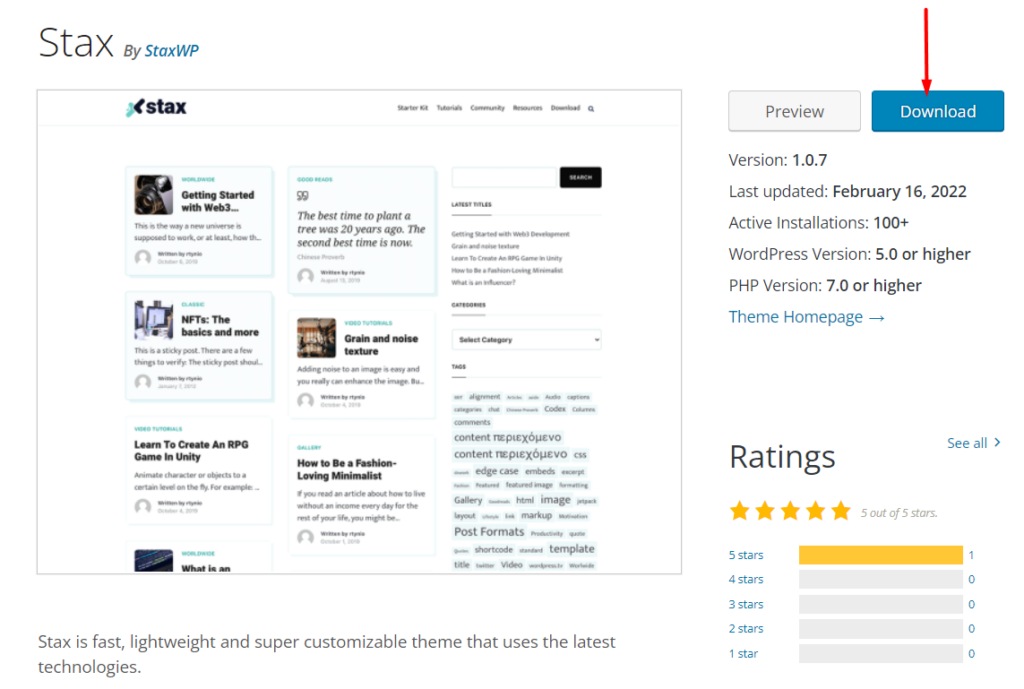
This can be achieved by first navigating to the WordPress repository link here .
You can then download the theme by clicking on the “Download” button:

With this done, a stax.zip file will be downloaded to your computer.
- Extract the zip file within your local computer
- Login to your server via Filezilla using your host, username, password and port details
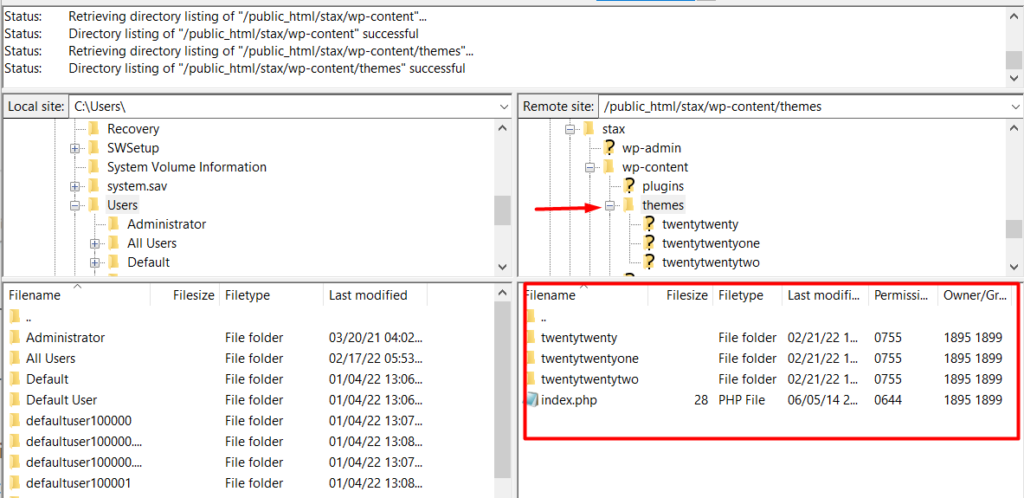
- Once logged in, navigate to the public_html > {your site folder} > wp-content > themes folder

On the directory generated, you will also find the themes currently installed as can be seen in the above screenshot.
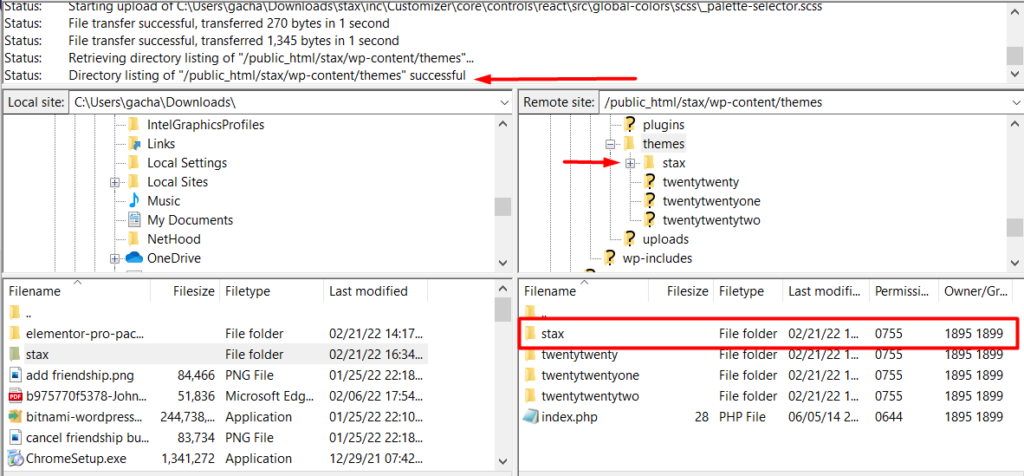
- Next, upload the stax theme folder you had unzipped within your computer, to the themes directory. This can be achieved by dragging the stax theme folder from the left panel in filezilla to the right panel where the “themes” directory is.
- Wait for the upload to start and complete
- Upon completion, there will be a “success” message and the theme will now be considered fully uploaded within your server. Below is a sample screenshot on this:

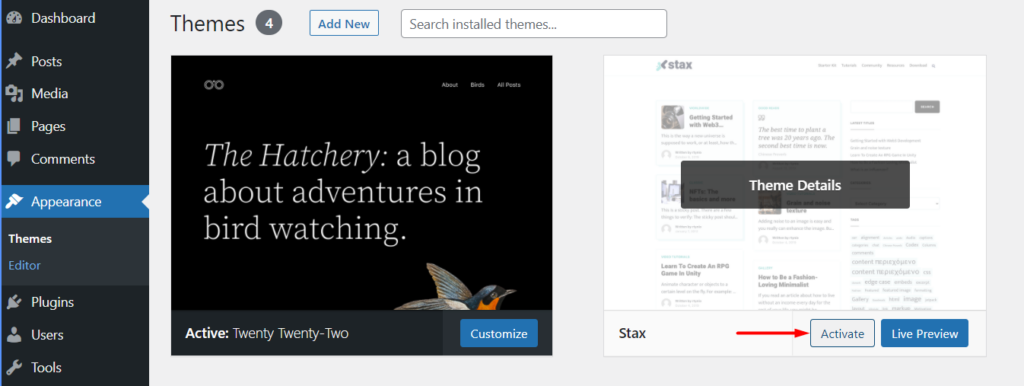
- Log in to your WordPress dashboard and navigate to the Appearance > Themes section where you should now find the uploaded stax theme

- Hover over the theme and click on the activate button to activate the theme

Once you are done with the activation, you may then proceed to the next step which is is installing the recommended plugins.


