Overview
A slow website leads to a bad user experience where a fast loading website leads to a better SEO score and generally improves the user experience.
In cases whereby you have a slow website, you are likely to contact the theme developer to raise an issue on this. However, truth to the matter is that the speed and performance of your website is highly dependent on a number of factors and not solely on the theme. Actually the theme plays a much smaller part than you can imagine.
Within this guide we will look into some of the ways that you can optimize your Stax theme powered website.
Stax – Performance Optimization Settings
For this we recommend carrying out the optimization settings integrated into the theme as mentioned within the guide below:
The will as well have an impact on your website performance.
Optimizing Images
Non-optimized images can be quite hurting to your website speed and performance. A key step some users miss is uploading non-optimized images to their website.
To reduce the negative impact of images to your website speed, we recommend:
- Optimizing your images for the web before uploading them to your website. You can use a photo editing software such as Photoshop for this.
- Optimize Images using the WebP Express plugin.
You may also check out the optimization techniques mentioned here.
Using a Cache Plugin
For this, we recommend using W3 Total Cache Plugin as its free, fairly easy to use and brings in some great performance benefits to your website.
The plugin installation is fairly similar to any other WordPress plugin. Upon Installation of the plugin, you will then need to carry out the plugins’ general setup guide. Once this is done, we recommend having the following specific plugin configurations as outlined below:
General Settings
Preview Mode
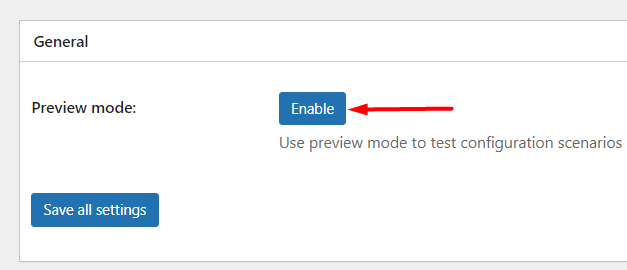
This is an optional setting, but it is always great to have this setting enabled so that you are in a position to test your changes before deploying them live.
Page Cache
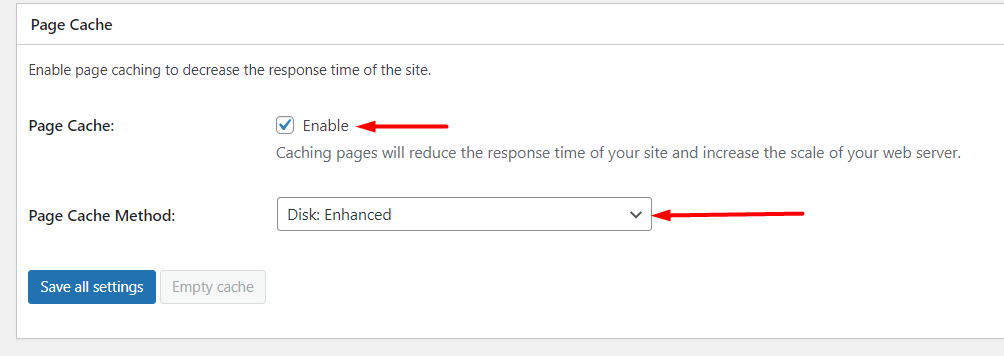
Here you need to enable the “Page Cache” and set the Page Cache method to “Disk: Enhanced”. This will help in reducing the server load and ensure that your site pages are served faster.
Minify
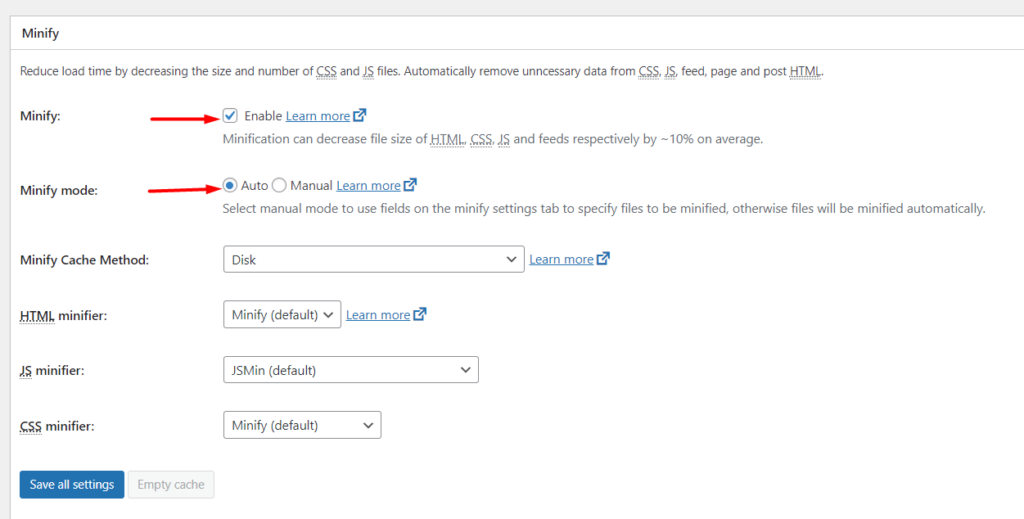
The minify option here helps in compressing the CSS, HTML and JS files within your website. We recommend setting the mode to “auto” so that the plugin automatically handles this. The rest of the options can be left to the default settings as seen in the screenshot above.
Opcode Cache
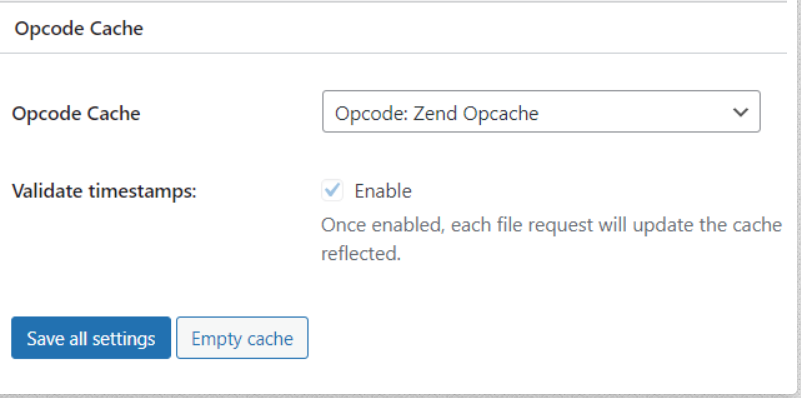
Opcode Cache is a performance enhancing caching that helps in storing pre-cached PHP code. This setting can be left to the defaults as seen in the screenshot above.
Browser Cache

Enabling the Browser Cache option will enable the use of cached resources on the visitors’ browser.
CDN Cache
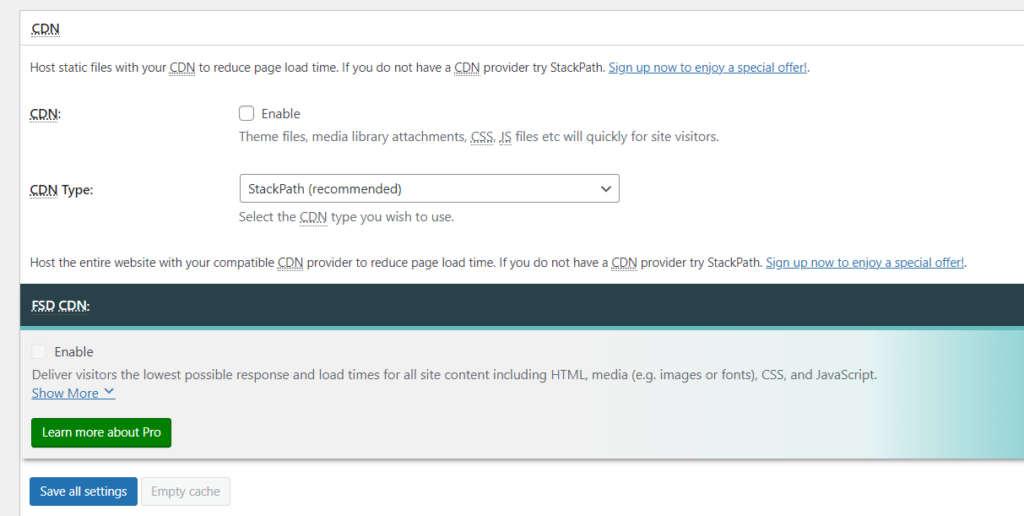
CDN stands for Content delivery network. A CDN is a global network of servers that delivers static content of your website.
The CDN option should only be enabled if you are using a CDN. We recommend consulting your CDN provider in regards to how to properly integrate the CDN.
Once all the above changes are carried out, ensure that save your changes/settings.
Browser Cache Settings
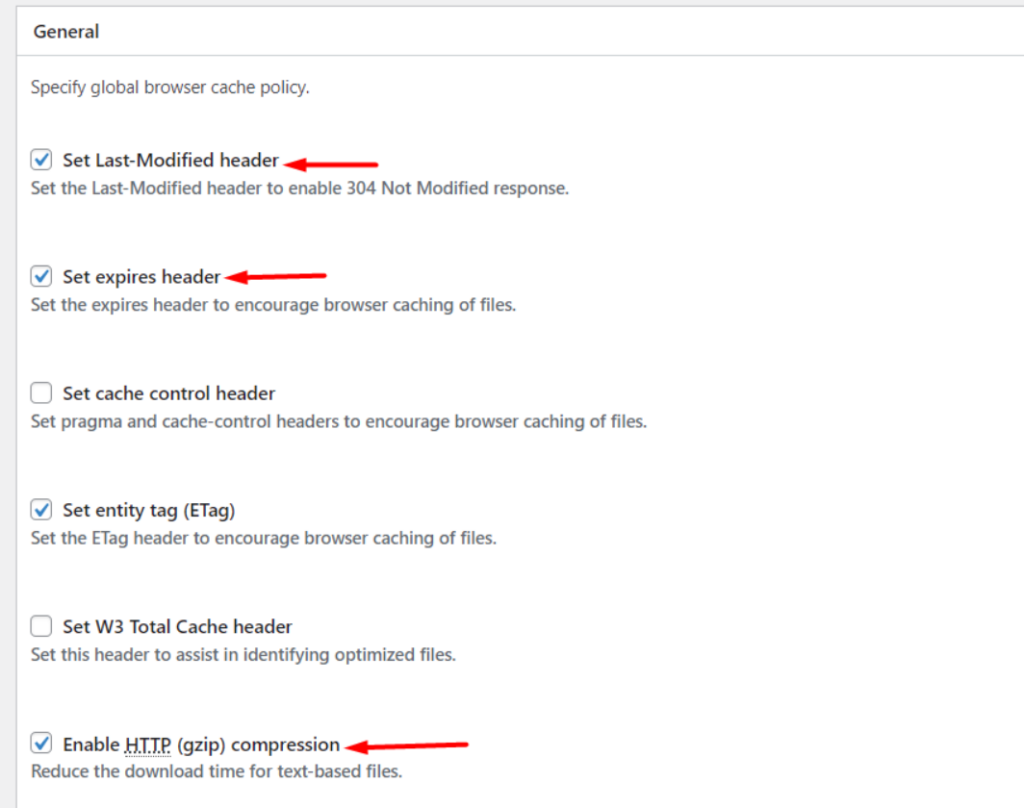
These are the settings available within the Performance > Browser Cache section.
Here the core settings that ought to be enabled are:
- Set Last-Modified Header
- Set Expires Header
- Enable HTTP (gzip) compression
Below is a screenshot on this:
Hosting Provider
A good website performance is highly dependent on your hosting provider as well as hosting plan. You can have all optimizations carried out but if your hosting server is poor, then this will also translate to a poor performance score of your website. Using the right hosting server and utilizing the right hosting plan is hence quite a key factor for your website.
We recommend using either of the below hosting providers:


