Overview
Loco Translate is a free WordPress translation plugin that offers a General User Interface to enable you carry out translation of WordPress files.
The plugin generates a stax.po file from the stax.pot file which is then compiled to a stax.mo file once you begin the translation of the theme.
Within this guide, we will see the steps how to go about translating the Stax theme via the Loco Translate plugin. This guide assumes that you have carried out the language switch as outlined here.
Install and Activate the Loco Translate Plugin
In order to install the plugin, navigate to the Plugins > Add New section within your WordPress dashboard and search for Loco Translate.

Once this is done, install and activate the Loco Translate plugin.
Access the theme from the translation dashboard
Navigate to the Loco translate > Themes section.

Here we can see that a number of themes are present. You will see “Stax” within this list. Once identified, click on it to proceed to the next screen.
Configure a New Language
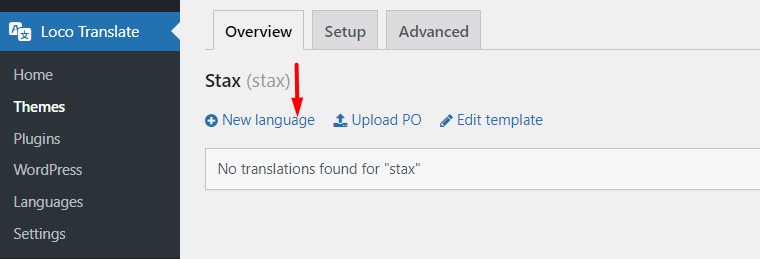
The theme does not contain any already carried out language translations. You will hence need to click on the “New Language” link illustrated below:

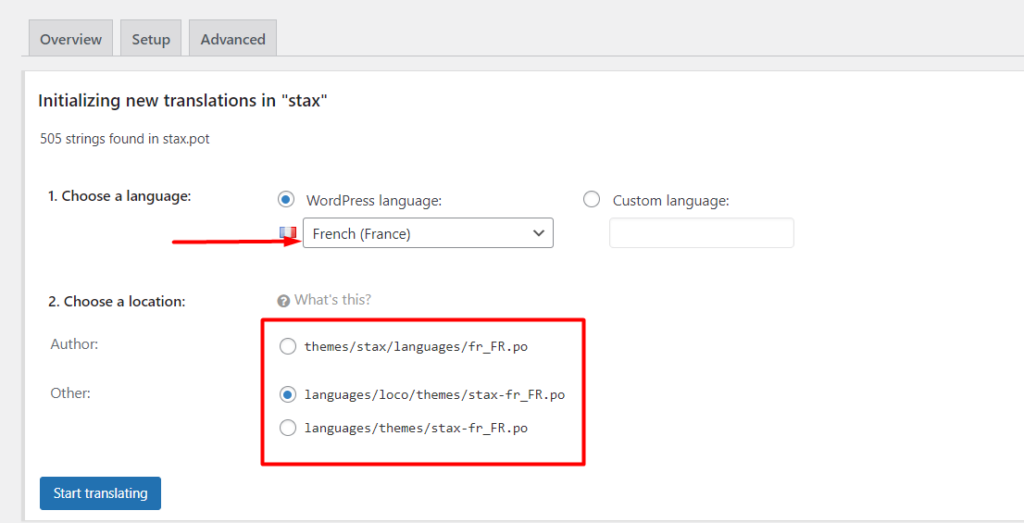
Once this is done, select a language from the dropdown within the next screen as well as the location to save your translations:

Here you can specify a language location of your preference. However it is worthwhile noting that in:
- Author: Automatic updates to the theme will overwrite files within this location. If you hence select this option, you will need to maintain local backups to the generated language files
- Other (languages/themes/stax-en_US.po): Automatic updates on WordPress will overwrite the generated files in this location hence you will need to disable automatic updates on WordPress and maintain local backups to the files
Translate the Stax Theme Strings
Once you are done with specifying your language and files location, click on the “start translating” button to begin translating the theme Strings. You can alter a select number of Strings upon filtering on them or all the theme Strings, from the GUI in place.

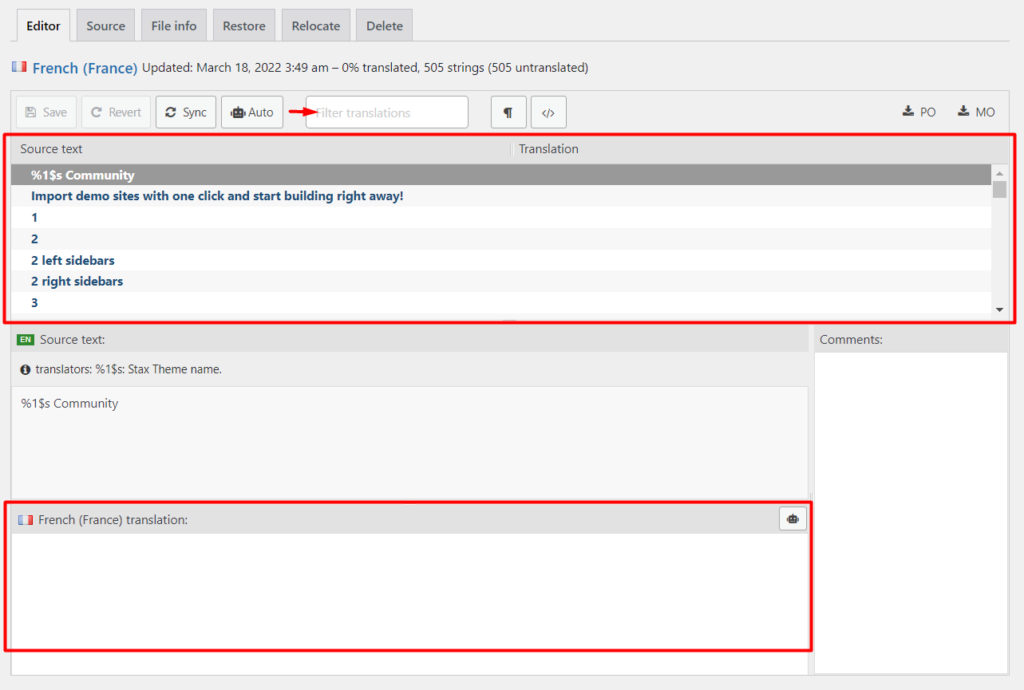
As observed in the screenshot above, there are two core sections involved:
- The upper section containing the English Strings
- The translation section which is where you fill in your String translation
You can also Filter Translation input field to search for Strings that you wish to translate.
Once you are done with a String Translation, ensure that you save your changes by clicking on the “Save” button.
Below is a sample illustration on how to go about carrying out a String translation:


