Overview
WPML is a premium plugin and is fully compatible with the Stax theme. You will hence need to ensure that you first purchase a WPML License.
With this guide we will look into how to setup WPML and turn our Stax powered website to a multilingual website.
Installing the Plugin
In order to setup a basic multilingual website, you will need a couple of WPML plugins. These include:
- WPML Multilingual CMS
- WPML Media Translation
- WPML String Translation
You will therefore require to login to your WPML account and download the three plugins. Once this done, install the three plugins from the Plugins > Add New section within your WordPress dashboard and have them activated.
Setting Up WPML
Upon activation, you will have a notification within your WordPress dashboard asking you to configure WPML, as seen below:

Click on the “Configure WPML” button. This will generate a setup wizard.
On the first screen, setup your default language as well as the translation language(s) and proceed to step 2.
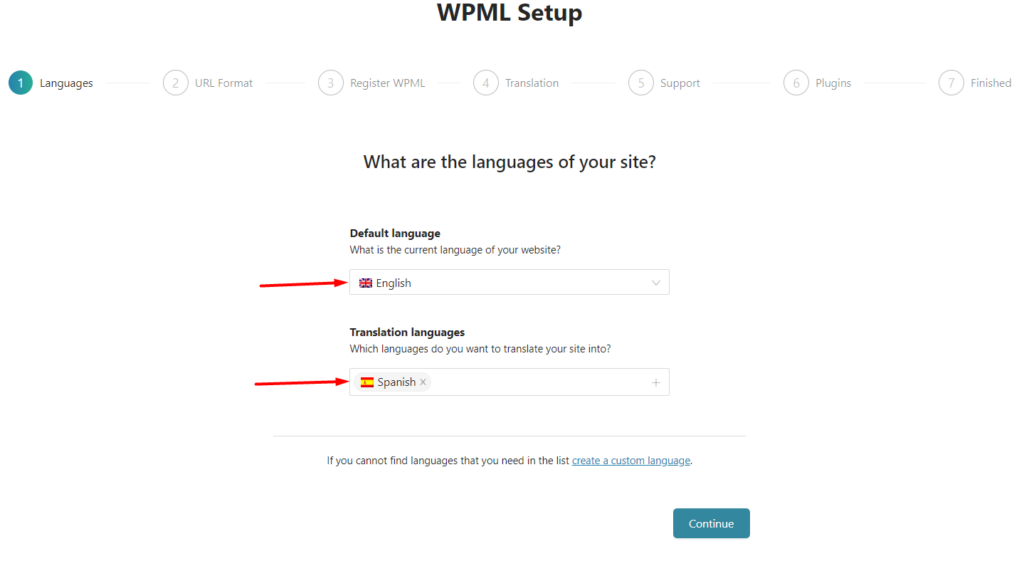
In step 2, specify how you wish your URLs to be rendered. Below is a screenshot on this:
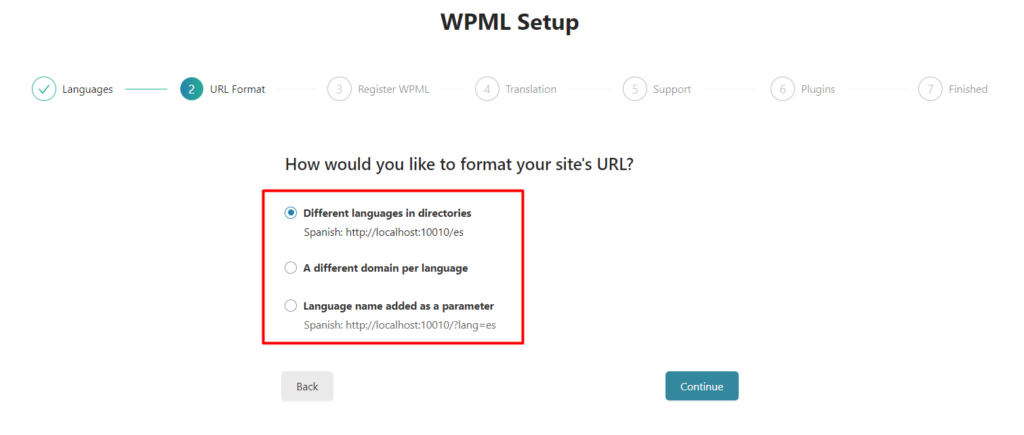
Here you can set the URLs to be based on different languages in directories, a different domain for each language or just have the language added to the URL as a parameter. Once this is done, proceed to step 3.
Within step 3, you will need to register WPML by adding your site key. You can click on the “Get a key for this site” link to access it from the WPML site. Upon successful activation, you should have a Thankyou notification as seen below:
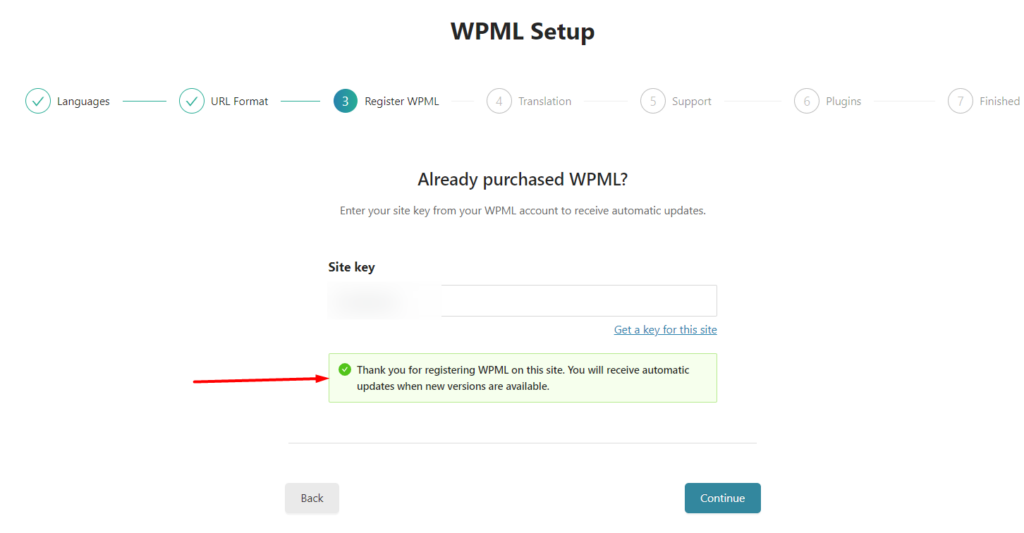
You may then proceed to step 4.
Within Step 4, you will need to specify how to translate WPML . You can have WPML automatically translate your site content or you can select the option “Translate Some”, which will enable the translator choose content to translate. If you also select the “Translate Some” option, you will need to specify who will carry out the translation.
Below is a screenshot on this:
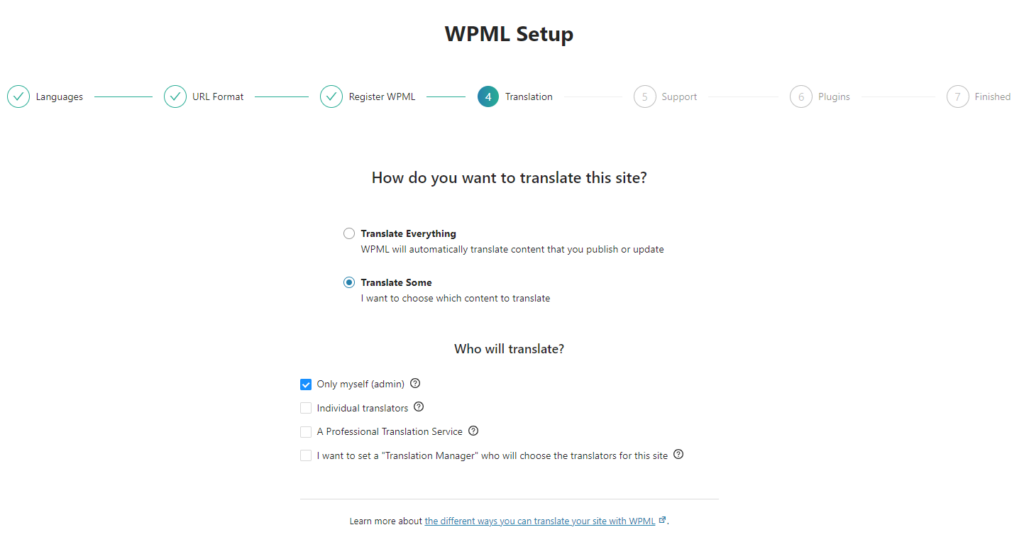
Once this is done, proceed to step 5.
Within step 5, here you can enable the option to send theme and plugins information to WPML in order to get faster support and alerts on WPML plugins.
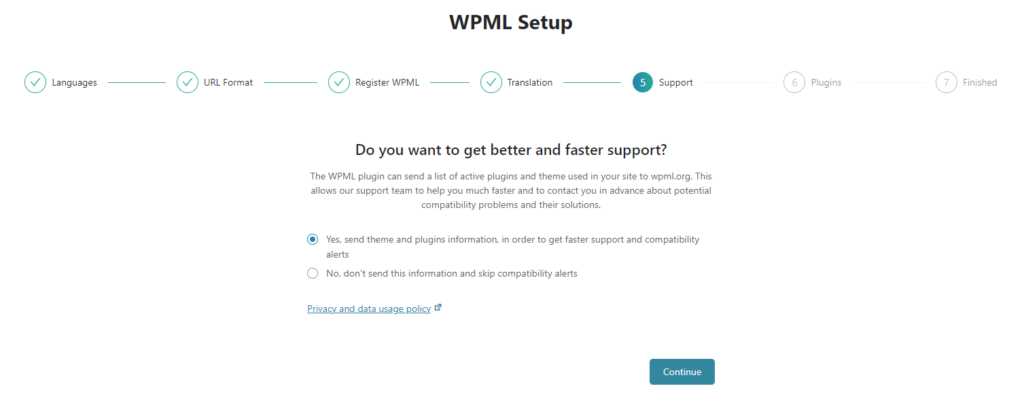
You may then proceed to step 6.
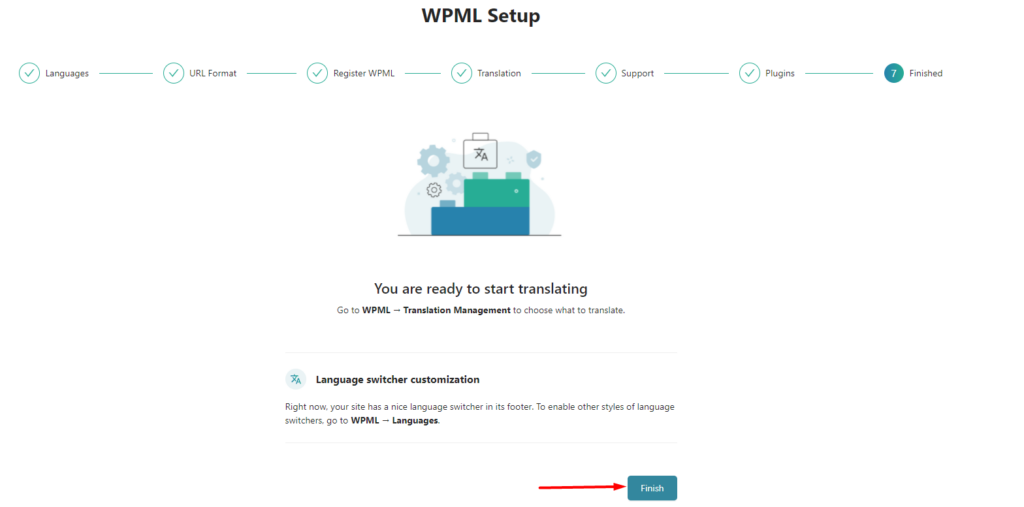
Within step 6, we are informed that WPML will add a language switcher to the footer. You can use the language switcher on posts, pages or custom post types that are already translated, to switch to either the original language or available translations.
If you are comfortable with this, you can now click on the finish button to complete the setup.
Translating Post / Page Content
Post, page or even custom post type translations are all carried out in a similar manner. Here, we will use pages to provide samples on this.
In order to translate a page, you will need to carry out the following:
1. Navigate to the Pages section within your WordPress dashboard
2. Click on the “plus” icon next to the page you wish to translate, and within the language you wish to carry out the translation

3. Once you click the icon within a page, you will be presented with the Advanced Translation Editor where you will need to carry out the content translation. Below is a sample screencast on how to go about the translation;
4. Once done with all the page translations, click on the “Complete” button.
Media Translation
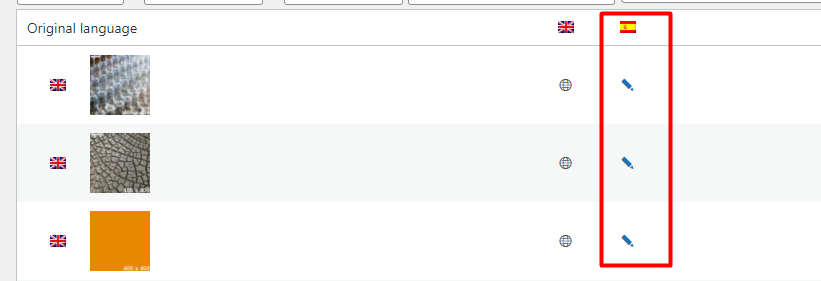
In order to translate media items within your website, navigate to the WPML > Media Translation and here, you will have a notice with the “Finish setup” button. Click on the button and all media items will be automatically translated to your translation language.
Similar to pages, posts and custom post types, you can as well click on the “pencil” icon to edit your media translation. Below is a screenshot on this:
Translating Menus
In order to translate menus, you will need to carry out the following:
Navigate to the Appearance > Menu section within your WordPress dashboard and select a menu to edit. In our case here, it is the “Main” menu which is the primary menu:

To the far right corner, you will also have a view of the translation options available as can be seen below:
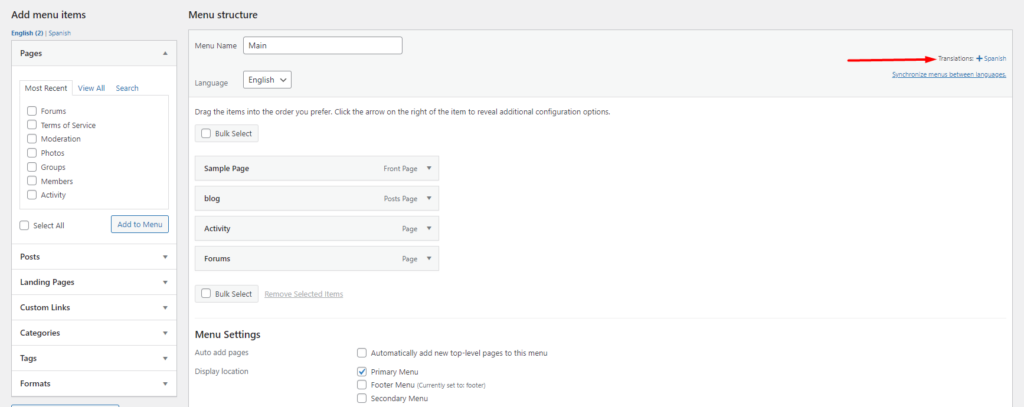
Click on the “plus” icon highlighted on the screenshot above
Within the next screen, add your menu name and click on the “create menu” button. For the menu name you can for example name it as “Main – Spanish” or any other wording that your original menu is using, alongside the translation language. Below is a sample screenshot on this:
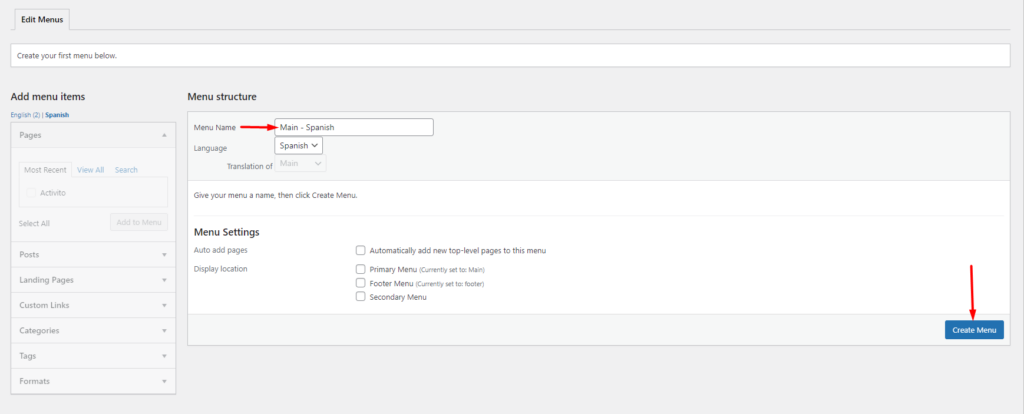
Once this is done, add your menu items to the menu.
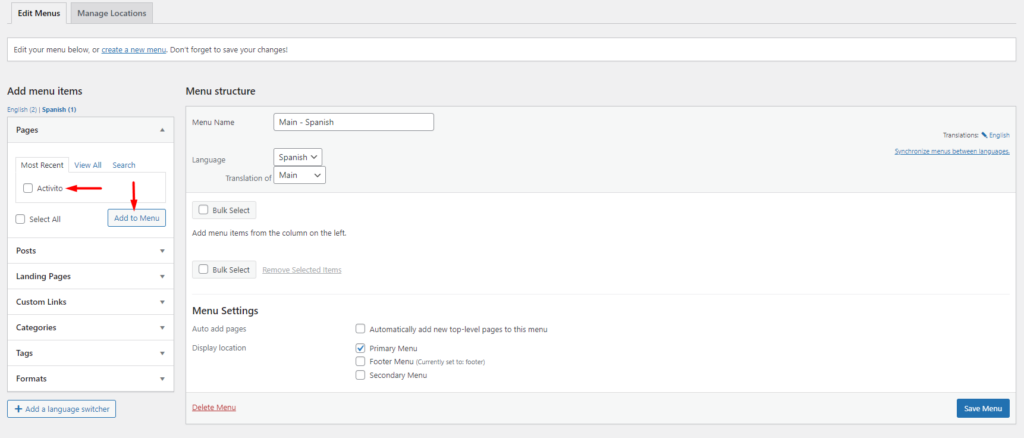
Please do note that you can only add menu items which are already available in the translation language. For example in our case here, only the “Activito” page menu item is available in Spanish, so this is the only page that can be added to the menu.
Once you add the menu items, save your menu.


