Let us quickly begin with the installation so that you can proceed to know more about the plugin and how it works.
In order to install the BuddyBuilder plugin on your WordPress Website, you will have to follow the steps highlighted below.
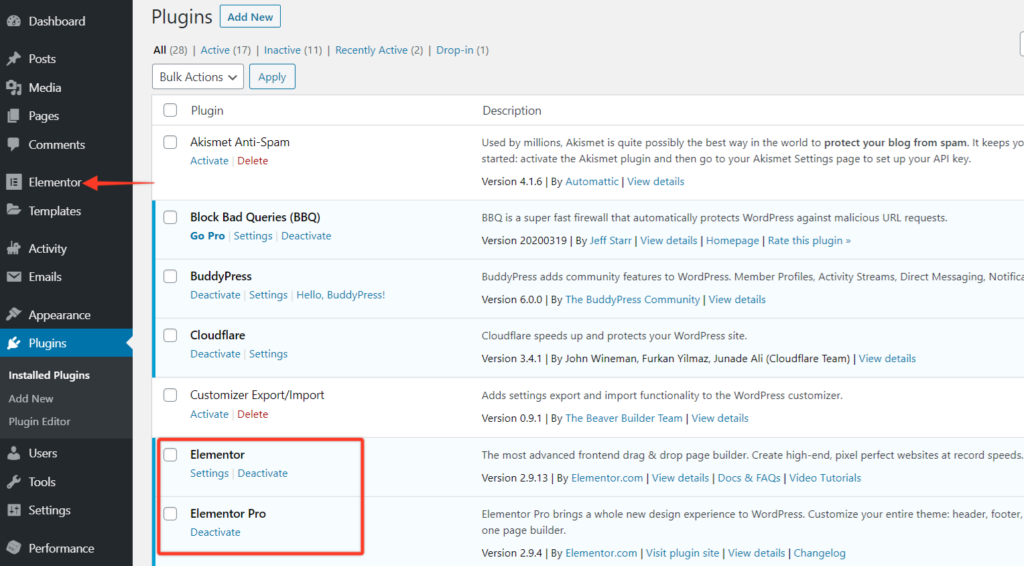
Step 1: Ensure you have Elementor Installed
Make sure that you have Installed & Activated the Free version of Elementor. You will need to use this plugin alongside the Elementor plugin whether you are using the Free or Pro Version.

Step 2: Download Plugin
Next you would need to download the plugin from the WP repo.
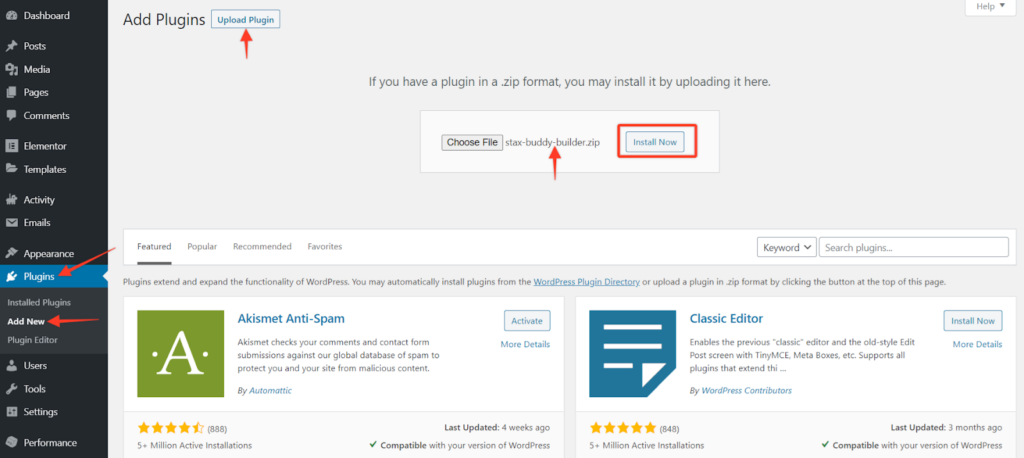
Step 3: Upload Plugin To WordPress
Then next thing is, go to your Plugins page from WordPress Dashboard. Then Click on the ‘Add New’ option and Upload the BuddyBuilder plugin that you have downloaded. After successfully uploading, click on the ‘Install Now’ button.

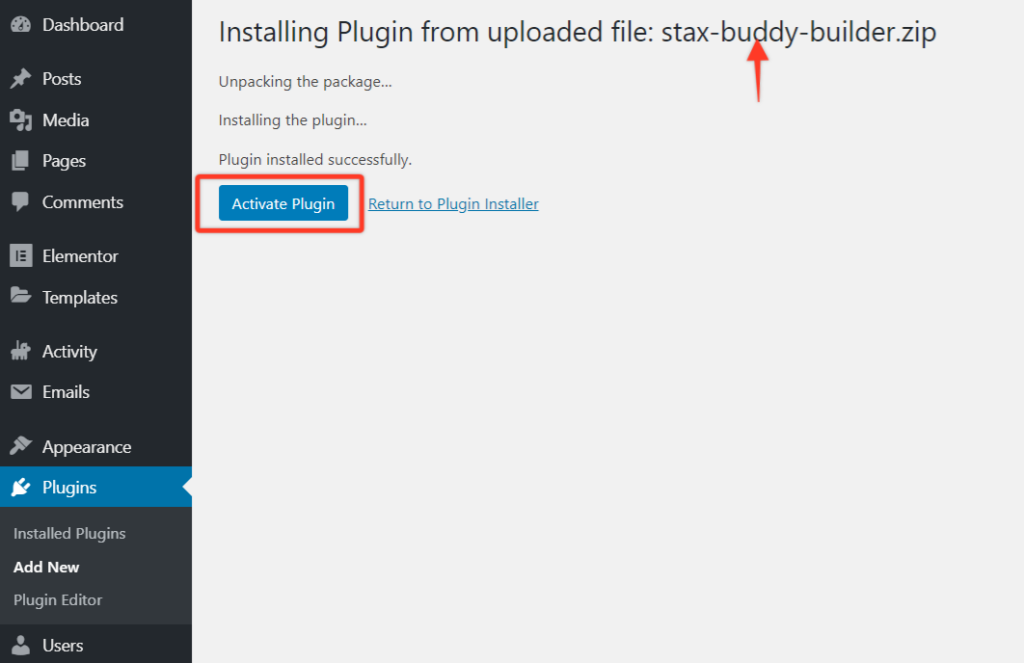
Step 4: Plugin Activation
Once you have completely finished the Installation, simply click on the ‘Activate’ Button.

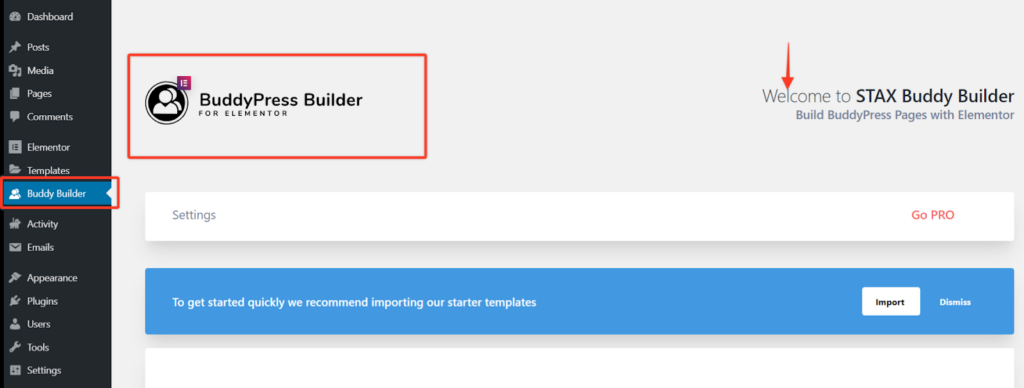
Once you have installed and activated the plugin you can successfully manage it from your WordPress Dashboard on the left panel by clicking on BuddyBuilder. You will then land on the Welcome screen page as shown below.

And you are done 🙂


