How to add a new template from Elementor Templates page
Within this doc, we are going to focus on adding a new Member profile template and importing a pre-built template. After that we will set it as the default template for the member profiles.
You will need to carry out the following steps:
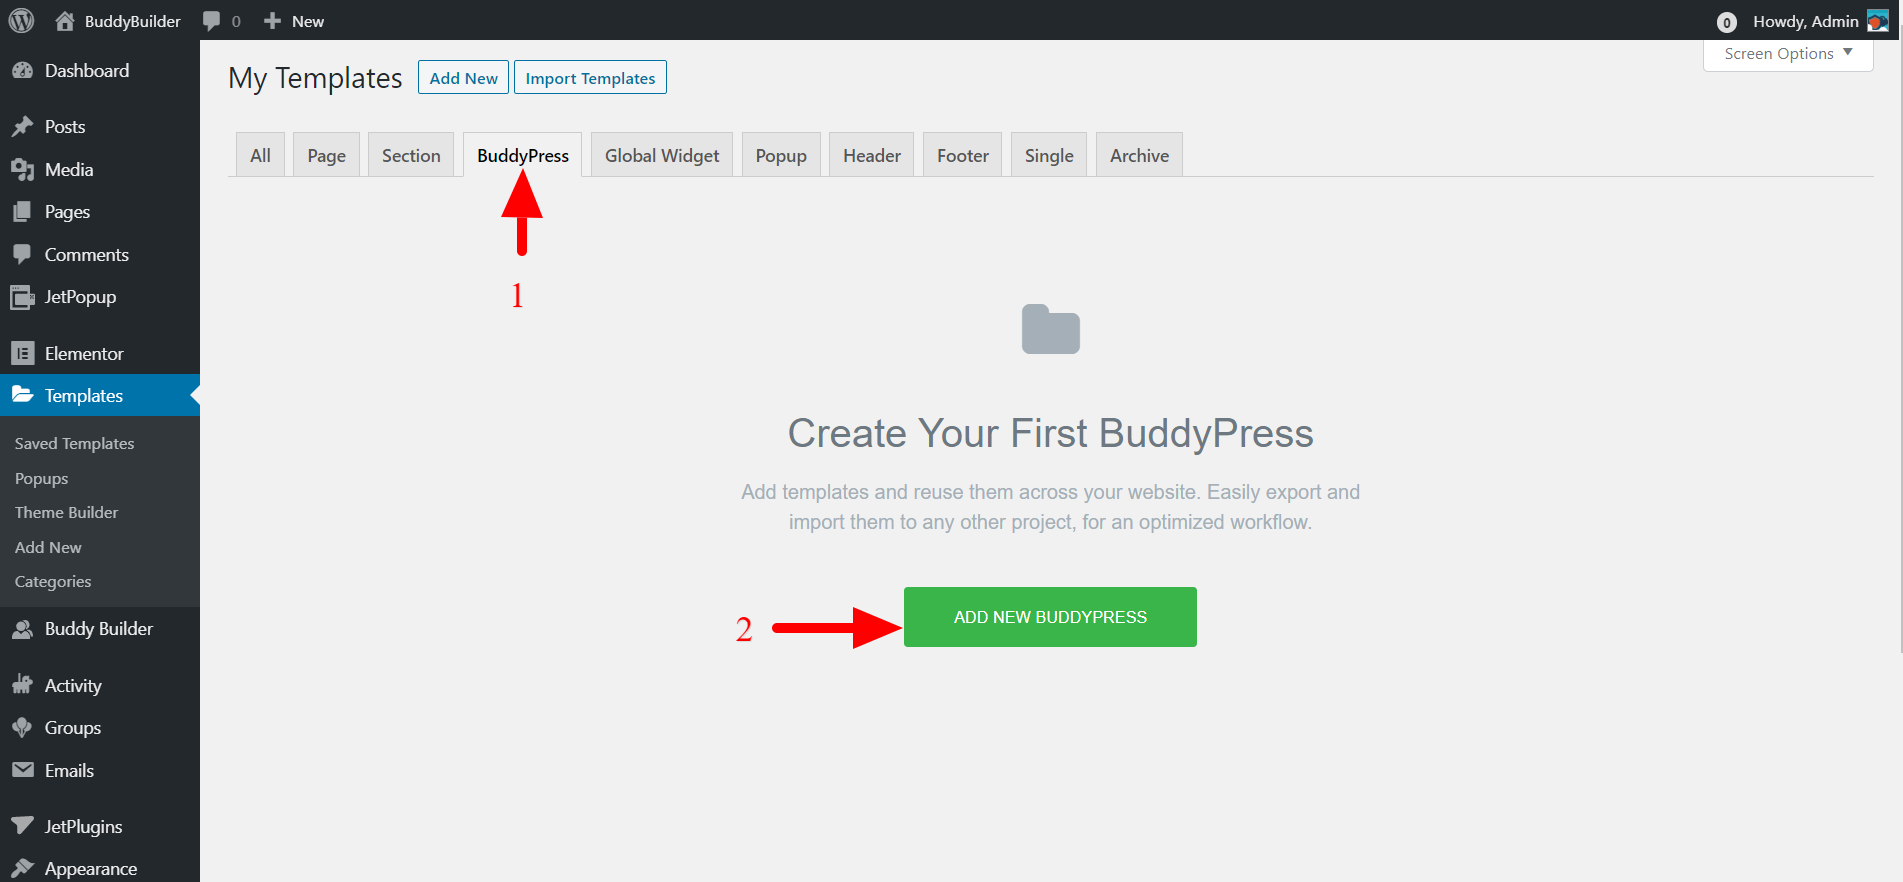
- Navigate to the Templates > Saved Templates section in WP admin.
- Within the BuddyPress Tab, click on the “Add New BuddyPress” button
From the popup rendered;
- Ensure that the template type is set to “BuddyPress”
- Set the BuddyPress page to “Member Profile”
- Add a name for your template. In our case here we shall name it “Custom Member Profile”
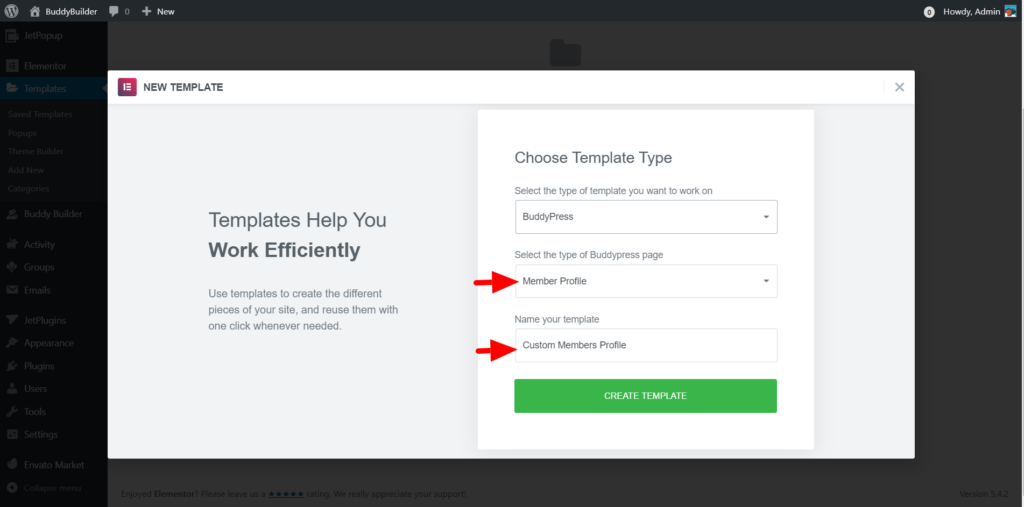
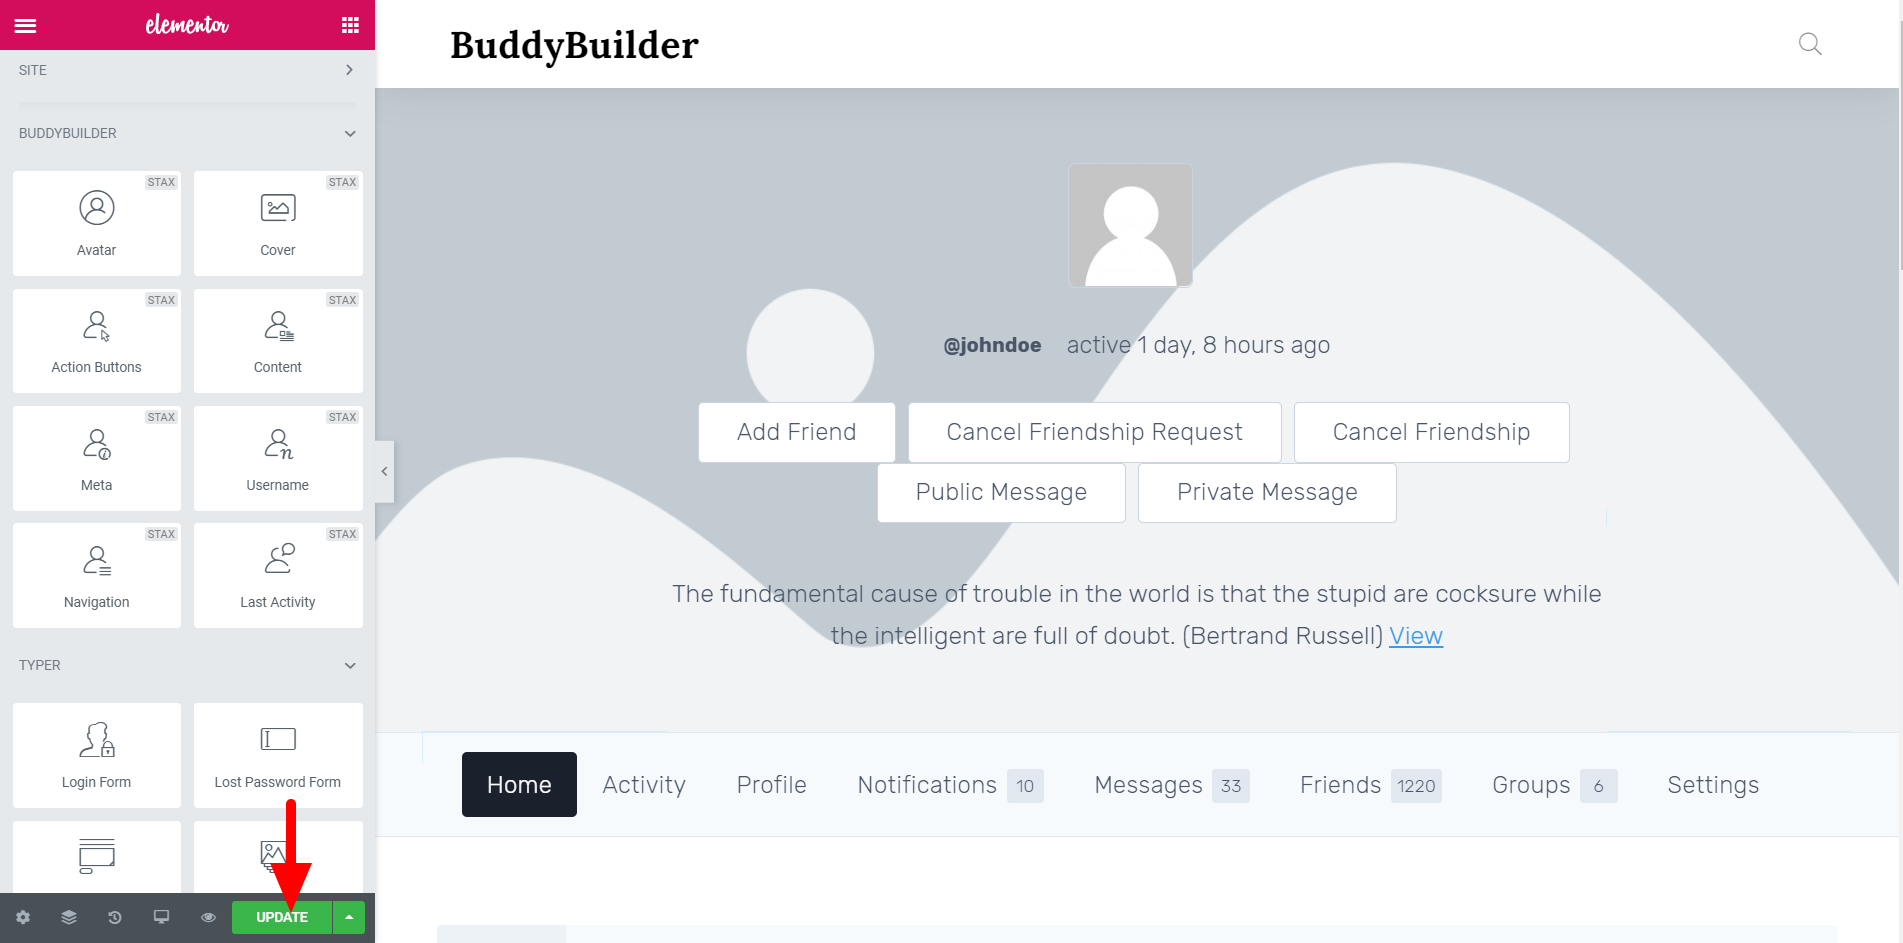
- Click on the “Create Template” button and within the popup rendered, also click on the “Insert” link to add the starter template if you want to have a quick start.
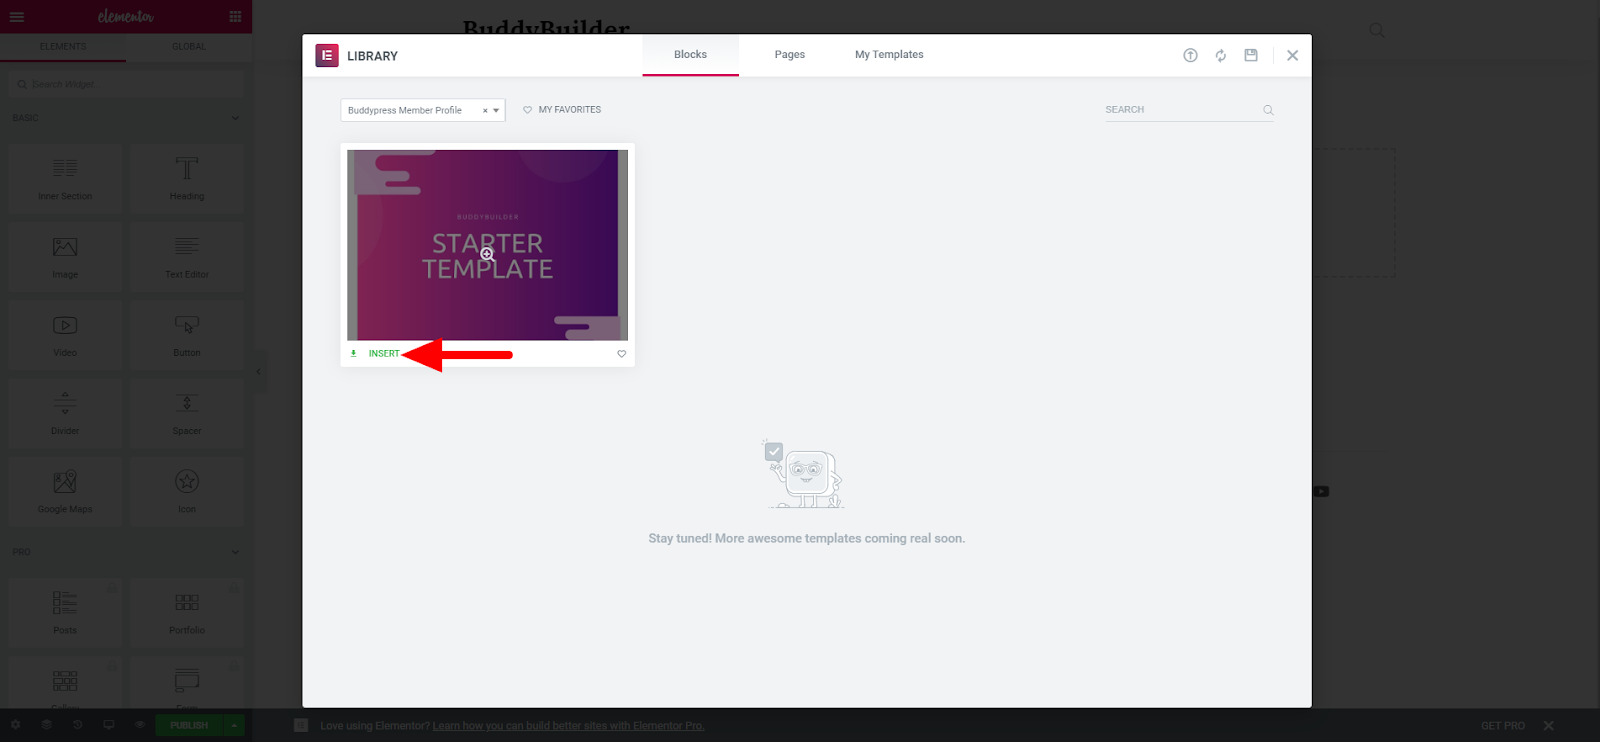
- Publish the template
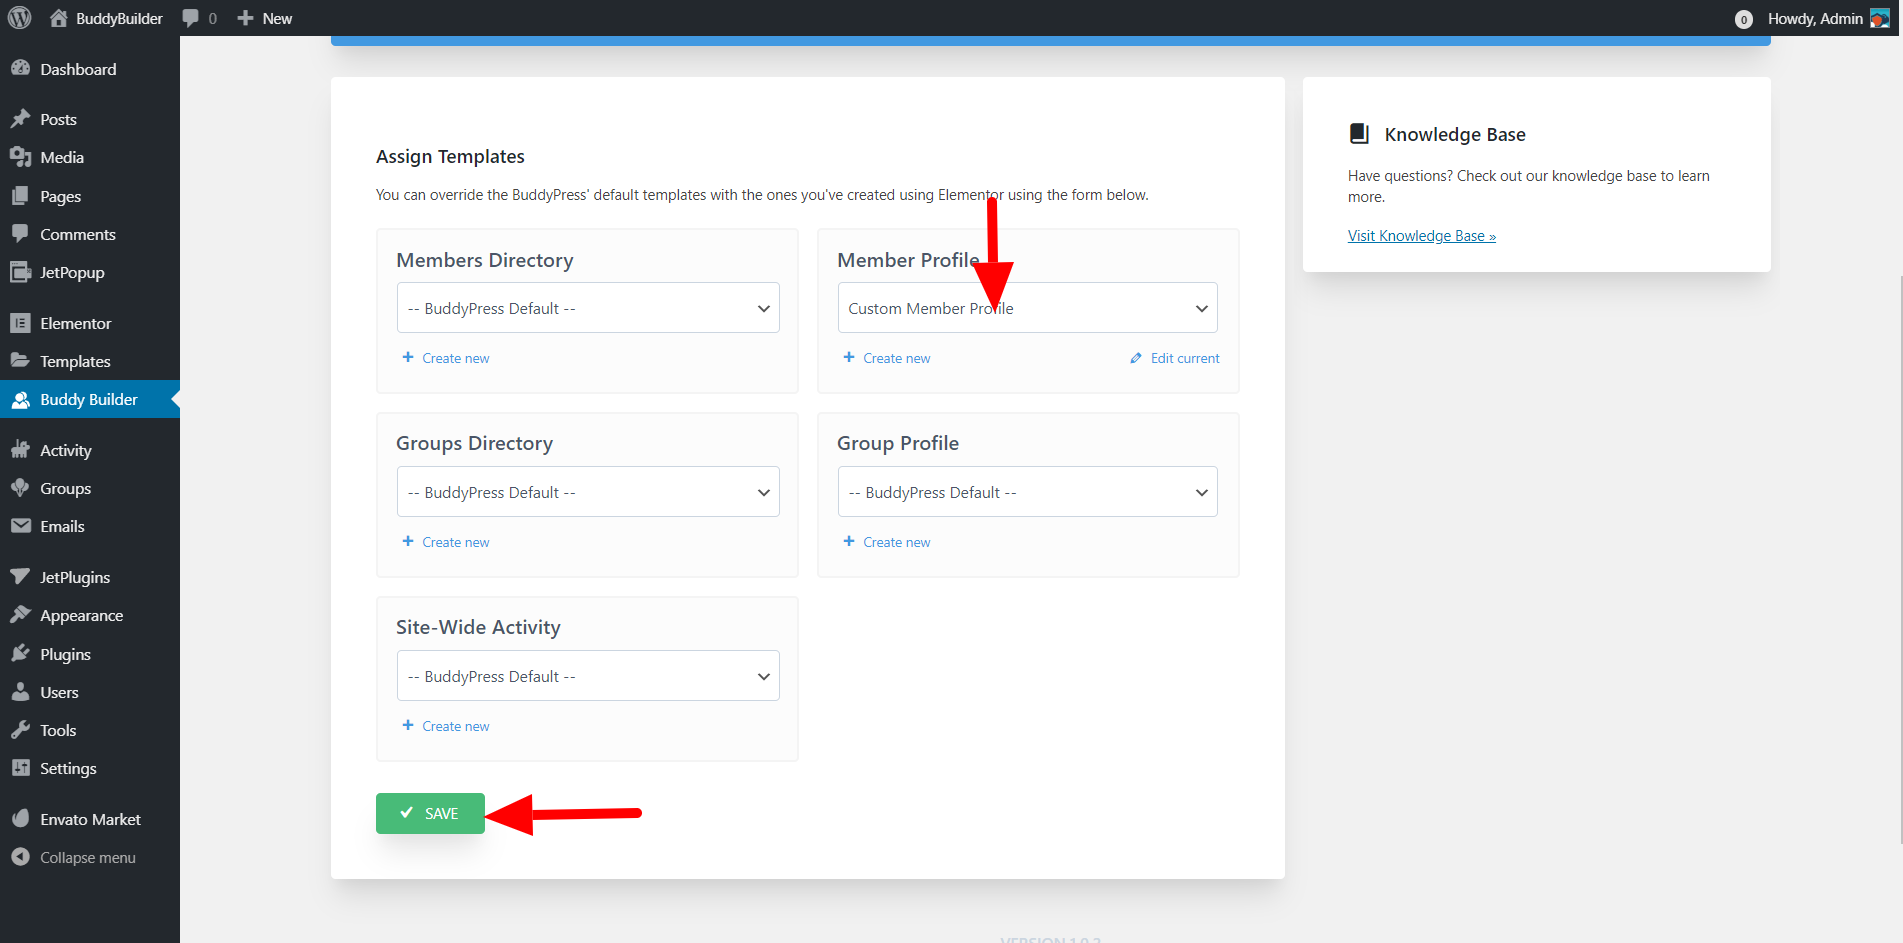
Setting the custom Profile Template as the Default Template
Section titled “Setting the custom Profile Template as the Default Template”In order to set the new template as the active template:
- Navigate to the BuddyBuilder tab within your dashboard, and on the “Member Profile” section, set the newly created template and save your changes