
Install Visibility Logic for Elementor
To install Visibility Logic, activate Elementor first, then add Visibility Logic for Elementor from Plugins > Add New Plugin. Visibility Logic Pro is a separate plugin that you upload on top of the free one.
Requirements
Section titled “Requirements”- WordPress 5.0 or newer (tested up to WordPress 7.1).
- PHP 7.4 or newer.
- Elementor (the free plugin is enough). Without it, Visibility Logic shows a notice and does nothing.
- Visibility Logic Pro needs the free Visibility Logic plugin installed and active.
Some conditions need another plugin to be active:
| Condition | Needs |
|---|---|
| ACF Field, Advanced ACF | Advanced Custom Fields |
| Dynamic Conditions (Pro) | Elementor Pro |
| WooCommerce Users (Pro) | WooCommerce; WooCommerce Subscriptions for the subscription options |
| EDD Users (Pro) | Easy Digital Downloads |
| Language (Pro) | WPML, Polylang or TranslatePress |
| Geo Location (Pro) | A free MaxMind account ID and license key (how to get them) |
Install the free plugin
Section titled “Install the free plugin”- In WordPress, make sure Elementor is installed and active.
- Go to Plugins > Add New Plugin.
- Search for
Visibility Logic for Elementor. - Click Install Now, then Activate.
The plugin adds a Visibility tab to Elementor widgets, sections and containers, and a Settings > Visibility Logic page in WordPress.
Install Visibility Logic Pro
Section titled “Install Visibility Logic Pro”- Sign in to your StaxWP account and download the Visibility Logic Pro zip file.
- In WordPress, go to Plugins > Add New Plugin and click Upload Plugin.
- Choose the zip file and click Install Now.
- Click Activate Plugin.
If the free plugin is missing or inactive, Pro shows a notice with an Install Visibility Logic or Activate Visibility Logic button. If the free plugin is too old, Pro asks you to update it first.
Activate the Pro license
Section titled “Activate the Pro license”Activate your license key so the site receives Pro updates and support. Pro conditions work without a key; until you activate one, Pro shows a short notice on the Plugins and Settings > Visibility Logic screens, which you can dismiss.
- Copy your license key from your StaxWP account.
- In WordPress, go to Settings > Visibility Logic Pro activation.
- On the License key activation tab, paste the key into License key.
- Click Save changes. License key status changes to Activated.
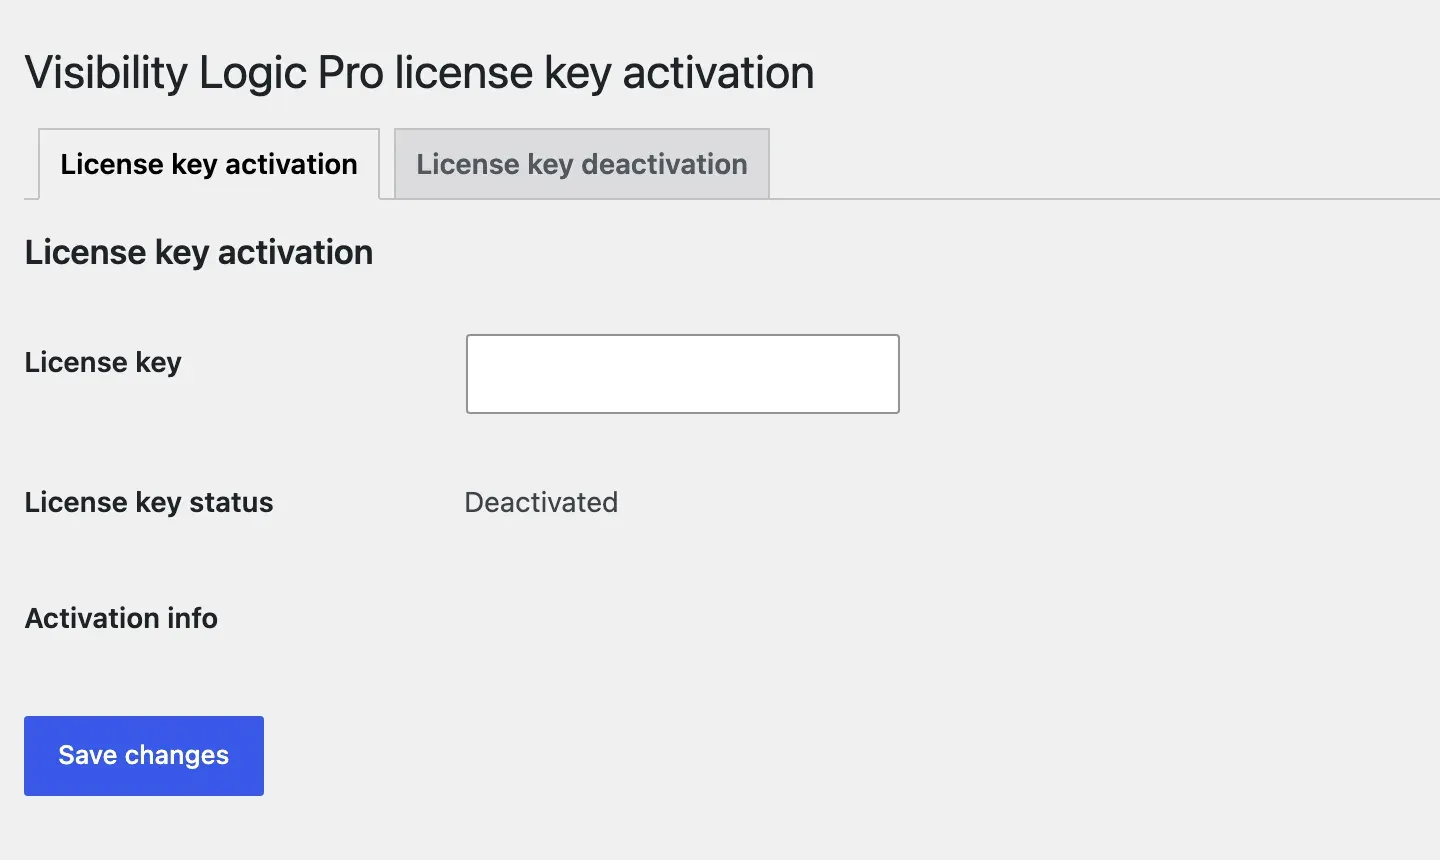
To move the license to another site, open the License key deactivation tab, tick Deactivate license key and click Save changes. Then activate the key on the new site.
If the license expires, Visibility Logic Pro keeps working, but the site no longer receives updates or support until you renew. For keys, activations and renewals, see License and account.
Multisite
Section titled “Multisite”The Pro license is stored per site. On a multisite network, every site that runs Visibility Logic Pro has its own Settings > Visibility Logic Pro activation page and uses one activation of your license.
- Install the free plugin and Visibility Logic Pro from Network Admin > Plugins.
- Activate both plugins on the sites that need them.
- On each of those sites, go to Settings > Visibility Logic Pro activation and activate your license key.
Make sure your plan includes enough site activations for the sites where you use Pro.
Choose which conditions are available
Section titled “Choose which conditions are available”Go to Settings > Visibility Logic and open the Options tab. Each condition has a toggle; switch off the ones you do not use and click Save. Disabled conditions disappear from the Elementor panel and have no effect on existing rules.
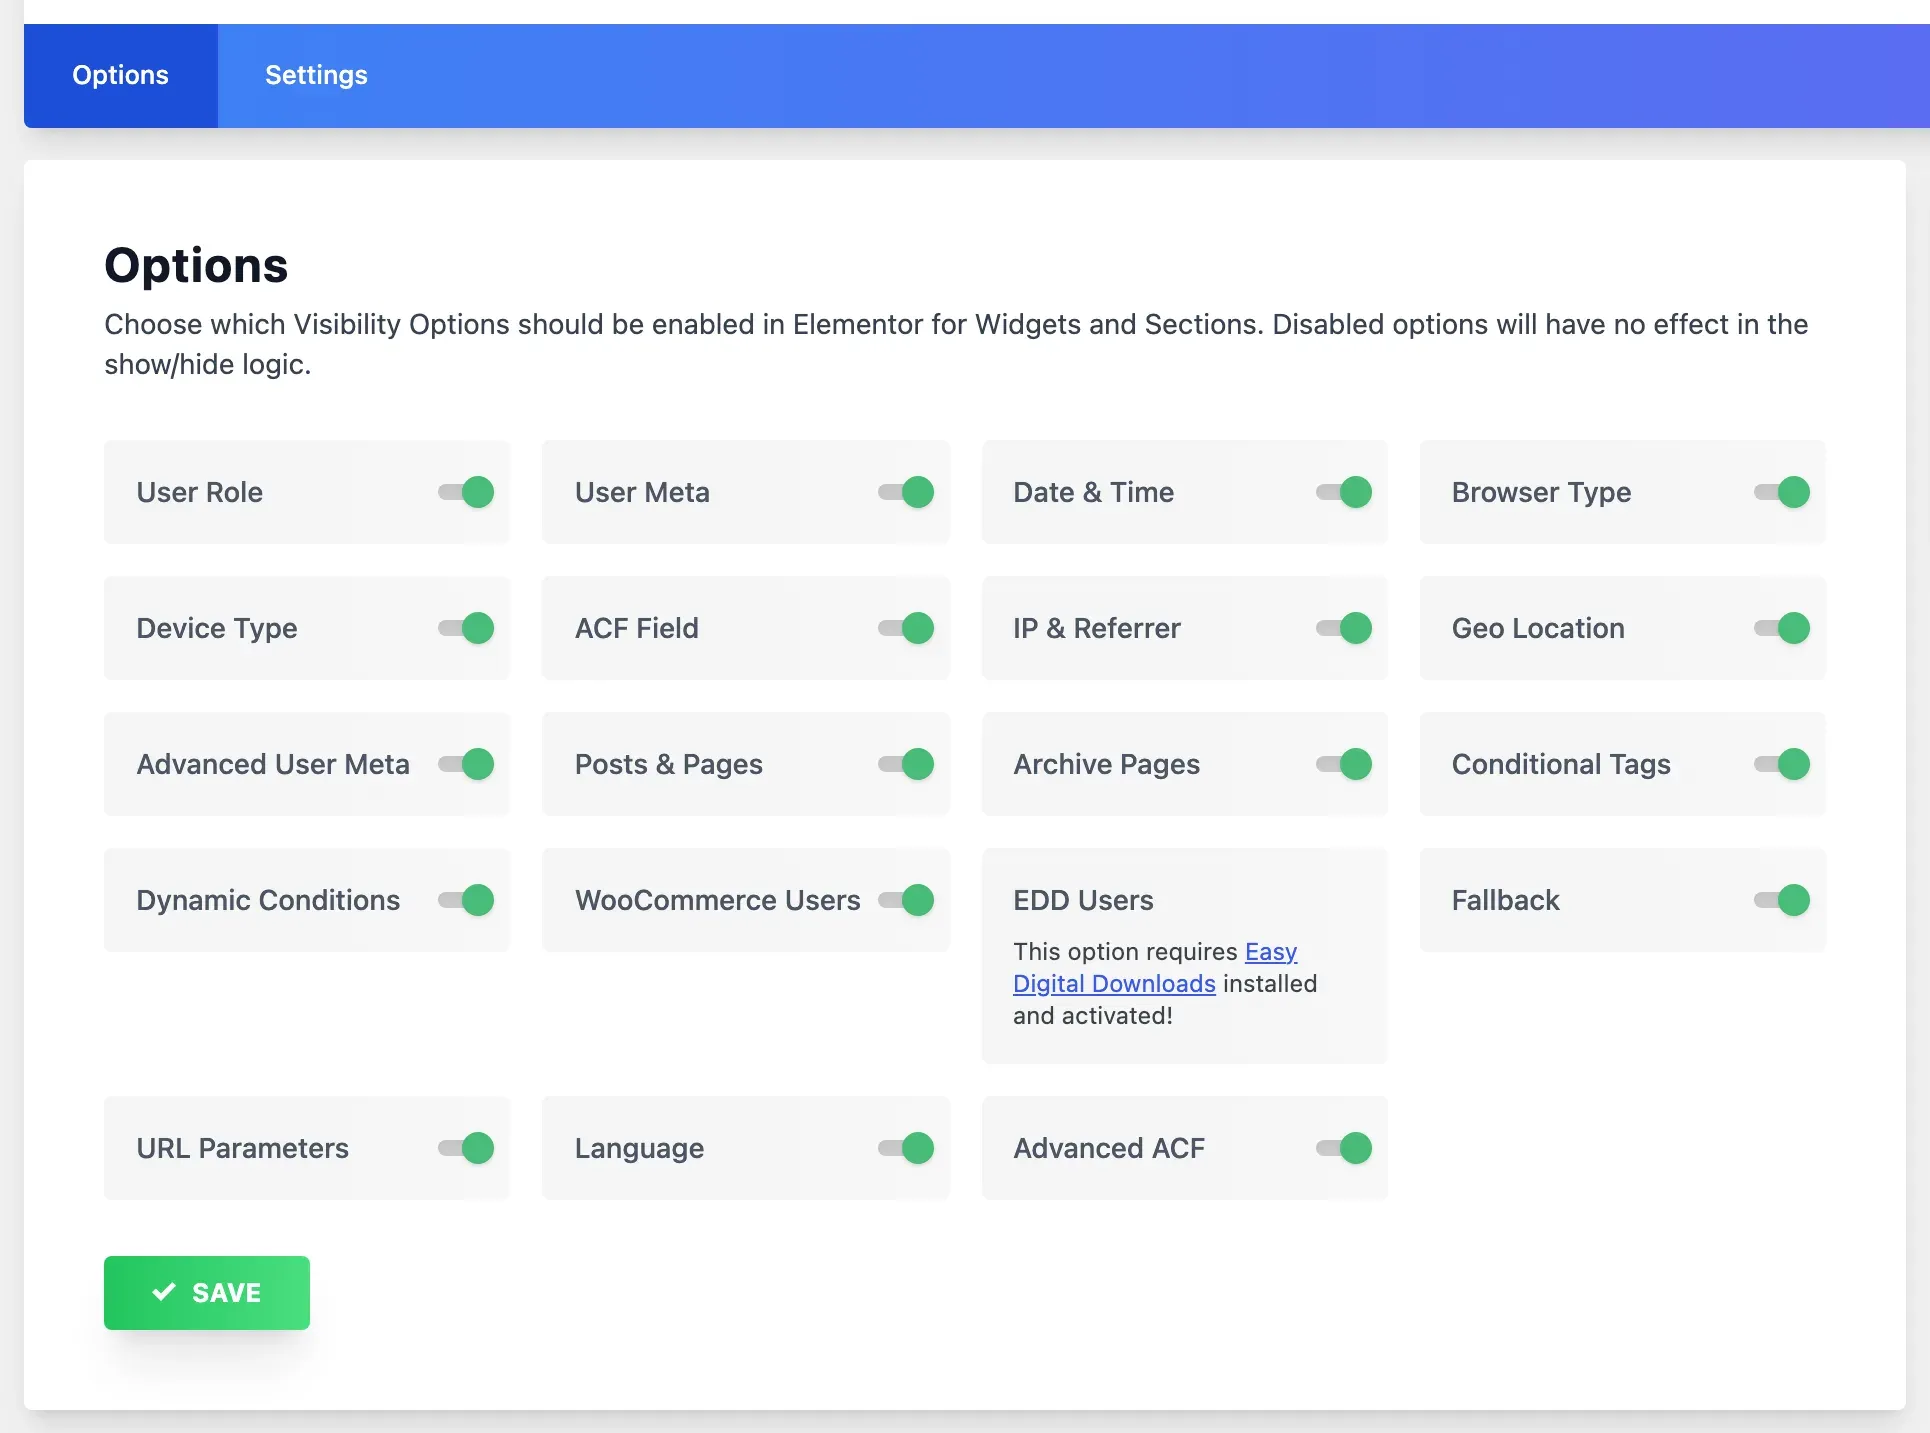
With Pro active, the Pro conditions get toggles too. A condition that needs another plugin (for example WooCommerce Users) shows which plugin to install instead of a toggle until that plugin is active.
With Pro, a Settings tab on the same page holds the MaxMind Api settings for the Geo Location condition.
Update
Section titled “Update”- Free plugin: updates come from WordPress.org like any other plugin.
- Pro: updates appear in Dashboard > Updates and Plugins once the license is activated. You can also download the latest zip from your StaxWP account and upload it with Upload Plugin; WordPress offers to replace the installed version.
Update the free plugin whenever you update Pro, since some Pro conditions need a recent free version.
Next steps
Section titled “Next steps”- Set up a rule on an element.
- Browse the free conditions and Pro conditions.